
Introduction to Tzatziki
What is tzatziki and why should you make it?
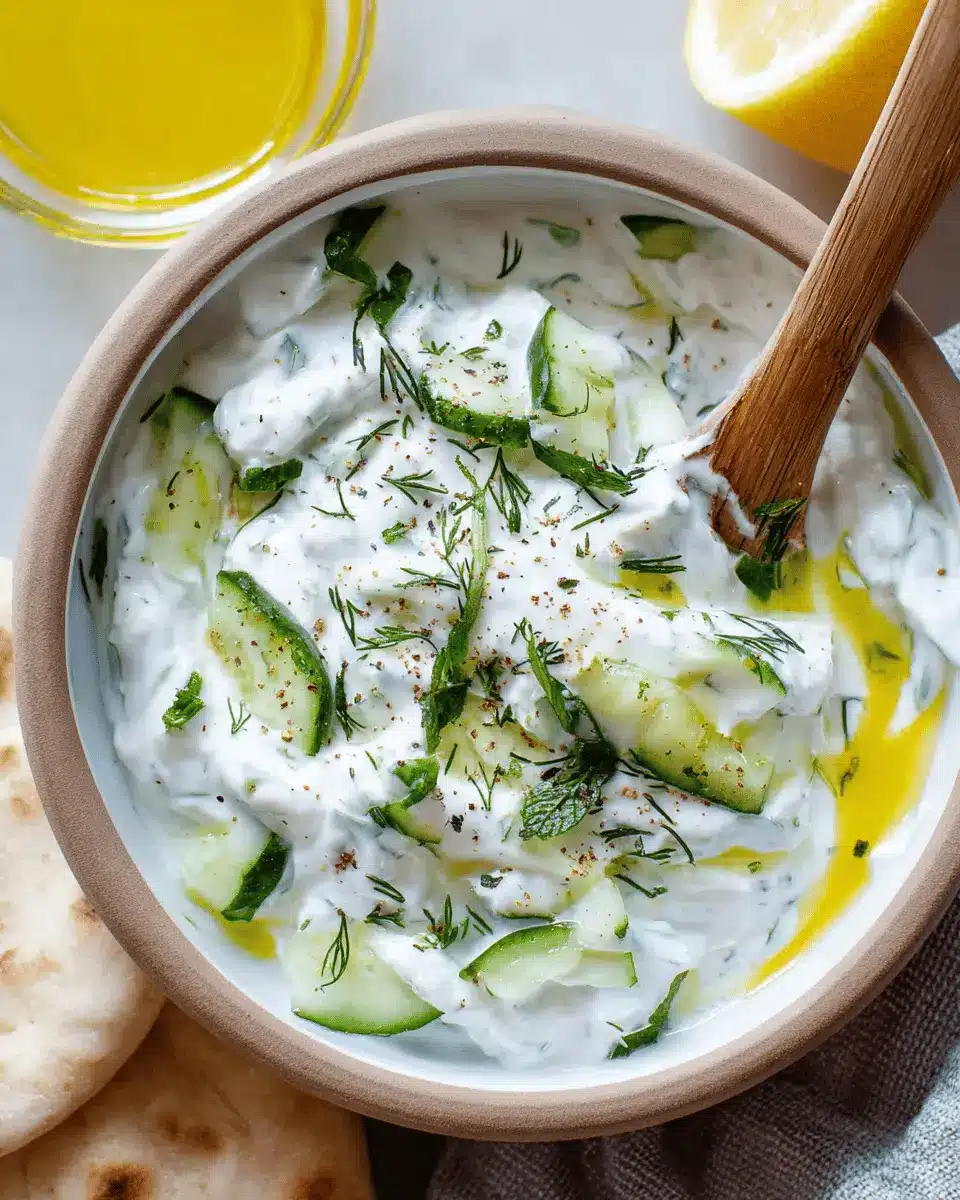
Tzatziki is a traditional Greek sauce, renowned for its cool, refreshing flavors. At its core, this delightful condiment features a simple blend of Greek yogurt, grated cucumber, garlic, and an array of aromatic herbs like dill and mint. This creamy dip isn't just a summer staple; it's incredibly versatile and can elevate a variety of dishes. Whether you're enjoying grilled vegetables, refreshing sandwiches, or a colorful crudité platter, tzatziki adds a delightful touch that enhances every bite.
But why should you dive into making it yourself? First off, it's remarkably simple and takes only 5 minutes to prepare! This means you can whip up a batch just in time for an afternoon barbecue or a spontaneous gathering with friends. Plus, when you make tzatziki at home, you have full control over the ingredients, ensuring a fresher taste and the ability to adjust the flavors to your personal preference. And with the rising popularity of Greek cuisine, mastering how to make tzatziki can impress your guests and make your culinary skills shine.
So grab your box grater and a few fresh ingredients, and let's get started on this quick and satisfying recipe!
Ingredients for Tzatziki
Fresh ingredients you’ll need
To get started with homemade tzatziki, gather these fresh ingredients that will elevate the flavor:
- ½ cup finely grated cucumber: Look for a firm cucumber, preferably English or Persian, as they are less watery.
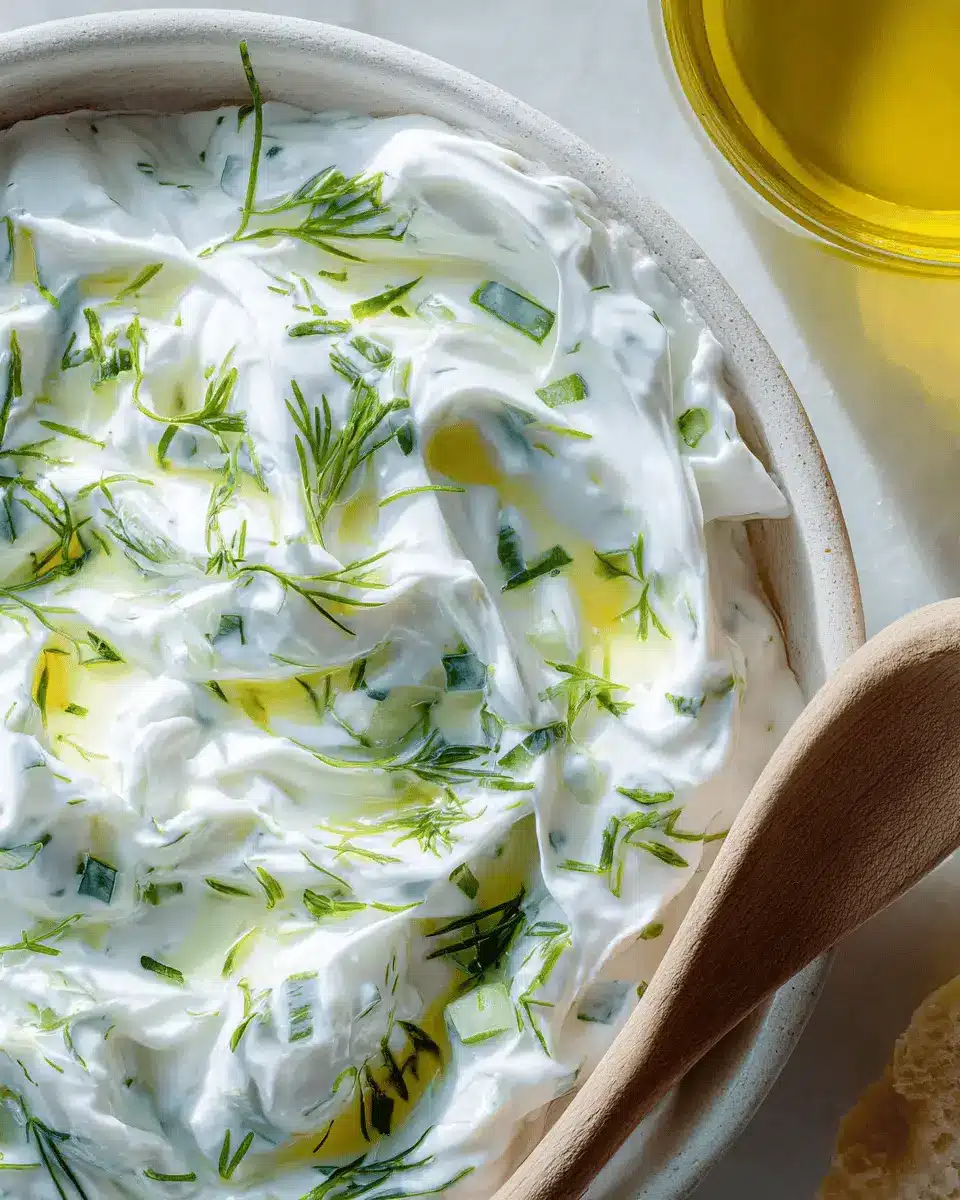
- 1 cup thick whole milk Greek yogurt: The base of our tzatziki, it will impart a creamy texture.
- 1 tablespoon fresh lemon juice: This adds a lovely brightness.
- ½ tablespoon extra-virgin olive oil: For a fruity olive essence.
- 1 garlic clove, grated: Fresh garlic enhances the zing.
- ¼ teaspoon sea salt: This will bring all the flavors together.
- 1 tablespoon chopped fresh dill: A classic herb in tzatziki.
- 1 tablespoon chopped fresh mint (optional): For an aromatic touch.
Importance of using Greek yogurt
When wondering how to make tzatziki that truly stands out, the choice of yogurt is crucial. Greek yogurt not only offers a thicker consistency than regular yogurt but also delivers a richer flavor and higher protein content. It makes your tzatziki creamy without being overly runny, which is essential for spreading on sandwiches or dipping with veggies. For the best results, opt for full-fat Greek yogurt; it provides the indulgent texture that makes tzatziki so irresistible.
For more kitchen tips, consider checking out resources on choosing quality yogurt from trusted culinary sites like America's Test Kitchen or Serious Eats. Your tzatziki experience will thank you!
Preparing Tzatziki
Tzatziki is one of those delightful sauces that elevates just about any dish to a new level. Whether you're enjoying grilled veggies, wraps, or simply dipping fresh pita, knowing how to make tzatziki will become an essential skill in your kitchen. Let's dive into the process!
Step 1: Prepare the cucumber
Start by selecting a fresh cucumber—nothing beats the crunch of a freshly picked veggie! Using a box grater, finely grate about a half-cup of cucumber. This will release some water, which we want to control for the perfect tzatziki texture. After grating, place the cucumber on a clean kitchen towel and gently squeeze out some of its excess moisture. This step ensures your tzatziki stays creamy and doesn’t become watery. If you’re curious about cucumber health benefits, they are packed with hydration and nutrients like vitamins K and C, making them a fantastic addition to your diet.
Step 2: Combine your ingredients
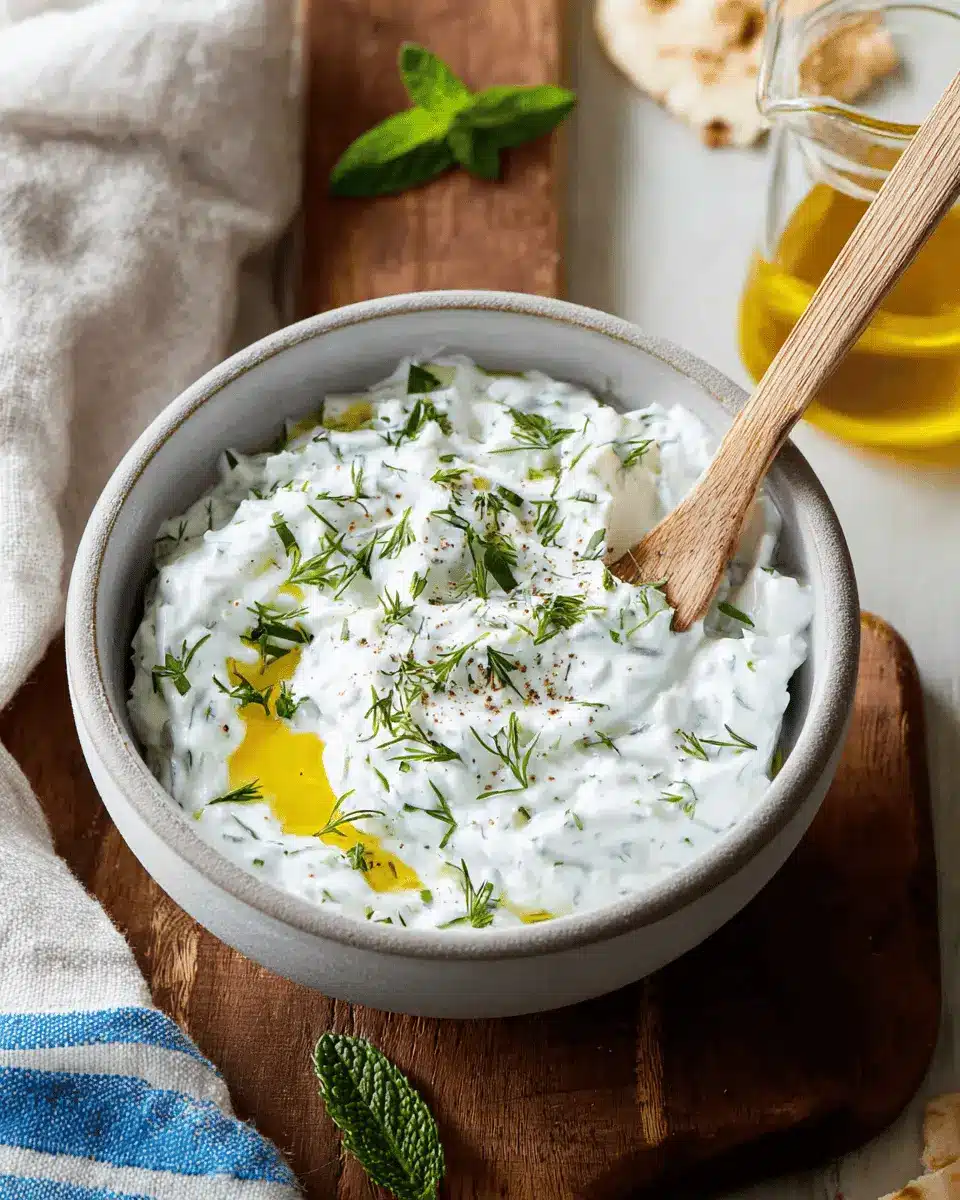
In a medium bowl, combine the grated cucumber with 1 cup of thick whole milk Greek yogurt. The yogurt is the base of our sauce and adds that rich, tangy flavor we love. Next, squeeze in 1 tablespoon of fresh lemon juice for brightness, and add half a tablespoon of extra-virgin olive oil to enhance the taste with its decadent notes. Don’t forget the garlic! Grate one clove and add it to the mix. Finally, toss in a quarter teaspoon of sea salt along with one tablespoon each of chopped fresh dill and mint if you prefer an aromatic finish. Stir everything together until well blended.
Step 3: Chill for flavor infusion
Once combined, cover the bowl tightly and pop it into the fridge. Letting your tzatziki chill for at least 30 minutes helps the flavors meld beautifully. It’s a bit like letting a good story develop—it gets better with time! If you're planning a gathering, making tzatziki ahead of time gives you one less thing to worry about as you prep for your guests.
Step 4: Adjust seasoning to taste
Before serving, take a moment to taste your tzatziki. Depending on personal preference, you might find it needs a pinch more salt or a dash of lemon juice. Feel free to adjust and tweak as you see fit! This step is all about catering to your palate. Perhaps you like it tangier; a squeeze of lemon can do wonders.
Step 5: Store properly
If you have any tzatziki left over (which is rare!), you can store it in an airtight container in the fridge. It should keep well for about three days. Just give it a good stir before serving, as separation can happen. Now you're equipped with not only how to make tzatziki but also how to store it wisely!
By following these simple steps, you’ll have a fresh, creamy tzatziki ready to complement your summer dishes. So go ahead, dive into your culinary creations, and enjoy this flavorful addition!
Variations on Tzatziki
Spicy tzatziki for a kick
If you're looking to spice things up, try adding some finely chopped jalapeños or a sprinkle of crushed red pepper flakes to your tzatziki. This variation not only brightens the flavor but adds a delightful kick that complements grilled meats beautifully. You can even experiment with Harissa paste for a deeper, North African flair. As someone who often craves bold flavors, I find this version transforms the classic sauce into something even more exciting!
Vegan tzatziki option
For those who prefer a plant-based option, consider substituting Greek yogurt with coconut yogurt or cashew cream. Both alternatives provide a creamy texture while keeping the tzatziki deliciously fresh. Simply follow the original recipe steps, and you'll have a vegan tzatziki that's perfect for dipping veggies or spreading on sandwiches. It’s a fantastic way to indulge without sacrificing flavor, proving that even vegan versions can be incredibly satisfying! Check out this guide on vegan ingredients.
Discovering these variations on how to make tzatziki can elevate your summer backyard barbecues or casual weeknight dinners!
Cooking tips and notes for Tzatziki
Tips for achieving the perfect texture
To get that perfectly creamy tzatziki, start by squeezing out excess moisture from the cucumber. Use a clean kitchen towel to wrap the grated cucumber and apply gentle pressure. This helps avoid watery tzatziki, allowing the flavors to shine. If you prefer a thicker texture, consider using Greek yogurt with a high-fat content. For an extra touch, try adding strained yogurt for an ultra-rich experience!
Importance of chilling
Don’t skip the chilling step! Allowing your tzatziki to rest in the refrigerator for at least an hour enhances its flavors and gives it a beautifully cool texture. This resting time allows the garlic and herbs to infuse, creating a vibrant taste. If you find yourself short on time, even 15-20 minutes can make a notable difference. Trust me, a chilled tzatziki is a game-changer for summer dishes!
For more cooking tips, check out resources like Serious Eats and Bon Appétit.
Serving suggestions for Tzatziki
Perfect pairings for your tzatziki
Tzatziki is incredibly versatile and makes an excellent addition to various dishes. Consider pairing it with:
- Grilled meats, such as chicken or lamb skewers
- Veggie-packed wraps featuring turkey bacon or roasted vegetables
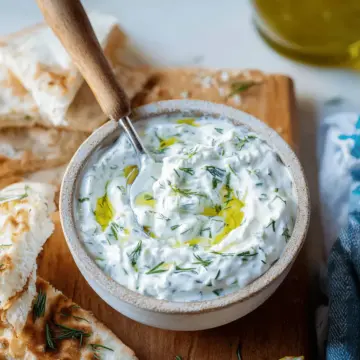
- Fresh pita bread or veggie sticks for a delightful dip
For a refreshing twist, you could even add tzatziki to your next salad or as a sauce for fish tacos, enhancing flavors while keeping the meal light.
Creative serving ideas
Not sure how to make tzatziki the star of your next gathering? Try these creative serving ideas:
- Crudité platter: Serve your tzatziki alongside an array of colorful cut veggies for stunning presentation.
- Sandwich spread: Use it in place of mayo or mustard in sandwiches, especially with grilled chicken or turkey bacon.
- Bowl topping: Drizzle tzatziki over grain bowls filled with quinoa, roasted veggies, and chickpeas for an extra layer of flavor.
With these suggestions, you're well on your way to turning your tzatziki into a crowd-pleasing condiment worthy of any meal! For more inspiration, check out this guide on Mediterranean cuisines that celebrates fresh ingredients.
Time Breakdown for Tzatziki
Preparation Time
Making tzatziki is a breeze! You’ll need about 5 minutes to prepare all your ingredients and have everything combined.
Total Time
In just 5 minutes, you can whip up this refreshing sauce. It's a quick addition to any meal, perfect for those busy summer gatherings or weeknight dinners. For more delicious quick recipes, check out BBC Good Food for inspiration.
This easy-to-make tzatziki sauce is not only delicious but also a great way to add a cool, creamy kick to your dishes without spending hours in the kitchen. Want to know how to make tzatziki part of your regular summer menu? It’s simple; just gather your ingredients, and you’re all set!
Nutritional Facts for Tzatziki
Calories
Tzatziki is a guilt-free delight, with approximately 50 calories per serving. This makes it a fantastic choice for those looking to spice up their meals without sacrificing flavor.
Protein
Rich in protein, thanks to the Greek yogurt, each serving packs around 5 grams. This contributes to a satisfying dip that supports your fitness goals.
Sodium
With only about 200 milligrams of sodium per serving, tzatziki is a heart-healthy option that can complement any dish—perfect for keeping your meals flavorful without the health drawbacks of high-sodium condiments.
If you're curious about how to make tzatziki at home, check out our full recipe above and enjoy this refreshing dip that adds a burst of flavor to your favorite meals! For more nutritional insights, the USDA Food Composition Database is a valuable resource.
FAQs about Tzatziki
Can I make tzatziki in advance?
Absolutely! In fact, making tzatziki in advance allows the flavors to meld together beautifully. Prepare it a day ahead and let it chill in the refrigerator. Just give it a good stir before serving to refresh its consistency.
How long does tzatziki last in the fridge?
When stored in an airtight container, tzatziki can last for about 3 to 5 days in the fridge. Just be sure to keep it chilled and check for any changes in texture or smell before enjoying it again!
What can I use instead of dill or mint?
If you’re not a fan of dill or mint, don’t worry—there are plenty of alternatives! Fresh parsley or chives can be fantastic substitutes, adding a unique twist to your tzatziki. You could even try adding a pinch of dried oregano for a different flavor profile.
For more tips on how to make tzatziki, check out detailed guides on sites like EatingWell for additional insights on this classic sauce!
Conclusion on Tzatziki
In conclusion, mastering how to make tzatziki opens up a world of culinary delight that elevates any meal. This versatile dip complements grilled meats, salads, and fresh veggies beautifully. Plus, with just a few simple ingredients and minimal prep time, you can enjoy a refreshing taste of summer anytime.
Tzatziki
Equipment
- Kitchen Towel
- box grater
- Lemon Juicer
Ingredients
- 0.5 cup finely grated cucumber
- 1 cup thick whole milk Greek yogurt
- 1 tablespoon fresh lemon juice
- 0.5 tablespoon extra-virgin olive oil
- 1 clove garlic, grated
- 0.25 teaspoon sea salt
- 1 tablespoon chopped fresh dill
- 1 tablespoon chopped fresh mint optional
Instructions
- Place the cucumber on a towel and gently squeeze out a bit of the excess water.
- In a medium bowl, combine the cucumber, yogurt, lemon juice, olive oil, garlic, salt, dill, and mint, if using. Chill until ready to use.


Leave a Reply