
Introduction to Black Forest Cheesecake
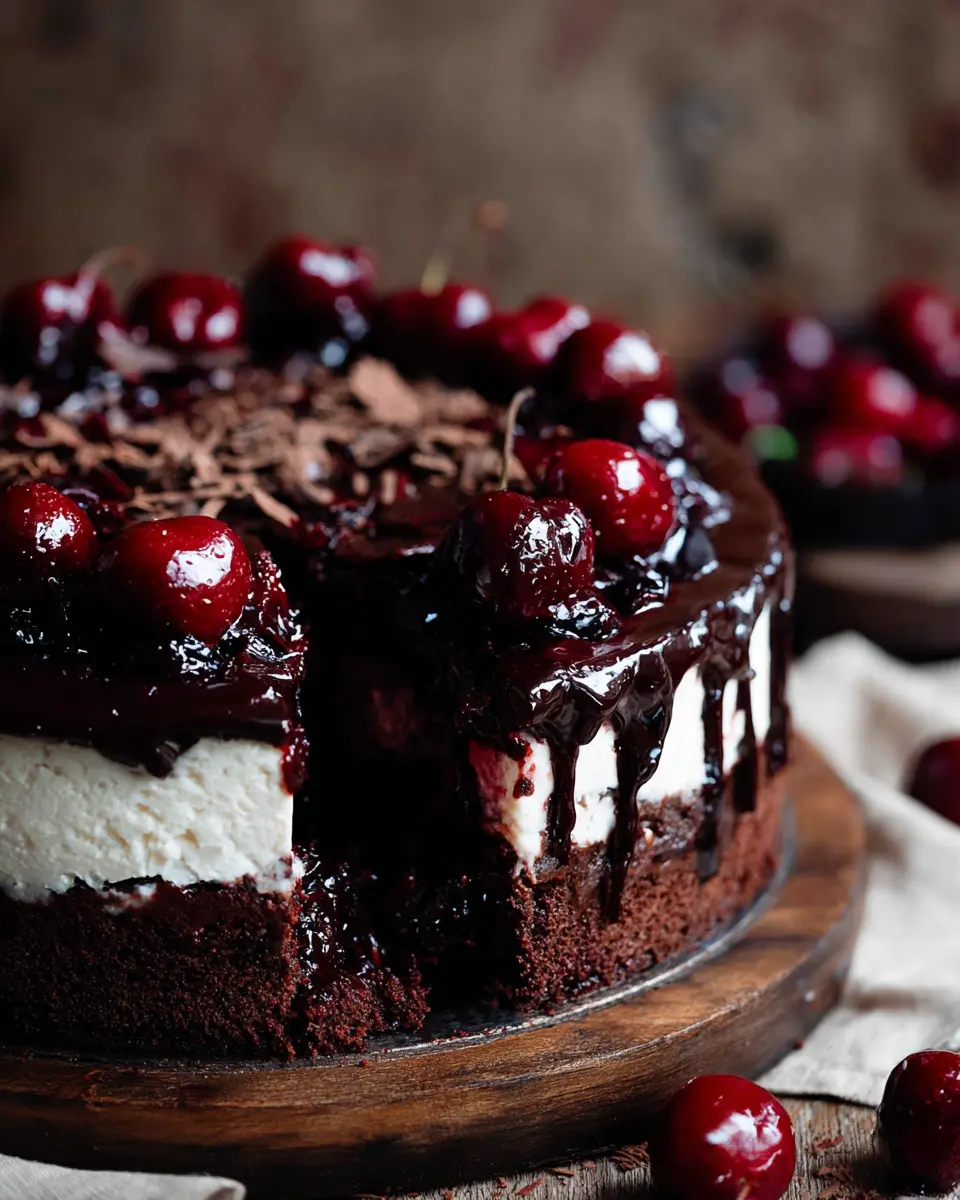
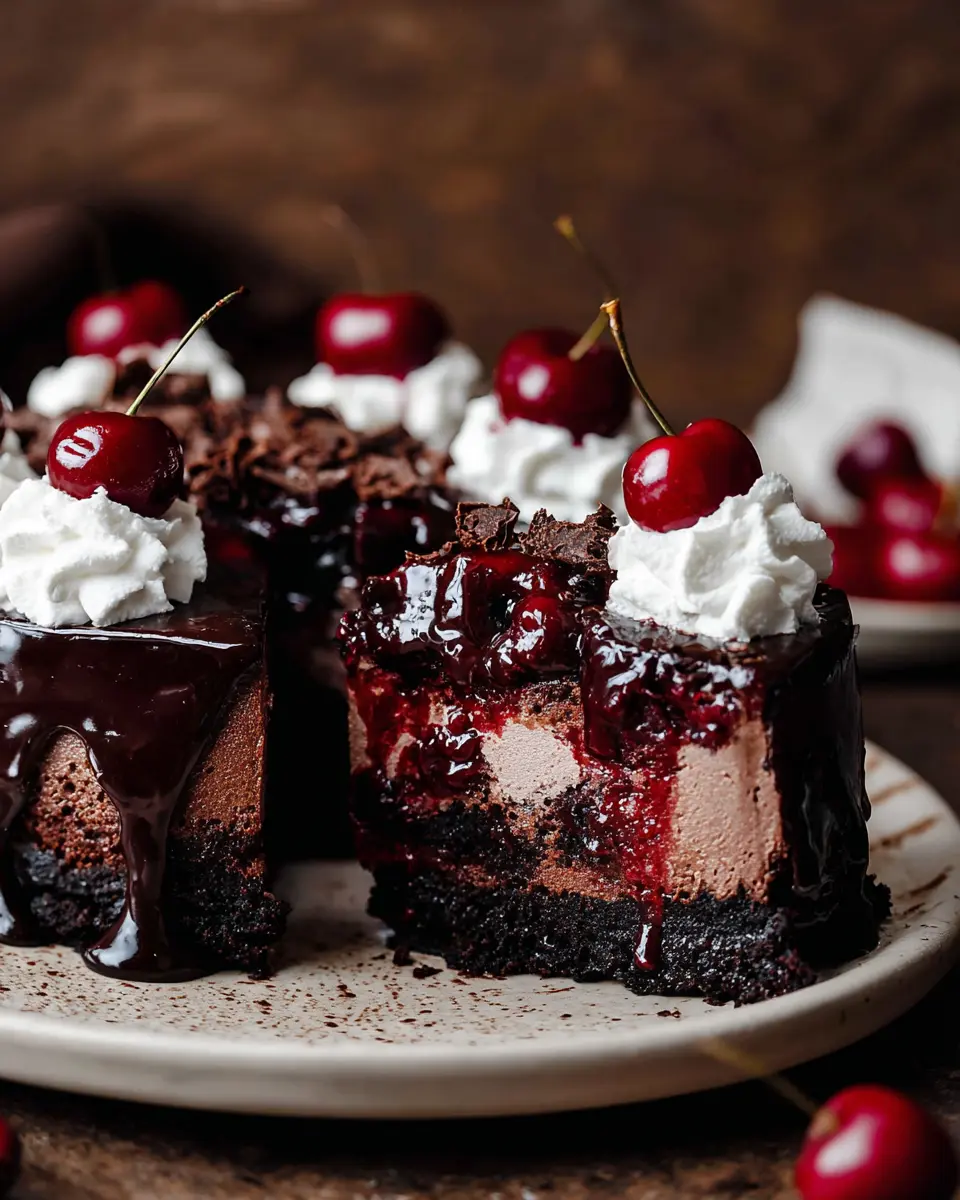
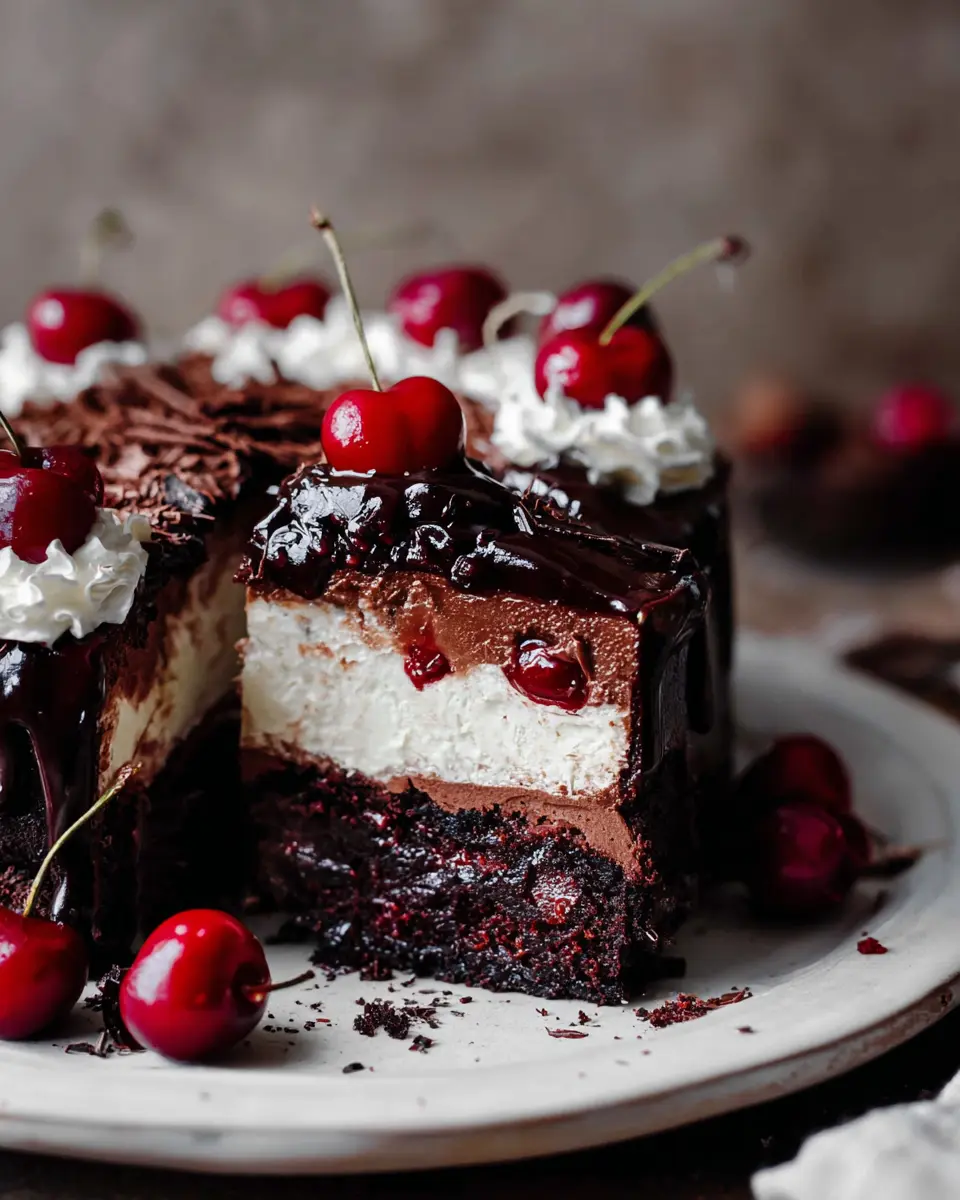
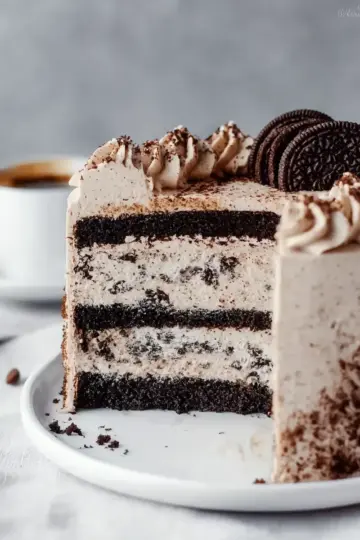
If you're on the hunt for a dessert that impresses as much as it delights, look no further than Black Forest Cheesecake. This decadent treat marries the rich flavors of classic cheesecake with the luscious sweetness of dark cherries, creating a gorgeous fusion that's visually stunning and irresistibly delicious. Imagine biting into layers of creamy chocolate cheesecake, topped with a vibrant cherry compote, and finished off with fluffy whipped cream. It's a dessert that brings a bit of elegance to any occasion.
What makes Black Forest Cheesecake a must-try? First, its combination of textures—smooth cheesecake, crunchy crust, and juicy fruit—creates a delightful experience in every bite. Plus, it's a versatile dessert, perfect for birthdays, holidays, or even a cozy night in. Not sure how to get started? This recipe guides you through each step, ensuring that even novice bakers can create a show-stopping centerpiece.
Curious about the history? The Black Forest cake originated in Germany and is named after the Black Forest region, known for its cherries. By adapting this classic into a cheesecake, you’re embracing both tradition and creativity. Ready to dive in? Let’s explore the ingredients and instructions to craft this delightful dessert!
Ingredients for Black Forest Cheesecake
Creating a delicious Black Forest Cheesecake is all about gathering the right ingredients. Here’s what you'll need to craft this decadent dessert:
Essential Ingredients for the Cherry Filling
- 2 and ½ tablespoon corn starch: This helps thicken your cherry filling beautifully.
- 2 and ½ tablespoon water: Essential for dissolving the cornstarch.
- 5 and ¼ cups dark sweet cherries (fresh or frozen): Frozen cherries work fabulous here; there's no need to thaw!
- ½ cup granulated sugar: Sweetens the cherries perfectly.
- 3 and ½ tablespoon kirsch: A lovely cherry brandy (substitute with water or orange juice if you prefer).
- 1 and ¼ teaspoon almond extract: Adds a hint of nutty flavor to your filling.
Ingredients for the Cheesecake Crust
- 35 whole Oreos: No need to scrape out the cream—just add them whole.
- ¼ cup salted butter, melted: This helps bind the crust together.
Ingredients for the Cheesecake Batter
- 32 ounces full-fat cream cheese, softened: It's essential for that rich taste.
- 1 and ⅔ cups granulated sugar: The sweetness factor!
- 4 large eggs, at room temperature: Helps achieve a smooth consistency.
- ¾ cup full-fat sour cream: Adds creaminess.
- 2 teaspoon vanilla extract: A classic flavor booster.
- 8 ounces semi-sweet chocolate, melted: Perfectly decadent.
- 1 cup cocoa powder: Rich chocolate flavor to balance the sweetness.
Ingredients for Whipped Cream and Decoration
- ¾ cup heavy cream: Essential for making that fluffy whipped cream.
- ⅓ cup powdered sugar: Sweetness for the cream.
- 2 teaspoon vanilla extract: More flavor to make everything pop!
- Extra fresh cherries and chocolate shavings: For that gorgeous finishing touch.
With these ingredients, you’ll have everything you need to create a stunning and delicious Black Forest Cheesecake. Enjoy the process, and don’t forget to taste along the way! For more tips on cherry varieties, check out this guide to elevate your filling even further.
Preparing Black Forest Cheesecake
The allure of a Black Forest Cheesecake lies in its rich layers of chocolate, creamy cheesecake, and luscious cherry compote. Here’s a step-by-step guide to help you make this indulgent dessert at home.
Make the Cherry Compote
Start by creating the cherry compote, which brings a delightful twist to the cheesecake.
- In a small bowl, whisk together 2.5 tablespoons of cornstarch with 2.5 tablespoons of water until completely dissolved.
- If you are using fresh cherries, rinse, pit, and halve them; if using frozen, there’s no need to thaw.
- In a medium saucepan, combine 5.25 cups of cherries, ½ cup of granulated sugar, and 3.5 tablespoons of kirsch. Cook over medium heat for about 10-15 minutes until the cherries soften and release their juices.
- Stir the cornstarch mixture back in and cook for another 30 seconds to 1 minute until the sauce thickens. Finally, mix in 1.25 teaspoons of almond extract and let it chill in the fridge.
Prepare the Crust
Now that your compote is taken care of, let’s focus on the crust.
- Preheat your oven to 350°F.
- Crush 35 whole Oreos (cream included) and mix the crumbs with ¼ cup melted salted butter. Press this mixture into a greased 9-inch springform pan. Bake for 10 minutes and then let it cool.
Make the Cheesecake Filling
Next up is the rich cheesecake filling that binds everything together.
- Ensure your 32 ounces of cream cheese is softened for optimal mixing. Beat it with an electric mixer until creamy, then gradually mix in 1 and ⅔ cups of sugar.
- Add 4 large eggs, one at a time, then gently fold in ¾ cup of sour cream, 2 teaspoons of vanilla extract, 8 ounces of melted chocolate, and 1 cup of cocoa powder, mixing until just combined.
Assemble the Cheesecake
Time for the fun part!
- Spread half of the cheesecake batter over the prepared crust, followed by about 40% of your cherry compote.
- Pour the rest of the batter on top, smoothing it evenly. If there's any batter left, you can bake it in muffin liners for mini cheesecakes.
Prepare the Water Bath and Bake
Using a water bath ensures that your cheesecake cooks evenly and doesn’t crack.
- Bring a large pot of water to a boil. Wrap the base of your springform pan in foil and place it in a larger baking pan or roaster.
- Pour the boiling water into the larger pan (not on the cheesecake!) and bake for 1 hour and 30 minutes. The center should be slightly wobbly.
Cool the Cheesecake
Patience is key!
- After baking, turn the oven off and crack the door, allowing the cheesecake to cool for an hour in the warm oven.
- Remove it and let it cool completely at room temperature for another 1-2 hours before chilling in the fridge for at least 6 hours.
Make the Whipped Cream
While your cheesecake cools, prepare some fluffy whipped cream.
- In a bowl, beat together ¾ cup heavy cream, ⅓ cup powdered sugar, and 2 teaspoons of vanilla until stiff peaks form.
Serve and Enjoy
Once your cheesecake is chilled, it’s time to assemble and serve!
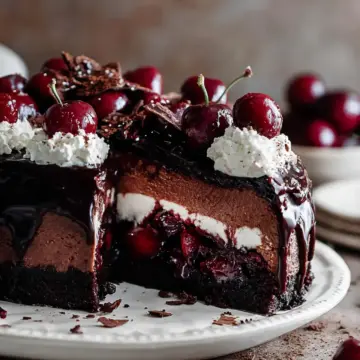
- Spread the remaining cherry compote over the cheesecake, dollop with whipped cream using a piping bag for flair, and sprinkle some chocolate shavings for decoration.
- Slice it up, and enjoy your Black Forest Cheesecake with family and friends!
For more delectable dessert inspirations, check out Epicurious and Bon Appétit.
Variations on Black Forest Cheesecake
Adding Different Fruits
While traditional black forest cheesecake relies on cherries for that classic flavor, why not mix it up? Broaden your flavor profile by adding fruits like raspberries, strawberries, or blueberries. These options can provide vibrant colors and new taste dimensions. Fresh fruit not only uplifts the visuals but also enhances the sweetness, allowing for a delightful twist. Consider a raspberry compote or a mixed berry topping for a summer flair—your guests will be impressed!
Experimenting with Chocolate Types
Chocolate lovers rejoice! The beauty of a black forest cheesecake is in its versatility with chocolate. Try swapping semi-sweet chocolate for dark, milk, or even white chocolate for different flavor notes. Each type brings a unique sweetness level—for example, white chocolate will lend a creamier texture, while dark chocolate intensifies the cocoa love. Don’t be afraid to play around with chocolate types; your taste buds will thank you!
For more inspiration, check out this guide on fruit pairings or explore different chocolate varieties here.
Baking Notes for Black Forest Cheesecake
Tips for Perfect Cheesecake Texture
To achieve that dreamy, smooth texture in your Black Forest Cheesecake, it's crucial to avoid overmixing your filling. Once you add the eggs, mix just until combined—this will help keep the cake dense and creamy. Using a water bath is essential, as it promotes even baking and prevents cracking, ensuring your cheesecake looks as beautiful as it tastes.
Importance of Room Temperature Ingredients
Make sure your cream cheese and eggs are at room temperature before you start! This allows for a more uniform blend and helps to prevent lumps. Take out your ingredients about 30 minutes prior to baking, or speed things up by warming eggs in water and gently microwaving the cream cheese. Properly prepared ingredients lead to a cheesecake that's utterly luscious and irresistible.
For more tips on making the perfect cheesecake, check out resources from the American Dairy Association.
Serving Suggestions for Black Forest Cheesecake
Pairing with Coffee or Tea
Enjoying a slice of Black Forest cheesecake with a warm beverage can elevate your dessert experience. Consider pairing it with a rich espresso or a smooth cappuccino for the perfect coffee complement. If tea is more your vibe, a cup of black tea adds an excellent balance to the luscious creaminess of the cheesecake. The contrast of flavors enhances each bite, making it a delightful routine for your afternoon break.
Presentation Ideas for Gatherings
When hosting friends, presentation can be just as delightful as taste. Serve your Black Forest cheesecake on a stylish cake stand, adorned with fresh cherries and chocolate shavings for an inviting look. You can also provide small plates with individual slices for a casual gathering. For an elegant touch, garnish with mint leaves and serve alongside a dollop of whipped cream. This simple yet beautiful setup is sure to impress your guests and make for stunning photos—perfect for sharing on social media!
Tips for Making Perfect Black Forest Cheesecake
Avoiding Common Cheesecake Pitfalls
To achieve a flawless black forest cheesecake, be mindful of your ingredients. Ensure that your cream cheese and sour cream are at room temperature; this helps create a smooth batter without lumps. Mix on medium speed to prevent overmixing, which can lead to cracks on the surface while baking. Don't forget the water bath! This technique keeps the cheesecake moist and prevents it from baking too quickly.
Success Tips for Homemade Whipped Cream
When making your whipped cream, keep your mixing bowl and beaters chilled for the best results. Use heavy cream and beat it on high speed, gradually incorporating powdered sugar and vanilla extract. This will help achieve those lovely stiff peaks that sit beautifully atop your black forest cheesecake. Don’t rush; gentle folding helps maintain the aerated texture you want!
For more tips, check out resources like Serious Eats and The Kitchn for in-depth discussions on cheesecake-making techniques.
Time Details for Black Forest Cheesecake
Preparation Time
To kick off your black forest cheesecake, set aside around 30 minutes for preparation. This includes gathering ingredients, making the crust, and getting the cheesecake batter ready to go.
Baking Time
Baking your cheesecake will take approximately 1 hour and 30 minutes to 1 hour and 45 minutes. Keeping an eye on it during the final stages is essential; you want that perfect wobble in the center!
Cooling and Chilling Time
After baking, you'll need to let your cheesecake cool in the oven for an additional hour with the door cracked open. Follow that up with at least 6 hours in the fridge to set it best, overnight is even better if you have the patience.
For an extra tip on making your own cherry topping, check this cherry compote guide — it’s a fantastic addition to complement your black forest cheesecake!
Nutritional Information for Black Forest Cheesecake
Calories Per Slice
Indulging in a slice of Black Forest Cheesecake brings about 771 calories, making it a decadent treat perfect for special occasions.
Key Nutritional Values
Each slice offers an array of nutritional values:
- Carbohydrates: 71g
- Protein: 13g
- Fat: 51g (of which, 28g is saturated)
- Sodium: 513mg
- Sugar: 58g
Enjoy this rich dessert in moderation, coupled with the delightful flavors of dark cherries and creamy cheese! For more details on the health benefits of cherries, check out resources from the Nutritional Research Foundation.
FAQs about Black Forest Cheesecake
Can I make this cheesecake ahead of time?
Absolutely! This Black Forest Cheesecake is perfect for making ahead. You can prepare it up to a day in advance, allowing the flavors to meld beautifully. Just be sure to refrigerate it for at least 6 hours once baked. Additionally, the cherry compote can be made a couple of days in advance as well and stored in an airtight container in the fridge.
What can I substitute for kirsch?
If you prefer to skip the kirsch, which is a cherry brandy, don’t worry! You can easily substitute it with water or orange juice. This will keep your Black Forest Cheesecake flavorful without the alcohol.
How do I store leftover cheesecake?
To keep your leftover cheesecake fresh, store it in an airtight container in the refrigerator. It should stay delicious for about 3-4 days. If you notice the whipped cream losing its fluffiness, just make a quick batch to top it off again!
For more detailed insights on recipe ingredient substitutions, you can check out this comprehensive guide on ingredient swaps.
Conclusion on Black Forest Cheesecake
In conclusion, this black forest cheesecake is a delightfully rich dessert that beautifully combines the flavors of chocolate, cherries, and cream. Perfect for any occasion, it’s sure to impress your guests. So grab your ingredients and create this luscious treat to share and enjoy with loved ones!
black forest cheesecake
Equipment
- 9-inch springform pan
- Roasting pan
- Large mixing bowl
- medium saucepan
- Electric Mixer
Ingredients
For the Cherry Filling & Topping
- 2.5 tablespoon corn starch
- 2.5 tablespoon water
- 5.25 cups dark sweet cherries Fresh or frozen, do not thaw if using frozen
- 0.5 cup granulated sugar
- 3.5 tablespoon kirsch Use water or orange juice if omitting alcohol
- 1.25 teaspoon almond extract
For the Crust
- 35 whole oreos No need to scrape out the cream
- 0.25 cup salted butter melted
For the Cheesecake Batter
- 32 oz full fat cream cheese softened at room temperature
- 1.67 cups granulated sugar
- 4 large eggs at room temperature
- 0.75 cup full fat sour cream at room temperature
- 2 teaspoon vanilla extract
- 8 oz semi-sweet chocolate melted
- 1 cup cocoa powder
Whipped Cream
- 0.75 cup heavy cream
- 0.33 cup powdered sugar
- 2 teaspoon vanilla extract
For Decorating
- extra fresh cherries
- 1 small semi-sweet chocolate bar for chocolate shavings
Instructions
Prepare Cherry Compote
- Stir water and corn starch together in a small bowl until fully dissolved. Rinse, pit, and halve the cherries. Add cherries to a medium saucepan with the sugar and kirsch. Cook over medium heat for 10-15 minutes, stirring until the cherries have released their juices. Stir in cornstarch mixture and cook until thickened, then add almond extract.
- Transfer to a bowl and chill completely before using.
Make the Crust
- Preheat oven to 350°F. Spray a 9-inch springform pan with nonstick spray. Stir together crust ingredients and press into prepared pan.
- Bake for 10 minutes and set aside.
Make the Cheesecake Filling
- Beat softened cream cheese until creamy in a large bowl. Gradually add sugar, mixing well. Add eggs one at a time, then mix in vanilla and sour cream. Finally, add melted chocolate and cocoa powder.
Assemble Cheesecake
- Spread half the cheesecake batter over the crust. Spoon about 40% of the cherry filling over it, followed by the remaining batter.
Prepare the Water Bath + Bake
- Wrap the base of the cheesecake pan in foil and place it into a larger cake pan. Pour boiling water into the roasting pan, then place the pans inside.
- Bake for 1 hour and 30 minutes to 1 hour 45 minutes. Let cool in the oven with the door cracked for 1 hour.
Cheesecake Cooling
- Remove the cheesecake from the oven and let cool to room temperature for 1-2 hours. Cover and refrigerate for at least 6 hours or up to 1 day.
Make the Whipped Cream
- Beat the heavy cream, powdered sugar, and vanilla until stiff peaks form.
Serve & Store
- Spread remaining cherry compote over the cheesecake and top with whipped cream. Decorate with chocolate shavings.
- Store leftovers in an airtight container in the fridge for 3-4 days.

Leave a Reply