
Introduction to Japanese Strawberry Sponge Cake
The allure of homemade desserts
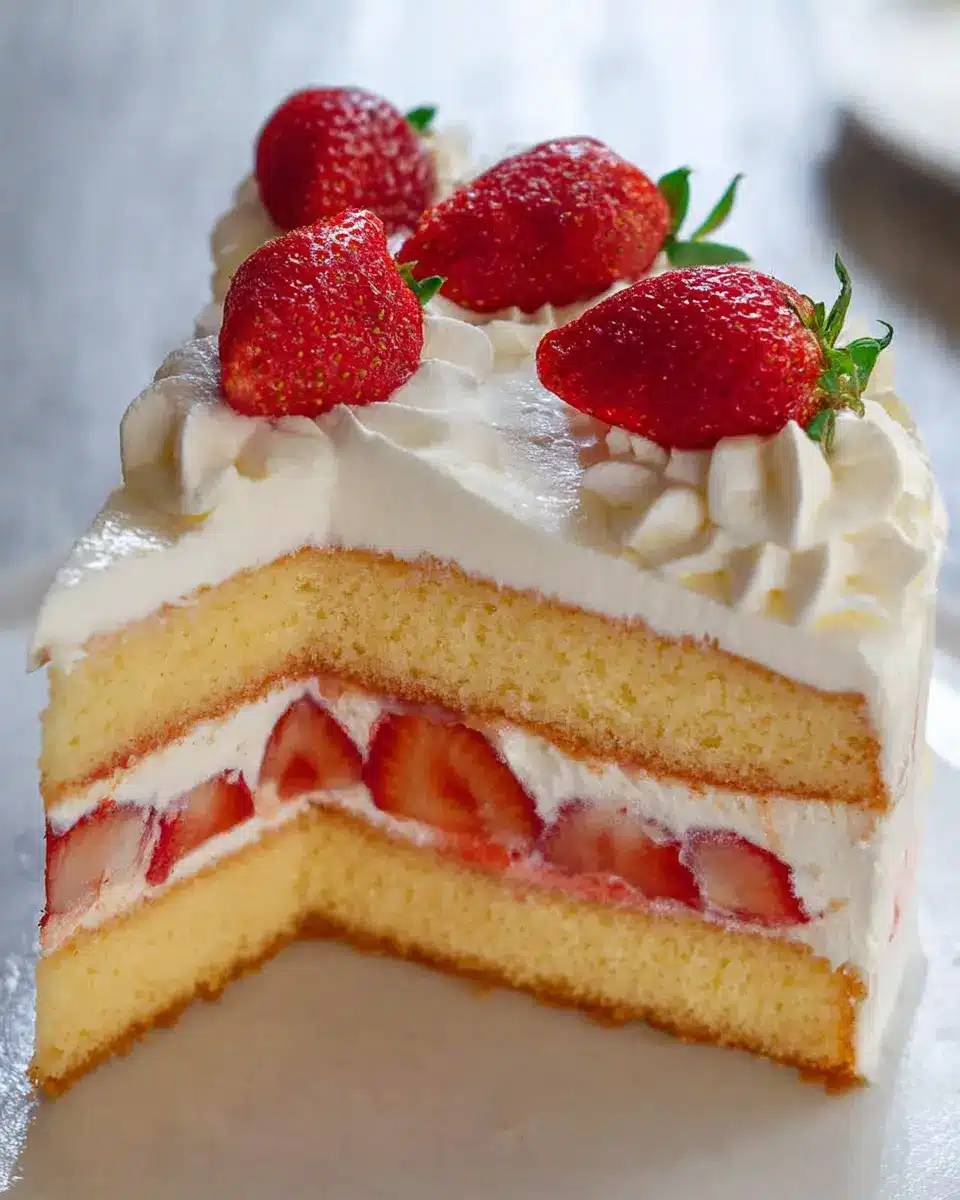
There's something magical about whipping up homemade desserts. Whether you're indulging in a cozy weekend or celebrating a special occasion, creating a treat from scratch adds a personal touch that's hard to replicate. Enter the Japanese Strawberry Sponge Cake. Known for its light, fluffy texture and fresh strawberry flavor, it’s a delightful way to impress family and friends alike. The combination of tender sponge and luscious whipped cream forms a contrast that's not just pleasing to the palate, but also looks stunning on any dessert table.
Why you should try this recipe
If you've ever felt intimidated by baking, fear not! This recipe is designed for bakers of all levels. The step-by-step instructions guide you through each stage, making it a breeze to create your own stunning Japanese Strawberry Sponge Cake. With just a handful of ingredients, the result is a cake that’s decadently simple yet elegant enough for celebrations or everyday enjoyment. Plus, strawberries can easily be swapped for your favorite seasonal fruit, giving you endless possibilities. Want to learn more about the process? Check out this guide to making the perfect sponge cake for handy tips!
So why not roll up your sleeves and bring a slice of Japan to your kitchen? Your taste buds will thank you!
Ingredients for Japanese Strawberry Sponge Cake
Sponge Cake Ingredients
To create a delightful Japanese Strawberry Sponge Cake, you’ll need the following essential ingredients for the sponge:
- 125g (⅘ cup) all-purpose flour, sifted three times
- 100g (⅖ cup) sugar
- 4 large eggs, yolks and whites separated
- 60g (¼ cup) melted butter
- Butter and flour for coating the cake pan
These ingredients come together to form a light and airy sponge, perfect for soaking up all the flavors of the strawberries and cream.
Decoration Ingredients
Your cake’s decoration will be just as vital as the sponge itself, requiring:
- 18 mid-sized strawberries
- 400ml cream for whipping
- 10g (2½ tsp) sugar
These components will not only enhance the flavor but also provide a beautiful presentation, making each slice irresistible.
Optional Syrup Ingredients
For an added touch of moisture and flavor, you might consider making an optional syrup with:
- 40ml water
- 10g (2½ tsp) sugar
This syrup can be brushed between layers, elevating your Japanese Strawberry Sponge Cake to a new level of deliciousness.
So gather these ingredients, and let’s get started on a lovely baking journey! If you’re curious about cake variation ideas or tips on ingredient substitutions, check out resources like Serious Eats or BBC Good Food.
Preparing Japanese Strawberry Sponge Cake
When it comes to creating a delightful dessert, the Japanese Strawberry Sponge Cake is a showstopper. This light, fluffy cake is perfect for celebrations or a delightful afternoon treat. Let’s break down the steps to ensure your sponge cake turns out perfectly every time!
Preheat Your Oven
Before you start mixing your ingredients, it’s crucial to preheat your oven. Set it to 180°C (356°F) so that it reaches the perfect temperature by the time your batter is ready. This ensures even baking and helps achieve that lovely rise that Japanese sponge cakes are famous for.
Prepare the Cake Pan
Next, it’s time to prepare your cake pan. Use an 18cm (7") cake tin, coating the inside with butter. After that, dust it lightly with flour, shaking off the excess. This step is vital to help your cake release easily after baking. If you’d like, consider using parchment paper for extra assurance!
Beat the Egg Yolks and Sugar
In a separate bowl, take your large egg yolks and add ⅔ of the sugar. Beat these together until the mixture becomes light and thickened, resembling a pale ribbon. This is a critical step in developing the structure that will hold your sponge cake together. If you’re not sure when it’s ready, check for that lovely, slow-disappearing ribbon effect when you lift your whisk.
Whip the Egg Whites into Meringue
Separately, you’ll want to whip your egg whites to create a stiff meringue. Beat them until small bubbles form and the volume doubles, then gradually add the remaining sugar. Continue whipping until you achieve soft peaks. This light and airy texture is what will give your cake its lift. Curious about the perfect peaks? You can watch some helpful tutorials here for a visual guide on achieving the right consistency.
Combine the Mixtures and Fold in the Flour
Once your yolk and meringue mixtures are prepared, it’s time to unite them. Gently fold the flour into the yolk mixture to keep the air you’ve created in your meringue. After thoroughly incorporating the flour, add one-third of the meringue, mixing until smooth, and fold in the rest gently in batches.
Add Melted Butter and Pour into the Pan
Now, it’s time to add the melted butter to the batter. Gently fold a few times until it’s just combined—you don’t want to overmix. Pour the delicate batter into your prepared cake pan. To make sure it settles correctly, gently drop the pan onto your work surface.
Bake and Cool the Cake
Pop that pan into your preheated oven for about 25 minutes. You can test for doneness by inserting a thin bamboo skewer into the center; if it comes out dry, your cake is ready! Once baked, carefully remove it from the oven and drop the tin twice onto the workbench to detach the cake. Turn the cake upside down (bottom side up) to cool completely on a wire rack.
There you have it—the essential steps to preparing a stunning Japanese Strawberry Sponge Cake. For those eager to enhance their baking skills, each step is an opportunity to embrace the art of cake making. Happy baking!
Decorating the Japanese Strawberry Sponge Cake
When it comes to making your Japanese Strawberry Sponge Cake shine, the decoration is just as important as its flavor. Follow these simple steps for a stunning final product!
Prepare Syrup (Optional)
To add a delightful moisture and subtle sweetness to the layers, you might want to whip up a quick syrup. Combine water and sugar in a saucepan and bring it to a boil. Once the sugar has dissolved, remove it from heat and allow it to cool. This step is optional but highly recommended for that extra juiciness!
Whip the Cream
Next, it’s time to whip your cream! Using a mixer, beat the 400ml of cream and add just a hint of sugar until you achieve soft peaks. This will create a light and airy texture that beautifully complements the sponge. For tips on achieving the perfect whipped cream, you might enjoy checking out this guide from Epicurious.
Slice and Layer the Sponge Cake
Once your sponge cake has cooled, slice it horizontally in half. Lay the two halves cut-side up; this creates the perfect canvas for layering. Don’t rush this step—make sure your knife is even for an aesthetically pleasing final look!
Spread Whipped Cream and Add Strawberries
Now, spread a generous amount of the whipped cream on the bottom half of the cake. Then, place your halved strawberries evenly over the cream. Make sure to fill up the space without any gaps—this is where your cake will get most of its fruitiness!
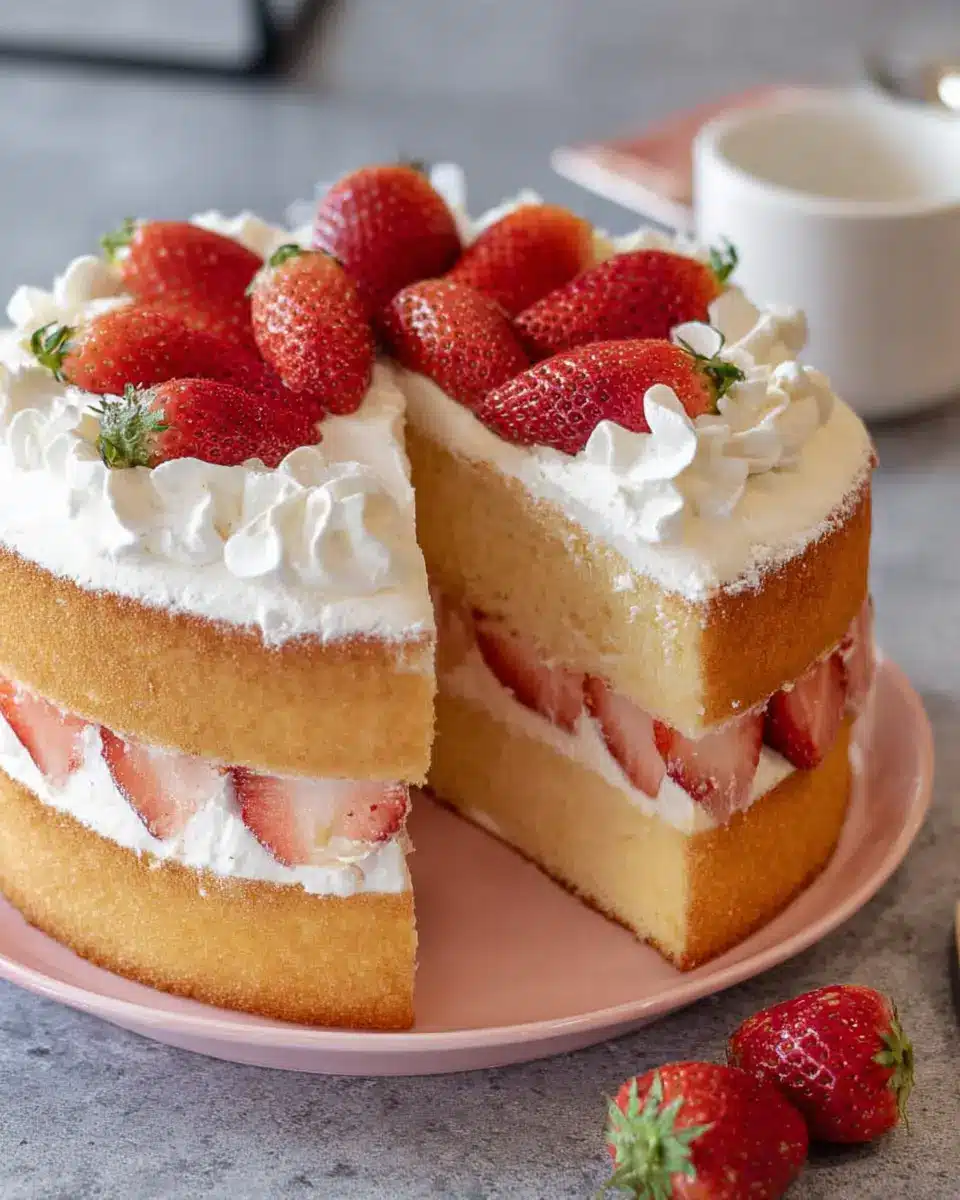
Top with Remaining Sponge and Frost
Gently place the top half of the cake back on, syrup side down. Press it down lightly to ensure everything aligns well. Next, frost the top and sides with the rest of your whipped cream, creating a smooth finish.
Final Touches for Decoration
For that professional look, consider piping some additional cream along the edges using a piping bag fitted with a round nozzle. Top each mound with a lovely strawberry to complete your masterpiece! A dash of mint leaves could also be a refreshing addition.
With these steps, your Japanese Strawberry Sponge Cake will not only taste divine but also look irresistibly beautiful! Enjoy making this delicious cake and impress your friends and family.
Variations on Japanese Strawberry Sponge Cake
Exploring variations of the classic Japanese Strawberry Sponge Cake can elevate your baking game and please a variety of tastes. Here are some delicious alternatives to try:
Mixed Berry Sponge Cake
Instead of just strawberries, use a combination of berries like raspberries, blueberries, and blackberries for a vibrant, colorful twist. This mixed berry sponge cake offers a delightful medley of flavors and textures. Plus, it’s a great way to celebrate summer's bounty or just create a fun, fruity dessert! Check out this resource on different berry types for your cake here.
Tropical Fruit Sponge Cake
For a taste of the tropics, swap strawberries for fruits like mango, pineapple, or passion fruit. The combination of fluffy sponge and exotic fruits results in a light, refreshing cake perfect for warm days or themed parties. Try pairing it with coconut whipped cream for an even more tropical flair.
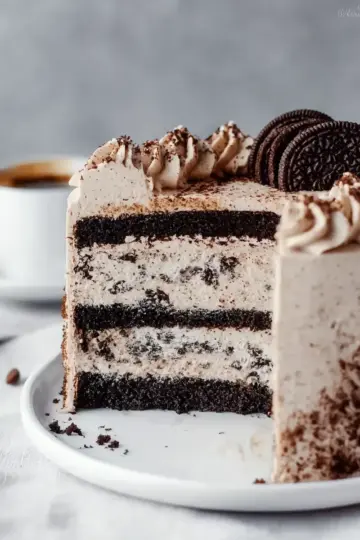
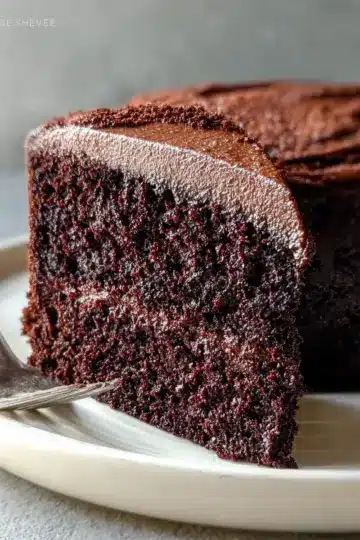
Chocolate-Flavored Sponge Cake
Love chocolate? Just add cocoa powder to your batter to transform your Japanese Strawberry Sponge Cake into a delightful chocolate version. Layer it with strawberries and whipped cream for a decadent treat that pairs beautifully with the light sponge. You can use bittersweet or Dutch-processed cocoa for varying degrees of richness.
By experimenting with these variations, you'll discover endless possibilities to make this classic cake your own!
Cooking Tips and Notes for Japanese Strawberry Sponge Cake
Importance of Fresh Ingredients
When making a perfect Japanese Strawberry Sponge Cake, fresh ingredients are essential. Start with fresh eggs, as they help create a lighter, fluffier texture. According to culinary experts, older eggs can lead to denser cakes, so opt for the freshest ones possible. Additionally, using ripe strawberries enhances flavor; seek out products that are in season for the best results.
Common Mistakes to Avoid
To achieve that beautifully airy sponge, avoid overmixing the batter after adding the meringue. Gently fold it in to preserve the air bubbles. Another common pitfall is undercooking the cake; always do the skewer test to ensure it’s fully baked. Lastly, remember to let your cake cool upside down to prevent sagging!
Storage Tips
For best flavor, consume your Japanese Strawberry Sponge Cake within two days. If you need to store it, keep it in the fridge to maintain the cream and fruit's freshness. To avoid drying out, cover it loosely with plastic wrap, allowing some air circulation.
Using these tips will ensure your cake turns out spectacular each time you bake! For more inspiration, check out this insightful guide on ingredient freshness.
Serving suggestions for Japanese Strawberry Sponge Cake
Best Pairings with Beverages
For the perfect complement to your Japanese Strawberry Sponge Cake, consider serving it with light and refreshing options. A frothy cup of matcha tea or a fragrant jasmine green tea enhances the cake's delicate flavors beautifully. Alternatively, an iced hibiscus tea adds a touch of fruity sweetness that echoes the strawberries. If you prefer something cooler, a sparkling water with a slice of lime can cleanse the palate between bites.
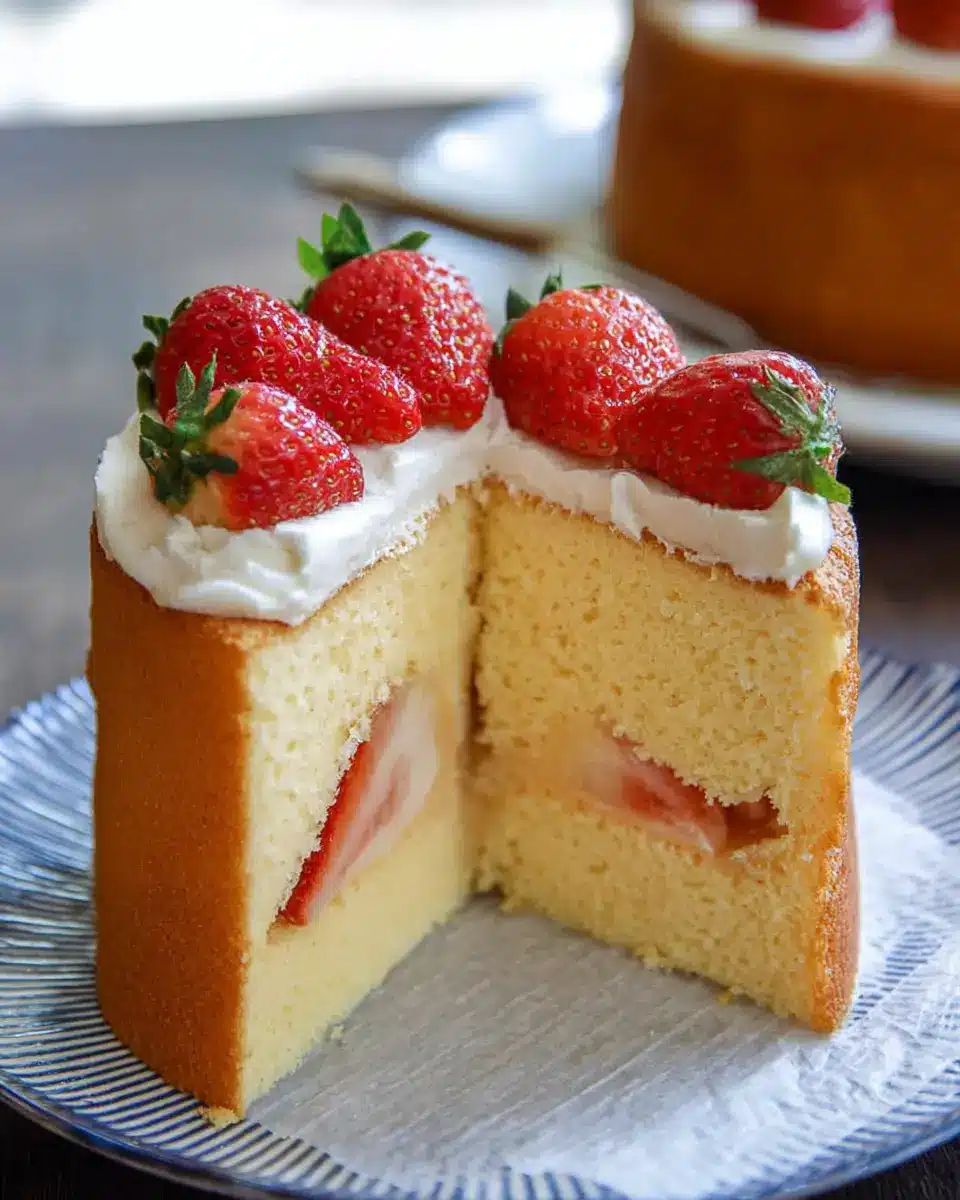
Presentation Ideas
Presentation is key when serving your Japanese Strawberry Sponge Cake. Try placing it on a decorative cake stand, surrounded by fresh strawberries for a picturesque touch. For added elegance, dust the top with powdered sugar or garnish with mint leaves. You can also slice the cake into individual servings and serve on fine china for a delightful afternoon tea vibe. A drizzle of strawberry sauce or a dollop of extra whipped cream on the side can take your presentation to the next level!
Whichever way you choose to serve it, this cake is not just a treat for the taste buds; it's a feast for the eyes!
Time breakdown for Japanese Strawberry Sponge Cake
Preparation time
The preparation for this delightful Japanese Strawberry Sponge Cake takes about 30 minutes. This includes gathering your ingredients, whipping egg whites, and prepping your cake pan, so ensure you set aside some time for this important step!
Baking time
Once you've prepared your batter, it’s time to pop it into the oven! The baking will take approximately 25 minutes. Keep an eye on your cake to ensure it rises beautifully and passes the skewer test—no one likes a soggy center!
Total time
In total, from start to finish, expect to invest around 1 hour in making this wonderful dessert. This includes preparation, baking, and the cooling time for your masterpiece. It’s a small commitment for a show-stopping sweet treat that’s sure to impress!
For more tips on getting that perfect sponge consistency, check out resources like the American Culinary Federation for expert advice on baking techniques!
Nutritional Facts for Japanese Strawberry Sponge Cake
Calories per Serving
A single serving of Japanese Strawberry Sponge Cake (approximately 146g) contains about 346 calories. That’s a delightful treat that feels indulgent but doesn’t completely derail your dietary goals!
Key Nutrients
This cake provides key nutrients beneficial for your health:
- Fat: 22g (with 13g saturated fat)
- Protein: 6.2g
- Carbohydrates: 31g, including 18g of sugar
- Vitamins: Rich in Vitamin C (40% DV) and Vitamin A (18% DV)
- Minerals: A good source of iron (7.6% DV)
The strawberries not only add sweetness but also a boost of fiber and antioxidants.
Dietary Considerations
When making your Japanese Strawberry Sponge Cake, consider the following:
- Gluten-Free Alternative: Swap out all-purpose flour for a gluten-free blend.
- Sugar Reduction: Reduce sugar for a lower-calorie option or use a sugar substitute.
- Dairy-Free Option: Replace whipped cream with coconut cream for a lighter, dairy-free dessert.
This cake is best enjoyed fresh, so aim to finish it within two days to experience the full flavors! For more tips on maintaining a balanced diet while indulging, check out the American Heart Association for helpful guidelines.
FAQs about Japanese Strawberry Sponge Cake
How can I make it fluffier?
To achieve an even fluffier Japanese Strawberry Sponge Cake, ensure your egg whites are whipped to firm peaks. It’s important to fold the meringue gently into the yolk mixture to retain that precious air. Incorporating sifted flour in small batches can also help avoid lumps while maintaining volume. For additional fluffiness, some bakers even suggest using cake flour instead of all-purpose flour for a lighter texture.
Can I use different fruits?
Absolutely! While strawberries add a beautiful touch, feel free to experiment with other fruits like blueberries, peaches, kiwis, or mangoes. You could also opt for a mixed berry combination for a delightful burst of flavor. Just remember to adjust the quantity based on the fruit you choose to maintain the cake's structure.
What's the best way to store leftovers?
To keep your Japanese Strawberry Sponge Cake fresh, store it in an airtight container in the fridge. Ideally, consume it within two days for the best flavor and texture. If you have a significant amount left, consider wrapping individual slices tightly in plastic wrap to prevent drying out. For more tips on preserving baked goods, check out this informative article.
Conclusion on Japanese Strawberry Sponge Cake
Reflection on the Joy of Baking
Baking a Japanese Strawberry Sponge Cake is not just about the delicious end result; it’s a delightful journey. As you mix the batter and create a fluffy texture, you’ll find joy in the simple act of creating something beautiful. Baking, after all, can soothe the soul and spark creativity.
Encouragement to Share and Enjoy
Once your cake is complete, don’t forget to share it with friends and family! Gather around, savor each slice, and create wonderful memories together. Whether it’s for a celebration or just a cozy afternoon, this cake is meant to be enjoyed by all. Ready your forks and dive in!

Japanese Strawberry Sponge Cake
Equipment
- oven
- Cake tin
- mixing bowls
- whisk
- spatula
- piping bag
Ingredients
Sponge Cake
- 125 g all-purpose flour sifted 3 times
- 100 g sugar
- 4 large eggs yolks and whites separated
- 60 g butter melted
- Butter and flour to coat inside the cake pan
Decoration
- 18 mid-size strawberries
- 400 ml cream for whipping
- 10 g sugar
Syrup (optional)
- 40 ml water
- 10 g sugar
Instructions
Baking A Sponge Cake
- Pre-heat oven to 180°C/356°F.
- Coat the inside of an 18cm/7" cake tin with butter, dust with flour, then shake off the excess flour.
- Put the egg yolks in a bowl, add ⅔ of the sugar and beat until whitish and thick.
- In a separate bowl, beat the egg whites until small bubbles form and volume doubles, then add remaining sugar in batches and beat to make meringue.
- Once meringue forms stiff peaks, fold in sifted flour to the egg yolk mixture.
- Mix ⅓ of meringue into batter until smooth, then fold in remaining meringue in batches.
- Pour in melted butter and fold several times.
- Pour batter into cake tin and drop tin to settle the batter.
- Cook for 25 minutes, checking with skewer for doneness.
- Remove from oven, drop tin to detach cake and cool upside down on a rack.
Decorating the Cake
- If making syrup, combine water and sugar in a saucepan, bring to boil, and cool.
- Whip cream until soft peaks form, prepare strawberries by washing and halving 10 of them.
- Slice the cake horizontally in half, set the top half aside.
- Brush syrup gently onto the cut surfaces of both cake halves.
- Spread whipped cream on the bottom half and cover with halved strawberries.
- Cover strawberries with more whipped cream and place the top half of the cake on it, pressing gently.
- (Optional) Thinly coat top and sides of the cake with whipped cream.
- Completely cover cake with remaining cream and use piping bag for decoration.
- Place strawberries on top of cream mounds for decoration.

Leave a Reply