
Introduction to Artisan Pizza Dough
Creating your own artisan pizza dough is truly a game-changer for any home cook. While ordering takeout can be convenient, nothing compares to the satisfaction of crafting your own pizza from scratch. Not only do you get to control every ingredient, but you also unlock a world of flavors and textures that store-bought dough simply can't match. Plus, making your own dough allows for customization to suit your taste—think about those unique toppings you've always dreamed of!
The process of making artisan pizza dough isn't as daunting as it may seem. With a little practice and patience, you can achieve that perfect balance of a crispy, chewy, and bubbly crust that elevates any pizza night. Did you know that a longer fermentation time can actually enhance the flavor profile of your dough? According to experts at the New York Times, the right fermentation process can lead to a more complex taste and improved dough texture.
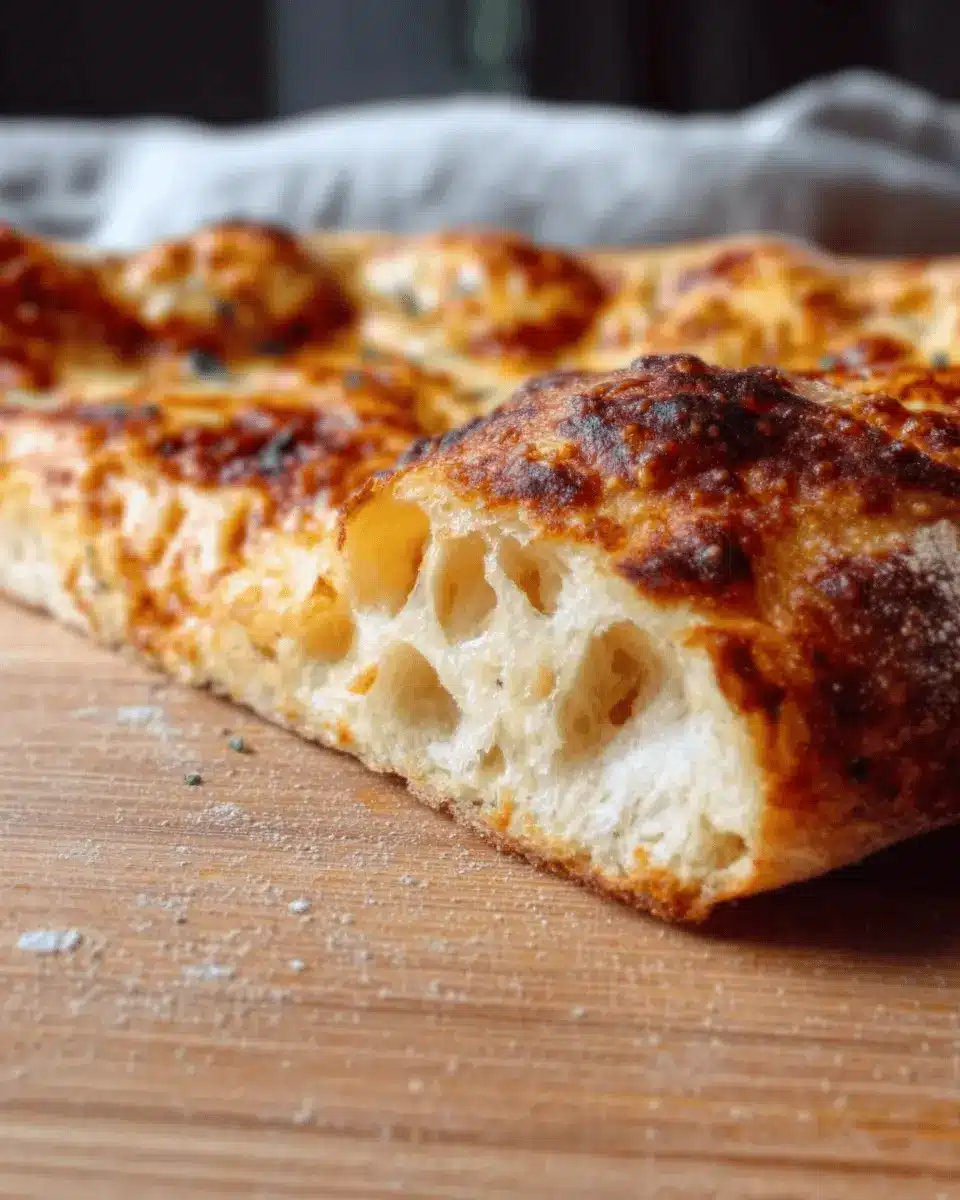
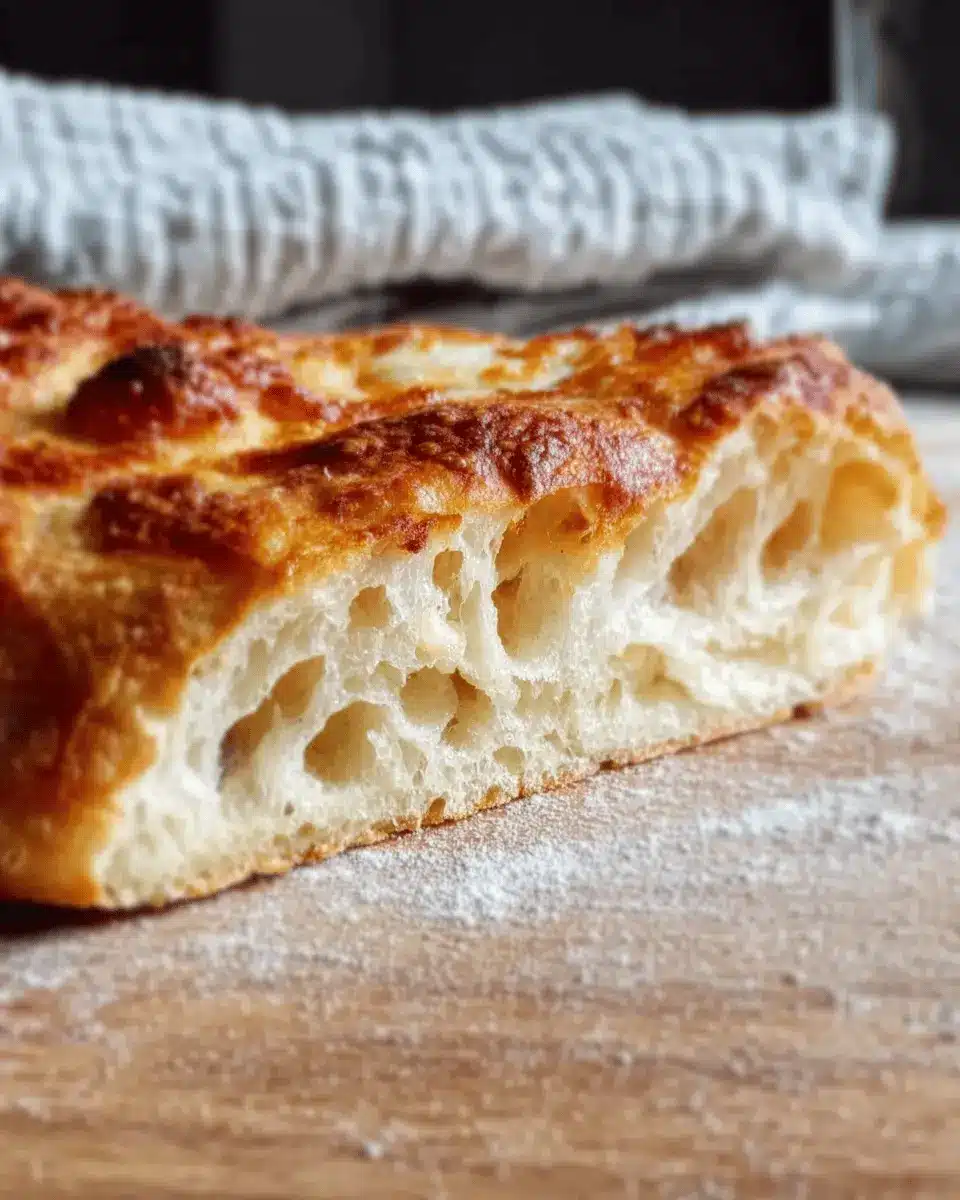
In this recipe, we'll use a high-hydration method that contributes to those delightful bubbles and a wonderfully crisp bottom. Whether you’re planning a cozy night in or impressing friends at a gathering, this artisan pizza dough will become your go-to base for delicious, homemade pizzas. Let’s dive into the details!
Ingredients for Artisan Pizza Dough
Essential ingredients for the perfect dough
Creating the ideal artisan pizza dough starts with just four essential ingredients:
- Flour: Use high-quality all-purpose flour (500g) for that perfect chewiness. It provides the structure and the backbone of your dough.
- Water: Warm water (375g) is crucial. It activates the yeast and creates the desired hydration level, leading to that bubbly crust.
- Yeast: A small amount of active dry yeast (1g) is all you need. This is the magic ingredient that makes your dough rise beautifully.
- Salt: Fine salt (10g) enhances flavor and strengthens the dough structure, contributing to that delightful chew.
A note on ingredient quality
The quality of these ingredients can significantly affect your pizza's final outcome. Opt for organic flour or local artisanal products whenever possible. Fresh yeast also makes a difference, so consider checking out resources like King Arthur Baking for options. Remember, investing in quality seldom goes unnoticed when you take that first delicious bite of your homemade pizza!
Step-by-Step Preparation of Artisan Pizza Dough
Creating the perfect artisan pizza dough doesn’t have to be intimidating! With a few simple steps, you’ll be on your way to crafting a crust that boasts a delightful combination of crispiness, chewiness, and bubbly goodness. Let’s dive in!
Mixing and resting the dough
Start by mixing 500g of all-purpose flour with 1 ½ cups of warm water (save just a tablespoon for later). Combine the ingredients in a large bowl until they are just mixed. You want the flour to be roughly hydrated. Cover the bowl with a clean kitchen towel and let it rest for 20 minutes. This resting period, known as autolyse, allows the flour to absorb the water, improving the dough's overall texture and flavor.
For a deeper understanding of hydration in dough, you can check out this article on flour and water ratios.
Incorporating yeast and salt
While the dough is resting, sprinkle ¼ teaspoon of active dry yeast over the remaining warm water. Give it a minute to dissolve fully. After the resting period, sprinkle 1 ½ teaspoons of fine salt over the dough surface. Pour the yeast mixture over it, and here’s the fun part: use your hands to mix and fold. You want to fold the dough into itself until everything is combined, resulting in a shaggy ball of dough.
Developing gluten through folding
Once your dough comes together, allow it to rest for about an hour covered with a towel. After this, it's time to develop the gluten. Lightly wet your hand, reach under the dough, and stretch a section up and over the center, rotating the bowl as you go. Repeat this process about five times, and you’ll notice the dough tightening up nicely into a ball.
Shaping the dough for fermentation
Now that gluten development is in full swing, it's time to shape your dough. Turn it out onto a floured surface and divide it into two equal pieces. For each piece, stretch it by folding over in each direction until you form a smooth ball. Place your shaped dough seam-side down in a lightly greased bowl, cover, and let it rise until it doubles in size—this will take about 5 to 6 hours, but it's worth the wait!
Preparing to bake the perfect pizza
After your dough rises, you’re just about ready to bake! Preheat your oven to its highest setting, ideally 500°F. Mold each ball into a larger disk, leaving a thick edge for the crust, and then add your favorite toppings.
For a successful pizza night, you can read more about bake techniques for pizza to ensure that crust turns out just the way you want it. The secret? A hot environment and careful monitoring of baking times.
With these steps, you're well on your way to mastering the art of artisan pizza dough! Happy baking!
Variations on Artisan Pizza Dough
Whole Wheat Artisan Pizza Dough
If you’re looking to add more nutrition to your pizza night, consider a whole wheat artisan pizza dough. Simply replace half of the all-purpose flour with whole wheat flour. You may need to increase the hydration slightly, as whole wheat flour absorbs more water. This variation not only boosts fiber content but also imparts a lovely nutty flavor to your crust. Pair it with a fresh arugula salad for a satisfying, wholesome meal.
Gluten-Free Artisan Pizza Dough
For a gluten-free option, you can craft a delicious artisan pizza dough using a blend of gluten-free flours, such as brown rice flour and almond flour. Combine these with a binding agent like xanthan gum and adjust the moisture to ensure a fluffy, stretchy dough. Not only does this cater to gluten-intolerant pizza lovers, but it also opens up exciting new flavors. Check out resources like Gluten-Free Girl for expert tips on perfecting gluten-free baking!
Cooking Tips and Notes for Artisan Pizza Dough
Secrets to achieving that crispy crust
To make your artisan pizza dough truly shine with a crispy crust, consider using a pizza stone or steel in your oven. Preheat them at the highest temperature (usually 500°F) for at least 45 minutes. This ensures that the base of your pizza cooks rapidly, creating that delightful crunch. Additionally, a sprinkle of cornmeal on your pizza peel can help prevent sticking and add texture!
Tools to enhance your pizza-making experience
There are several essentials that can elevate your pizza-making game:
- Pizza Stone or Steel: For that professional-quality bake.
- Pizza Peel: A must-have for transferring your pizza in and out of the oven.
- Bench Scraper: Great for handling sticky dough and portioning.
For more tips on enhancing your pizza-making experience, check out resources from Serious Eats on kitchen tools and techniques!

Serving Suggestions for Artisan Pizza Dough
Ideal Toppings for Your Artisan Pizza
Elevate your artisan pizza dough with delightful toppings that tantalize the taste buds! Consider these combinations:
- Classic Margherita: Fresh mozzarella, basil leaves, and a drizzle of balsamic reduction create a timeless favorite.
- BBQ Chicken: Top with chicken ham, BBQ sauce, red onions, and cilantro for a smoky, savory twist.
- Veggie Delight: Load up on seasonal vegetables like bell peppers, mushrooms, and spinach with a sprinkle of feta cheese.
- Turkey Bacon Supreme: Crispy turkey bacon, fresh arugula, and a poached egg make for a hearty meal.
Pairing Suggestions for Side Dishes
Complement your pizza with scrumptious sides that round out the meal:
- Simple Salad: A fresh arugula and cherry tomato salad dressed with lemon vinaigrette adds a refreshing crunch.
- Garlic Bread: Warm, buttery garlic breadsticks are always a hit and great for dipping into marinara.
- Roasted Veggies: Serve mixed roasted vegetables tossed in olive oil, thyme, and sea salt for a healthy addition.
- Cheesy Breadsticks: For that extra indulgence, cheesy, melted breadsticks with marinara dip will certainly please!
For more ideas on pizza combinations, you can check out resources like Serious Eats and The Kitchn for inspiration. Enjoy your artisanal creations!
Time Breakdown for Artisan Pizza Dough
Preparation Time
Making this artisan pizza dough is a breeze with just 20 minutes of active prep. That means you can dive into mixing your ingredients and letting that lovely dough come together while you plan your perfect toppings.
Rising Time
Patience is key! Allow the dough to rise for about 5 to 6 hours until it doubles in size. This long fermentation time develops maximum flavor and that delightful texture we all love in pizza crust.
Baking Time
When it comes to baking, it only takes about 8 minutes at high heat for your pizzas to achieve that irresistible crispy, chewy, and bubbly crust. Just imagine the aroma filling your kitchen! Want to know more about baking techniques? Check out the oven temperature guide for the best results.
Nutritional Facts for Artisan Pizza Dough
Calories per serving
Each serving of this artisan pizza dough, which is about a quarter of a 12-inch pizza, contains approximately 228 calories. This makes it a great base for a meal that can be easily customized with your favorite toppings without overwhelming your daily caloric intake.
Macronutrient Breakdown
Understanding the macronutrients in artisan pizza dough helps you make informed choices:
- Carbohydrates: 48g
- Protein: 6.5g
- Fat: 0.6g (with minimal saturated fat)
The dough is a balanced option for a satisfying meal, especially when topped with fresh vegetables, lean proteins, or healthy fats.
For more on the nutritional benefits of whole grains, check out the Whole Grains Council here. By making informed topping choices, you can create a delicious and well-rounded pizza that fits your lifestyle!
FAQs about Artisan Pizza Dough
What can I do if my dough doesn't rise?
If you find that your artisan pizza dough hasn't risen, it may be due to inactive yeast or insufficient warmth. Make sure you use fresh active dry yeast and proof it properly by dissolving it in warm water (around 110°F) before mixing. If the room is cool, try placing the dough in a warm spot, like an oven that's turned off but slightly warmed or near a sunny window.
Can I freeze the dough?
Absolutely! Freezing is a great way to preserve your artisan pizza dough. After shaping it into balls, wrap them tightly in plastic wrap and store them in a freezer bag. They can last up to three months. When ready to use, simply thaw in the refrigerator overnight and allow them to come to room temperature before stretching.
How do I know when the dough is ready?
Your dough is ready when it has doubled in size and has a smooth, elastic texture. A quick test is to poke it with your finger—if the indentation springs back slowly, like a soft pillow, it's perfect for shaping. Want to dive deeper? Explore more dough tips at King Arthur Baking.
Conclusion on Artisan Pizza Dough
Creating your own artisan pizza dough is a rewarding experience that elevates your homemade pizza game. With a few ingredients and some time, you can achieve a crust that's crispy, chewy, and full of flavor. Enjoy the process and share your delicious results!
For more tips on pizza toppings and baking techniques, check out Serious Eats.
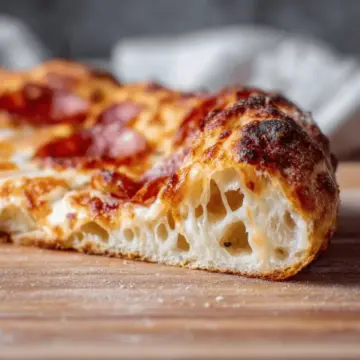
artisan pizza dough- crispy, chewy, bubbly crust
Equipment
- large bowl
- pizza peel
- oven
- floured surface
- greased plate
- cast iron pan
Ingredients
Dough Ingredients
- 500 g all-purpose flour
- 375 g warm water divided
- 1 g active dry yeast
- 10 g fine salt
Instructions
Dough Preparation
- Mix flour and all but 1 tablespoon of the water in a large bowl until just combined, then cover and set aside for 20 minutes to rest. Sprinkle yeast over remaining warm water and set aside to dissolve.
- Sprinkle salt over the surface of the dough. Stir yeast mixture and pour over dough. Fold the dough until the yeast and salt are fully mixed and a shaggy dough is formed. Cover the bowl and let rest about an hour.
- Fold the dough one time to develop the gluten, then invert it into a clean, lightly greased bowl, seam down. Cover and let rise until doubled in volume, 5-6 hours.
- Turn the dough out onto a floured work surface, cut in half, and shape each piece into a ball. Let rest at room temperature for about an hour.
- If not using right away, cover tightly with plastic wrap and refrigerate until ready (for up to 2 days).
Making Pizza
- Place pizza steel, stone, or inverted baking sheet on the middle rack of the oven and preheat to 500°F (or as high as it will go) for at least 45 minutes.
- Flatten one dough ball into a large disk with a thick edge. Shape it into a 12-inch circle and lay it on the prepared pizza peel.
- Add sauce and toppings, then slide the pizza onto the hot steel and bake for 5 minutes. Broil for 2-4 minutes until melted and golden.
- For cast iron, bake for 15-20 minutes and broil for the last few minutes for char.


Leave a Reply