
Introduction to Baked Kielbasa Pierogi Casserole
If you're a busy young professional, finding time to whip up a nutritious dinner can feel like a daunting task. Enter the baked kielbasa pierogi casserole—a delightful, one-dish meal that not only satisfies your taste buds but also fits seamlessly into your hectic schedule.
Homemade casseroles are the perfect solution for those busy evenings when you want comfort food without spending hours in the kitchen. This baked pierogi casserole allows you to toss ingredients together with minimal prep time—just 10 minutes! Once it’s in the oven, you can step away and focus on other tasks while the magic happens. For some great ideas about efficiency in the kitchen, you can check out articles from The Kitchn or Serious Eats.
Imagine coming home to the warm aroma of melted cheese and savory kielbasa filling your space—a guaranteed way to lift your spirits after a long day. Plus, this dish is incredibly versatile; feel free to swap out ingredients or add vegetables like spinach or bell peppers for an extra nutritional boost. It’s a perfect way to use up leftovers too, making it not only a delicious choice but also a practical one.
So, whether you're cooking for yourself or hosting a small get-together, this baked pierogi casserole is sure to impress!

Ingredients for Baked Kielbasa Pierogi Casserole
Cooking is all about using the right ingredients, and for this baked kielbasa pierogi casserole, you'll want to gather a few key items that pack a flavor punch! Here's what you'll need:
- Sliced Kielbasa Sausage: 14 ounces of kielbasa, cut into ¼-inch thick slices. This savory sausage adds a rich depth of flavor.
- Frozen Pierogies: A 32-ounce package will make things easy and keep prep time to a minimum. You can choose potato, cheese, or even meat-filled varieties!
- Cream Cheese and Sour Cream: You'll need 8 ounces of softened cream cheese and ½ cup of sour cream for a delightfully creamy texture.
- Chicken Broth: ½ cup of low-sodium chicken broth enhances the flavor without overwhelming the dish.
- Spices: Don’t forget about the 1 teaspoon each of onion powder and garlic powder, along with ½ teaspoon of salt and pepper for seasoning.
- Cheeses: A total of 2 cups (1 cup each) of shredded cheddar and mozzarella cheese creates that irresistible cheesy topping.
- Garnish: For a pop of color and flavor, sliced green onions are essential to finish off the casserole beautifully.
Feeling inspired? You can find more about the benefits of using frozen pierogies in your cooking here. Happy cooking!
Step-by-Step Preparation of Baked Kielbasa Pierogi Casserole
Preheat the oven and prepare the baking dish
Start your culinary adventure by preheating your oven to 375 degrees Fahrenheit. Meanwhile, grab your trusty 9x13-inch baking dish and give it a spritz with non-stick cooking spray. This little step ensures that your baked pierogi casserole won’t stick, making cleanup a breeze! Once you’ve prepared the dish, it’s time to layer in those flavorful fillings.
Combine kielbasa and pierogies in the dish
Now for the exciting part! Add 14 ounces of sliced kielbasa sausage and 32 ounces of frozen pierogies right into your baking dish. The smoky richness of the kielbasa coupled with the soft, pillowy pierogies creates a mouthwatering base for your casserole. Feel free to get creative—try using different flavors of pierogies or even swapping in turkey bacon for a twist!
Make the creamy sauce mixture
In a separate bowl, the real magic begins. Use a hand mixer to beat together an 8-ounce block of softened cream cheese and ½ cup of sour cream until they’re smooth and velvety. This creamy concoction is not just an ordinary sauce; it’s the secret to achieving that luscious texture in your casserole. Gradually mix in ½ cup of chicken broth, along with 1 teaspoon each of onion powder and garlic powder. A dash of ½ teaspoon each of salt and pepper adds coziness, while half of your shredded cheddar and mozzarella cheese contributes to that gooey goodness we all crave.
Coat the pierogies and sausage with the sauce
Once your sauce mixture is well combined, pour it over the pierogies and kielbasa in the baking dish. Using a spatula (or even your hands, if you’re feeling adventurous), gently mix everything together until each pierogi and piece of sausage is beautifully coated in that creamy dreaminess.
Top with cheeses and bake
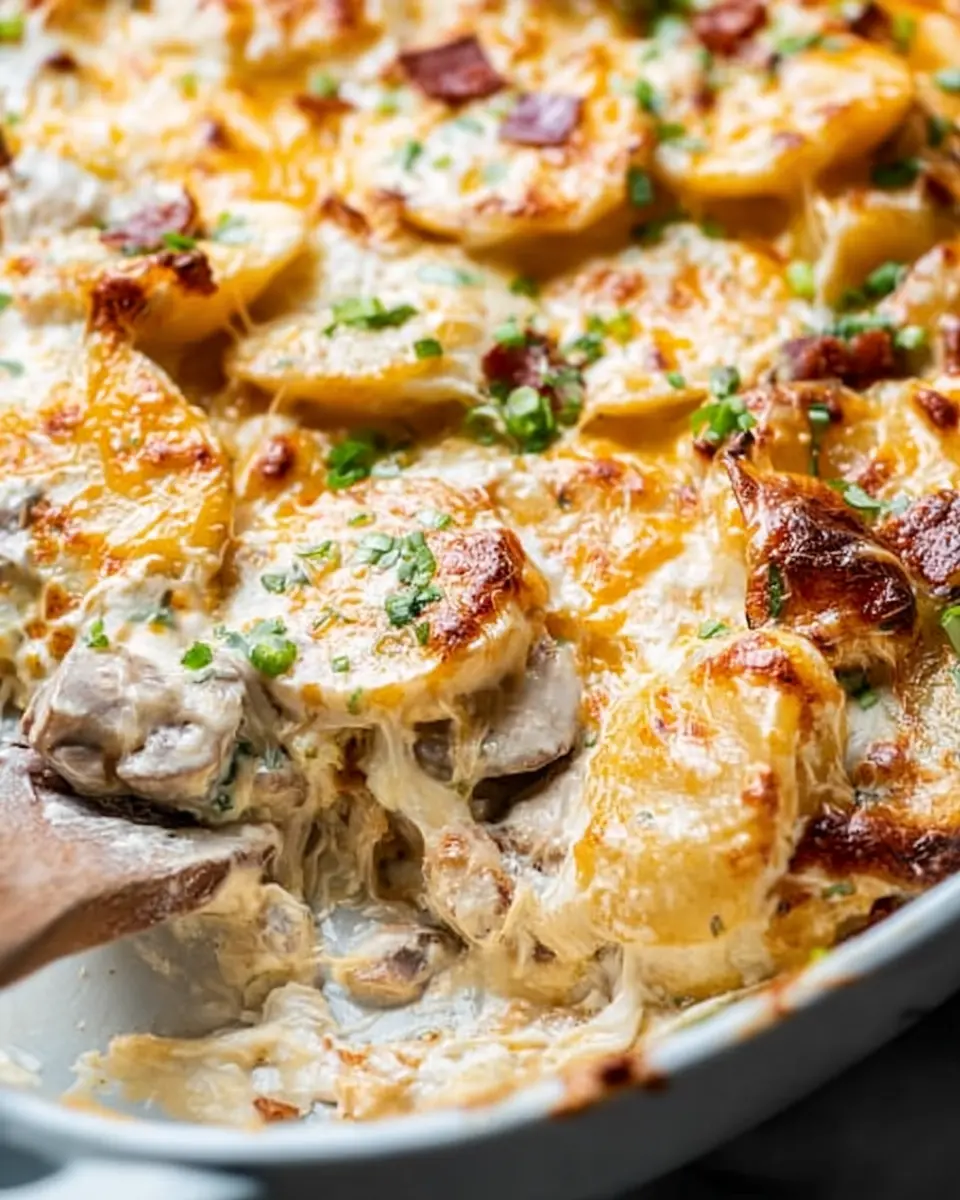
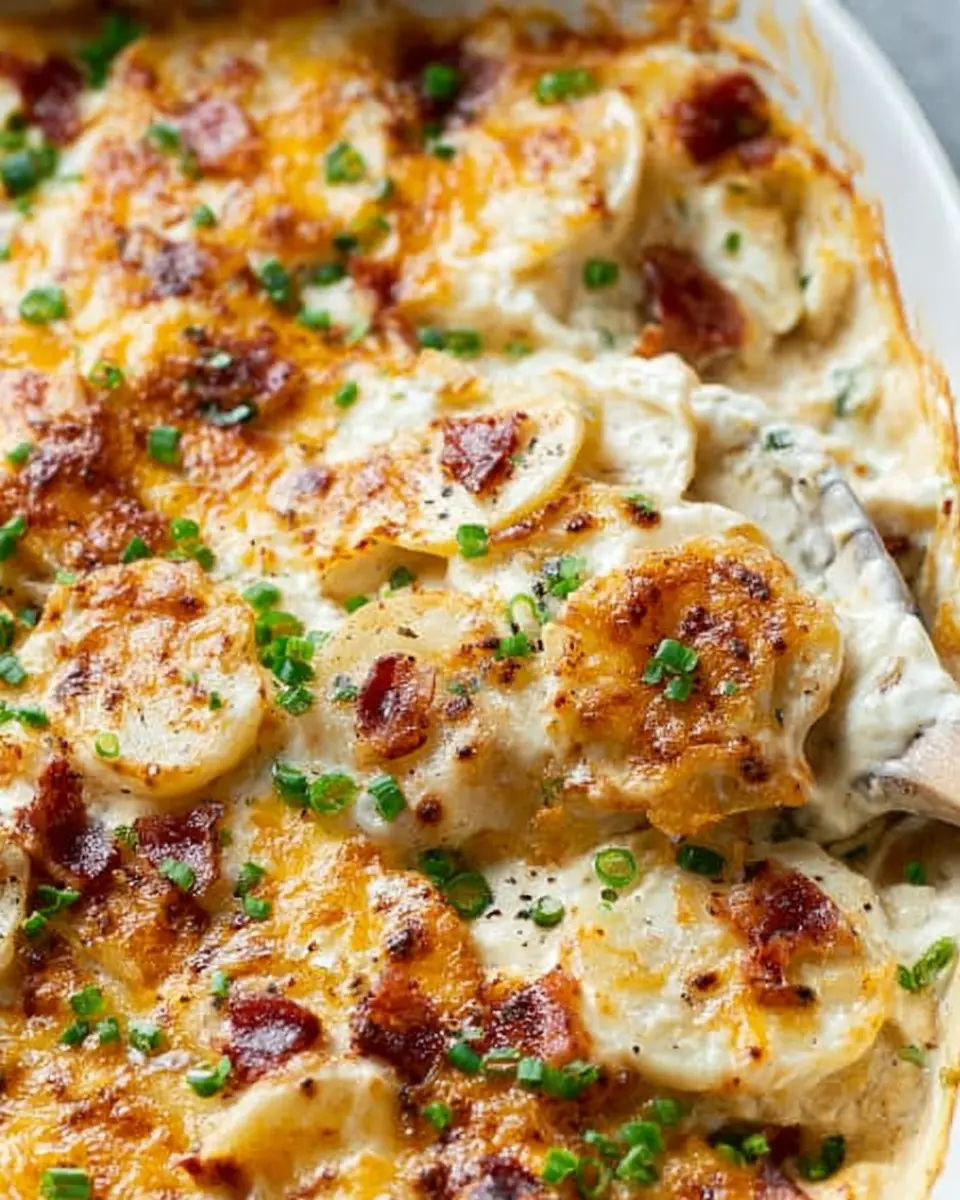
It’s time for the final touches! Sprinkle the remaining cheddar and mozzarella cheese over the top of your mixture. This layer is key when it comes to achieving that heavenly, cheesy crust. Cover the dish with foil and slide it into the preheated oven. Bake for 30 minutes, then remove the foil for an additional 10 minutes to let the top get bubbly and golden brown.
After baking, let your baked kielbasa pierogi casserole cool for a few minutes. Top with sliced green onions for a pop of color and flavor before digging in. Enjoy this cozy meal that’s perfect for sharing with friends or family! For more tips on perfecting your casseroles, check out this resource on casserole cooking methods.
Variations on Baked Kielbasa Pierogi Casserole
Vegetarian Options
If you're looking for a meat-free alternative, try swapping out the kielbasa for a mix of hearty vegetables. Zucchini, bell peppers, and spinach work beautifully, creating a vibrant and nutritious baked pierogi casserole. You can enhance the flavors further by adding some herbs like thyme or basil. Consider using vegetable broth instead of chicken broth for an even lighter dish. For added protein, toss in cooked lentils or chickpeas—it's a delicious way to keep everyone satisfied!
Add Some Heat with Spicy Variations
For those who crave a bit of spice, add diced jalapeños or sliced green chilies to your baked pierogi casserole. This twist brings a lively kick that complements the creamy texture and savory kielbasa beautifully. You can also experiment with spicy cheese blends or top the casserole with ranch seasoning for an extra layer of flavor. The contrast of spice and creaminess makes this variation a hit for gatherings or cozy dinners.
Explore more variations by checking out seasonal vegetables that may complement the traditional outline of this dish. Happy cooking!
Cooking Tips and Notes for Baked Kielbasa Pierogi Casserole
When preparing your baked pierogi casserole, consider using fresh ingredients to elevate the dish's flavors. For a twist, swap regular kielbasa for turkey kielbasa for a lighter option. Always remember to let your casserole cool for a few minutes after baking; this helps the layers set nicely for serving.
Feel free to customize your pierogi—choose varieties like potato, sauerkraut, or cheese to fit your taste. If you want extra crunch, try topping with breadcrumbs before the final baking. For more ideas, check out resources on making homemade pierogi at Serious Eats and add your personal touch to this comforting dish!
Serving Suggestions for Baked Kielbasa Pierogi Casserole
When it comes to enjoying your baked kielbasa pierogi casserole, think beyond the plate! Here are some delightful ways to elevate your meal:
-
Side Salad: Pair your casserole with a light, fresh salad. A mix of leafy greens, cherry tomatoes, and a tangy vinaigrette can provide a refreshing contrast to the rich flavors of the dish. You might want to try a classic vinaigrette recipe for a perfect balance.
-
Bread Options: Serve it alongside crusty bread or garlic bread to soak up every last bit of the creamy sauce. This adds a satisfying crunch and makes for a cozy dining experience.
-
Garnishes: Don't forget the garnish! Chopped fresh herbs like parsley or dill can add a pop of color and flavor.
Feeling adventurous? Consider serving with pickled vegetables to bring a bit of acidity that cuts through the richness. Your family and friends will surely love these additions, making your meal memorable!
Time Breakdown for Baked Kielbasa Pierogi Casserole
Preparation time
In just 10 minutes, you can prepare all your ingredients and get everything ready for the oven. Set your workspace efficiently, and you’ll be amazed at how quickly you can whip up this comforting dish!
Cooking time
Once it’s in the oven, the cooking time is a delightful 40 minutes. You’ll want to cover it initially to let the flavors meld together perfectly, ensuring you get that deliciously gooey texture.
Total time
All in all, you’ll need about 50 minutes from start to finish. This makes the baked pierogi casserole an excellent option for busy weeknights or cozy weekend dinners. Perfect for a family meal, it’s both simple and satisfying!
Nutritional Facts for Baked Kielbasa Pierogi Casserole
If you've got a craving for something comforting yet delicious, look no further! This baked pierogi casserole is not just indulgent but also brings a satisfying balance of nutrients to the table. Here’s a quick breakdown:
- Calories: 725 kcal – Perfect for a filling dinner after a long day!
- Protein: 27g – Packed with protein from kielbasa and cheese to fuel your evening.
- Sodium: 1713mg – A hearty dish, so enjoy in moderation, especially if you're watching your salt intake.
To dive deeper into healthy meal planning, consider checking out resources on nutrition from sites like the CDC or Nutrition.gov.
FAQ about Baked Kielbasa Pierogi Casserole
Can I use fresh pierogies instead of frozen?
Absolutely! Fresh pierogies can add an amazing homemade touch to your baked kielbasa pierogi casserole. Just adjust the cooking time slightly, as fresh pierogies might need less time in the oven. Keep an eye on the top and ensure it gets that bubbly, golden finish!
How do I store leftovers?
Leftovers? Yes, please! To store your delicious casserole, let it cool completely, then cover it tightly with plastic wrap or transfer to an airtight container. It will keep well in the refrigerator for up to 3-4 days. For longer storage, consider freezing individual portions. Just reheat in the oven or microwave when you're ready for a quick meal.
What can I serve as a side dish?
A baked pierogi casserole pairs wonderfully with a variety of side dishes! Consider a crisp garden salad for a refreshing contrast, or roasted veggies for a hearty complement. You could also serve it with sautéed greens or a tangy coleslaw to bring brightness to your meal. The options are endless!
Conclusion on Baked Kielbasa Pierogi Casserole
This baked pierogi casserole is not just a meal; it’s a warm hug in a dish. Perfect for busy weeknights, it combines the comforting flavors of savory kielbasa and cheesy goodness that everyone loves. Give it a try, and watch your family come back for seconds!

Baked Pierogi Casserole
Equipment
- 9x13 inch baking dish
- Hand mixer
Ingredients
- 14 ounces sliced kielbasa sausage ¼-inch thick
- 32 ounces frozen pierogies
- 1 block (8-ounce) softened cream cheese
- ½ cup sour cream
- ½ cup chicken broth
- 1 teaspoon onion powder
- 1 teaspoon garlic powder
- ½ teaspoon salt
- ½ teaspoon pepper
- 1 cup shredded cheddar cheese divided
- 1 cup mozzarella cheese divided
- sliced green onions for garnish
Instructions
- Preheat the oven to 375 degrees Fahrenheit and spray a 9x13-inch baking dish with non-stick cooking spray. Place the sliced kielbasa sausage and frozen pierogies in the prepared baking dish.
- In a bowl, using a hand mixer, whisk together the softened cream cheese and sour cream until smooth. Add in the chicken broth, onion powder, garlic powder, salt, pepper, HALF of the shredded cheddar cheese, and HALF of the mozzarella cheese, and whisk until well combined.
- Pour the sauce over the pierogies and sausage and mix to coat everything well. Top the dish with the remaining cheddar cheese and mozzarella cheese.
- Cover the dish with foil and bake for 30 minutes. Remove the foil and bake for an additional 10 minutes, until the top is bubbly and golden.
- Remove from the oven and let the casserole cool for a few minutes before topping with sliced green onions for garnish and serving.


Leave a Reply