
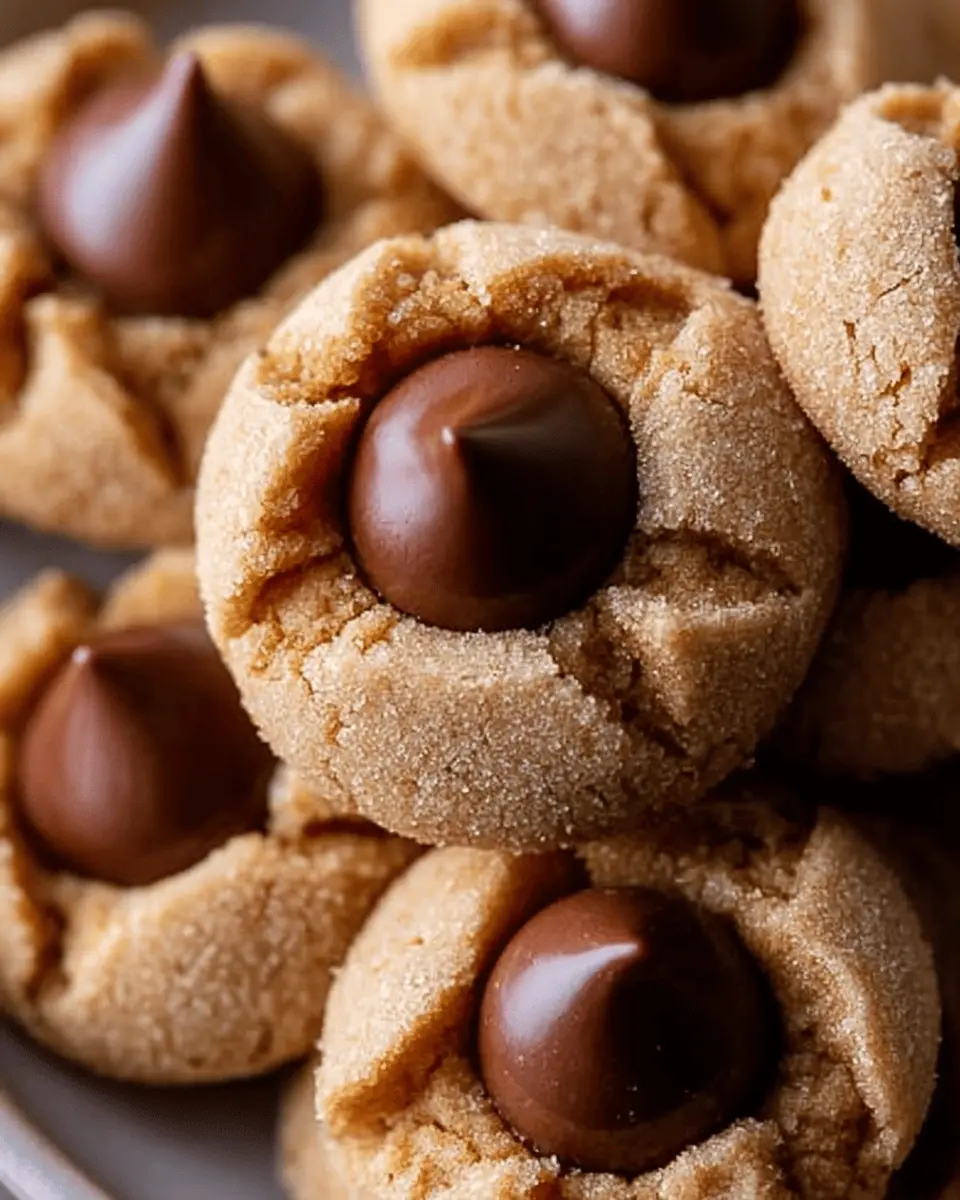
Introduction to Classic Peanut Butter Blossoms
Classic Peanut Butter Blossoms are more than just cookies; they are a trip down memory lane for many of us. These delightful treats, with their signature peanut butter base and a luscious chocolate kiss nestled on top, evoke feelings of warmth and cheer. Whether baked during the holiday season or enjoyed at any family gathering, their irresistible combination of textures and flavors makes them a beloved favorite.
Why are Classic Peanut Butter Blossoms a Nostalgic Favorite?
For countless home bakers, there's something comforting about the smell of peanut butter cookies baking in the oven. Originating in the 1950s, these cookies have been a staple in American kitchens ever since, often passed down through generations. According to a study by the American Baking Association, cookies remain the top favorite homemade treat, with peanut butter cookies often leading the pack.
Remember the excitement of pressing the chocolate kiss into the warm cookie? That simple act not only creates a delightful contrast of flavors but also embeds fond memories of family togetherness.
Whether you’re recreating a family tradition or introducing this recipe to friends, Classic Peanut Butter Blossoms are sure to bring joy and deliciousness to your table. For tips on perfecting these cookies, check out Sally’s Baking Addiction, where you can find a wealth of recipe ideas and baking advice!

Ingredients for Classic Peanut Butter Blossoms
Essential ingredients for making the cookies
Creating classic peanut butter blossoms that allure with their soft, chewy texture and delightful peanut butter flavor requires a few essential ingredients. Here’s what you need:
- All-purpose flour: 1 and ¼ cups helps give the cookies their structure.
- Baking soda: ½ teaspoon adds the right amount of leavening.
- Salt: ¼ teaspoon enhances the flavor.
- Unsalted butter: ½ cup, softened to room temperature, for that creamy, decadent texture.
- Sugar: Both brown sugar and granulated sugar are necessary for sweetness and moisture.
- Egg: One large egg brings the ingredients together.
- Creamy peanut butter: ¾ cup is key for that rich flavor.
- Vanilla extract: 1 teaspoon adds warmth and depth.
- Chocolate kiss candies: 24 unwrapped candies to crown each cookie.
For a handy guide on how to measure these ingredients accurately, check out this link.
Optional ingredients for creative twists
Want to add a bit of flair to your classic peanut butter blossoms? Consider these optional ingredients:
- Sanding sugar: Use red and green for a festive touch during the holidays.
- Different nut butters: Swap out peanut butter for almond or sunflower seed butter for a unique flavor.
- Chocolate variations: Experiment with flavored chocolates like caramel-filled or dark chocolate kisses.
Incorporating these optional ingredients can elevate your cookies and impress your friends. What creative twist will you try?
Preparing Classic Peanut Butter Blossoms
Classic Peanut Butter Blossoms are not just cookies; they’re a holiday tradition that brings warmth and happiness to gatherings! They feature a delicious peanut butter base topped with a melt-in-your-mouth chocolate kiss. Let’s walk through the process of preparing these delightful treats, ensuring every step is clear and fun.
Gather and Measure Your Ingredients
Before diving into the mixing, it's crucial to gather all your ingredients. Having everything on hand not only streamlines the baking process but also reduces the chance of forgetting something essential. Here’s what you'll need:
- 1 and ¼ cups all-purpose flour
- ½ teaspoon baking soda
- ¼ teaspoon salt
- ½ cup unsalted butter, softened
- ½ cup packed brown sugar
- ¼ cup granulated sugar (plus more for rolling)
- 1 large egg, at room temperature
- ¾ cup creamy peanut butter
- 1 teaspoon vanilla extract
- 24 chocolate kiss candies, unwrapped
Once you have your ingredients measured, it's time to start mixing!
Mix the Dry Ingredients
In a medium bowl, whisk together the flour, baking soda, and salt. This step is vital, as it ensures that your dry ingredients are evenly combined, which helps your cookies bake uniformly.
Cream the Butter and Sugars
In a large mixing bowl, use a hand mixer or stand mixer to beat the softened butter for about a minute until it’s creamy. Slowly add in the brown sugar and granulated sugar, mixing until smooth. This process is the key to achieving that fluffy texture in your classic peanut butter blossoms.
Incorporate Egg and Peanut Butter
Next, add the egg, mixing until it's fully combined. Scrape down the sides of the bowl as needed. Following this, add the peanut butter and vanilla extract, blending until everything is just mixed together. You want a rich, creamy consistency—this is where your cookies will get that luscious flavor.
Combine Dry and Wet Ingredients
Gradually add the dry ingredients to the wet mixture, stirring gently on low speed until fully combined. Your dough will be soft and slightly sticky, which is perfect.
Chill the Cookie Dough
Cover the cookie dough and refrigerate it for at least an hour. Chilling helps firm it up and improves the texture, making for thick, chewy cookies that stand up beautifully.
Prepare Baking Sheets and Preheat the Oven
While the dough chills, preheat your oven to 350°F (177°C). Line your baking sheets with parchment paper or silicone mats. More tips on cookie sheets and baking can be found in resources like the Ultimate Baking Guide.
Roll the Dough and Coat in Sugar
After chilling, scoop about a heaping tablespoon of dough and roll it into balls. Roll each ball in granulated sugar before placing them on the prepared sheets, spacing them out about 3 inches apart.
Bake and Add Chocolate Kisses
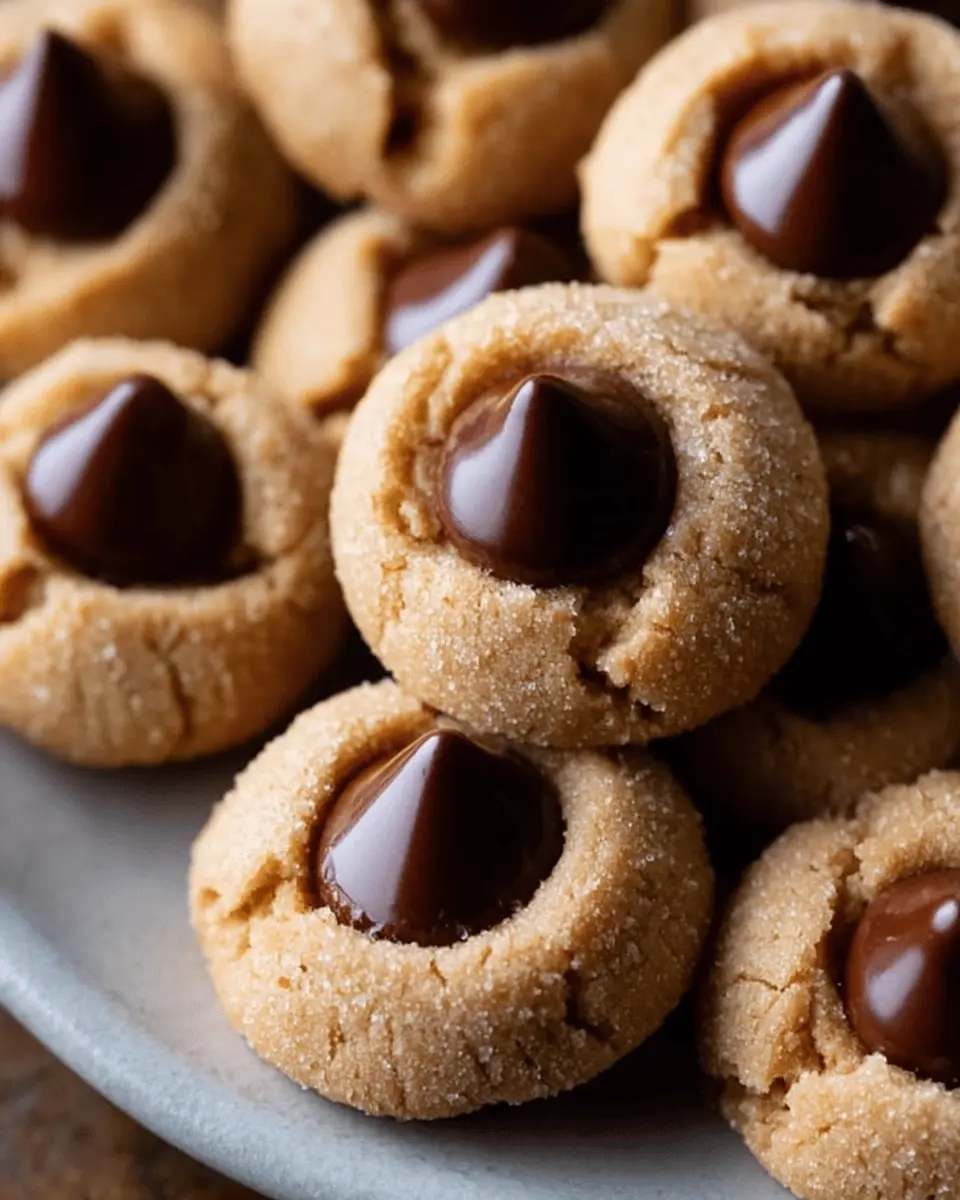
Bake your cookies for 11-13 minutes, removing them when the tops begin to crack. This is the moment you’ll want to add your chocolate kisses—immediately press one into the center of each cookie right when they come out of the oven.
Cool and Enjoy Your Cookies
Let the cookies cool on the baking sheets for about five minutes before transferring them to a wire rack. Be sure to allow the chocolate kisses to set properly! Once cooled, enjoy these heavenly bites with a glass of milk or your favorite oat milk alternative.
Classic Peanut Butter Blossoms are a perfect addition to any gathering or simply for enjoying on your own. Happy baking!
Variations on Classic Peanut Butter Blossoms
Chocolate Peanut Butter Blossoms
Want to take your classic peanut butter blossoms to the next level? Try adding a twist of chocolate! Simply substitute half of the peanut butter with cocoa powder or use chocolate peanut butter for an indulgent flavor. Not only do these cookies look stunning with a kiss of chocolate on top, but they also satisfy even the most devoted chocolate lovers.
Nut-Free Versions with Sunflower Seed Butter
Have a nut allergy or cooking for someone who does? No worries! Swap out the peanut butter for sunflower seed butter. These nut-free variations taste just as delicious and are perfect for school snacks or gatherings. Sunflower seed butter can be found at most grocery stores; just make sure to choose a brand without added sugars or oils for the best results.
By exploring these fun variations, you’ll keep the spirit of classic peanut butter blossoms alive while catering to everyone’s taste buds!
Baking Tips for Classic Peanut Butter Blossoms
Importance of Chilling the Dough
Chilling the dough is a crucial step when making classic peanut butter blossoms. It not only helps the flavors meld but also ensures your cookies maintain their shape while baking. A good rule of thumb is to chill the dough for at least one hour. This helps to prevent spreading, resulting in thicker, chewier cookies—exactly what we're aiming for!
Tips for Achieving the Perfect Texture
To achieve that perfect soft and thick texture, consider these tips:
- Use creamy peanut butter for a smoother dough.
- Be careful not to overmix after adding the flour. Stop as soon as it's combined to maintain tenderness.
- Roll the dough into uniform balls to ensure even baking.
Experiment with these tips, and you’ll be well on your way to delectable peanut butter blossoms that are sure to impress! For more insights, check out this article on baking techniques.
Happy baking!
Serving suggestions for Classic Peanut Butter Blossoms
Pairing Cookies with Milk or Coffee
When you take a bite of your classic peanut butter blossoms, nothing pairs quite like a glass of cold milk or a warm cup of coffee! The creaminess of milk perfectly balances the rich peanut butter flavors, while coffee adds a toasty contrast that enhances the sweetness. Consider experimenting with specialty coffee blends or flavored milk alternatives, such as almond or oat milk, to elevate your cookie experience.
Ideas for Festive Presentations
Presentation can make your classic peanut butter blossoms even more delightful! Try these fun ideas:
- Holiday Platters: Arrange your cookies on a decorative platter, layering them with festive napkins for a cozy touch.
- Gift Jars: Fill mason jars with your cookies, tie a ribbon around the lid, and attached a cute note for a thoughtful gift.
- Cookie Bags: Use clear treat bags to individually wrap each cookie, perfect for holiday gatherings or office treats.
For more delightful presentation ideas, visit Food52 for inspiration!
Time Details for Classic Peanut Butter Blossoms
Preparation Time
The preparation for these classic peanut butter blossoms takes about 1 hour and 30 minutes, which includes the essential chilling time for the dough. This step is crucial for achieving those soft, thick cookies.
Baking Time
Once the dough is ready, the actual baking time is relatively short! Expect to bake your cookies for about 12 minutes until they are perfectly set.
Total Time
In total, you’ll be looking at approximately 1 hour and 45 minutes from start to finish. This includes prep, baking, and the time spent chilling the dough to ensure the best possible texture.
These cookies are a delightful holiday treat that’s worth every minute spent in the kitchen! If you're curious about other quick baking tips, check out this guide on how to bake cookies perfectly every time. Happy baking!
Nutritional Information for Classic Peanut Butter Blossoms
Calories
Each classic peanut butter blossom boasts approximately 120 calories, making it a delightful treat without overwhelming your daily intake. Perfect for satisfying that sweet craving while still keeping an eye on your nutrition!
Protein
Boasting about 3 grams of protein per cookie, these peanut butter blossoms offer a fun way to incorporate some extra protein into your day — perfect for an on-the-go snack!
Sugar Content
With around 10 grams of sugar per cookie, it’s important to enjoy these classic peanut butter blossoms in moderation. Pair them with a glass of milk or an apple for a balanced snack. For more insights on navigating sugar intake, check out American Heart Association.
FAQs about Classic Peanut Butter Blossoms
Can I make these cookies in advance?
Absolutely! You can prepare the cookie dough and store it in the fridge for up to three days. If you're planning to freeze the dough, shape it into balls, wrap them well, and they’ll keep in the freezer for up to three months. Bonus tip: bake them straight from the freezer, adding an extra minute to the baking time!
How do I store leftover cookies?
To keep your classic peanut butter blossoms fresh, simply store them in an airtight container at room temperature. They typically stay delicious for about a week. If you want to keep them longer, consider freezing the baked cookies. They can last up to three months in the freezer!
Can I substitute ingredients for allergen concerns?
Yes, you can easily modify this recipe! If peanut allergies are a concern, try using sunflower seed butter or a nut-free alternative. Just remember, these substitutes might change the texture slightly, so expect a deliciously unique outcome! Be sure to check out this guide on safe substitutions for more tips.
Conclusion on Classic Peanut Butter Blossoms
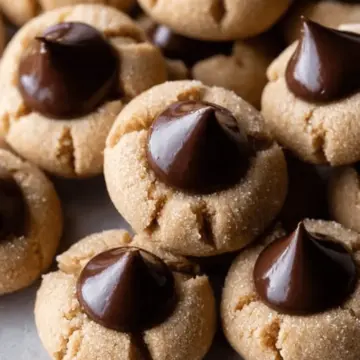
Classic peanut butter blossoms are a timeless treat that never fails to warm hearts and satisfy cravings. With their soft texture and decadent chocolate center, they’re perfect for any occasion. Whether for a holiday gathering or an afternoon snack, these cookies are sure to be a crowd-pleaser!
As you embark on baking your own version of this beloved cookie, remember the joy that comes with sharing them with friends and family. Don’t hesitate to experiment with different coatings or nut butters for your unique twist. Happy baking, and enjoy those delightful moments that come with indulging in your homemade classic peanut butter blossoms!
For tips on more delicious cookie recipes, visit Sally's Baking Addiction.
Classic Peanut Butter Blossoms
Equipment
- Hand mixer
- Stand Mixer
- mixing bowls
- spatula
- baking sheets
- parchment paper
- Cooling Rack
Ingredients
- 1.25 cups all-purpose flour spooned & leveled
- 0.5 teaspoon baking soda
- 0.25 teaspoon salt
- 0.5 cups unsalted butter softened to room temperature
- 0.5 cups packed light or dark brown sugar
- 0.25 cups granulated sugar
- 1 large egg at room temperature
- 0.75 cups creamy peanut butter
- 1 teaspoon pure vanilla extract
- 24 pieces chocolate kiss candies unwrapped
Coating
- 0.5 cups granulated sugar
- 0.25 cups green sanding sugar optional
- 0.25 cups red sanding sugar optional
Instructions
- Whisk the flour, baking soda, and salt together in a medium bowl. Set aside.
- In a large bowl, beat the butter for 1 minute on high speed until creamy. Add brown sugar and granulated sugar and beat until completely smooth, about 2 minutes. Add the egg and beat until combined, then add peanut butter and vanilla, beating until combined.
- Add the flour mixture to the wet ingredients and beat on low speed until combined. Cover and chill in the refrigerator for at least 1 hour.
- Preheat oven to 350°F (177°C). Line baking sheets with parchment paper. Place cookies in the freezer for 10 minutes.
- Scoop and roll dough into balls, coat with sugar and arrange on baking sheet. Bake for 11–13 minutes until tops begin to crack. Let cool on the sheets for 5 minutes.
- Press a chocolate kiss into the center of each cookie and transfer to a plate. Freeze for 10 minutes to set the chocolate.
- Remove from freezer and serve.
- Cookies stay fresh covered at room temperature for up to 1 week.
Leave a Reply