
Introduction to No Knead Bread
When it comes to baking bread, the term no knead bread may just be the best-kept secret for busy young professionals. In a world that often prioritizes convenience, this effortless method allows you to enjoy the simple pleasure of homemade bread without the need for rigorous kneading, making it perfect for those of us juggling work, social lives, and more.
Why is this a game changer? First, it requires minimal effort. Simply mix your ingredients, let the dough rise for two hours, and you’re well on your way to creating a golden, crusty loaf. This low-maintenance approach means you can set aside time for other activities while your dough does its thing. According to a study published by The Bread Bakers Guild of America, making artisan bread at home can boost your well-being, providing a sense of accomplishment and the delightful aroma of fresh bread wafting through your house.
Moreover, no knead bread is versatile. You can easily customize it by adding herbs, cheese, or even seeds, ensuring each loaf is exciting and tailor-made for your taste buds. So why not whip up a batch this weekend? You might just find your new favorite activity!
Ingredients for No Knead Bread
Essential ingredients for the perfect loaf
Crafting the ideal no knead bread requires just a few essential ingredients that you'll likely have in your pantry. Here’s what you need to get started:
- 4 ¾ cups all-purpose flour: This is your base, giving structure and texture to the bread.
- 2 ½ teaspoons instant yeast: Make sure it’s fresh for optimal rising!
- 2 teaspoons sea salt: This might seem simple, but it enhances flavor and controls yeast activity.
- 2 cups very warm water: The warmth will activate the yeast.
- 2 teaspoons maple syrup, agave, or granulated sugar: This provides a touch of sweetness and promotes browning.
- 1 teaspoon olive oil or any oil: Adding a bit of fat keeps the bread tender.
Optional ingredients for unique flavors
Once you’ve mastered the basic recipe, have fun experimenting with optional ingredients to elevate your no knead bread. Consider adding:
- Herbs (like rosemary or thyme) for a fragrant twist.
- Cheeses (such as parmesan or cheddar) for a rich flavor boost.
- Seeds (like sesame or poppy) sprinkled on top for texture and crunch.
By playing with these extras, you’ll create a delicious homemade loaf that impresses family and friends alike!
Step-by-step Preparation of No Knead Bread
Making no knead bread is a delightful journey into the world of artisan baking, and it requires just a few simple steps. Don’t worry if you’re new to bread making; this recipe is designed to be approachable and forgiving! Here’s how to whip up a delicious loaf at home.
Gather your kitchen tools
Before you get started, you’ll want to ensure you have all the necessary tools on hand:
- Large mixing bowl: This is where all the magic begins.
- Dough scraper or spatula: Perfect for folding and shaping your dough.
- Dutch oven: Essential for creating that bakery-style crust.
- Parchment paper: For easy transfer and cleanup.
- Measuring cups and spoons: Accuracy is key in baking.
Having everything ready makes the process so much smoother, so take a moment to gather your tools before diving in!
Combine the dry ingredients
In a large bowl, whisk together the dry ingredients: flour, instant yeast, and sea salt. Ensure they are well combined, which is essential for uniform flavor and texture. This step is straightforward but so crucial. If you want to learn more about yeast, check out this guide on how to test yeast to make sure yours is active!
Add the wet ingredients and mix
Next, create a well in the center of your dry ingredients. Pour in the very warm water, maple syrup, and olive oil. Use a spatula to stir the mixture until it forms a shaggy dough. It will look a bit messy, but that’s perfectly okay! The goal here is to ensure that all ingredients are mixed in without any dry pockets.
Let the dough rise
Cover your bowl with a greased plastic wrap or a kitchen towel and let it rise in a warm spot for 2 to 3 hours. This is where the magic happens! You’re allowing the gluten to develop and the yeast to ferment, resulting in a lovely, airy texture. If your kitchen is a little chilly, placing the bowl in an oven with just the light on can create a cozy environment for the dough.
Shape and preheat the Dutch oven
Once your dough has risen and doubled in size, flour your work surface and dump out the dough. Lightly fold it over itself a few times, then shape it into a ball. Meanwhile, place your Dutch oven in the oven and preheat it to 450°F (230°C). Preheating the Dutch oven is crucial; it helps to achieve that gorgeous crust.
Bake your no knead bread
Transfer your dough onto a piece of parchment paper, and carefully place it in the hot Dutch oven. Cover with the lid and bake for 45 minutes. When the timer goes off, remove the lid and bake for an additional 15 to 20 minutes until you achieve a beautiful golden crust. If you want to avoid burning, keep a close eye on the bread, especially towards the end.
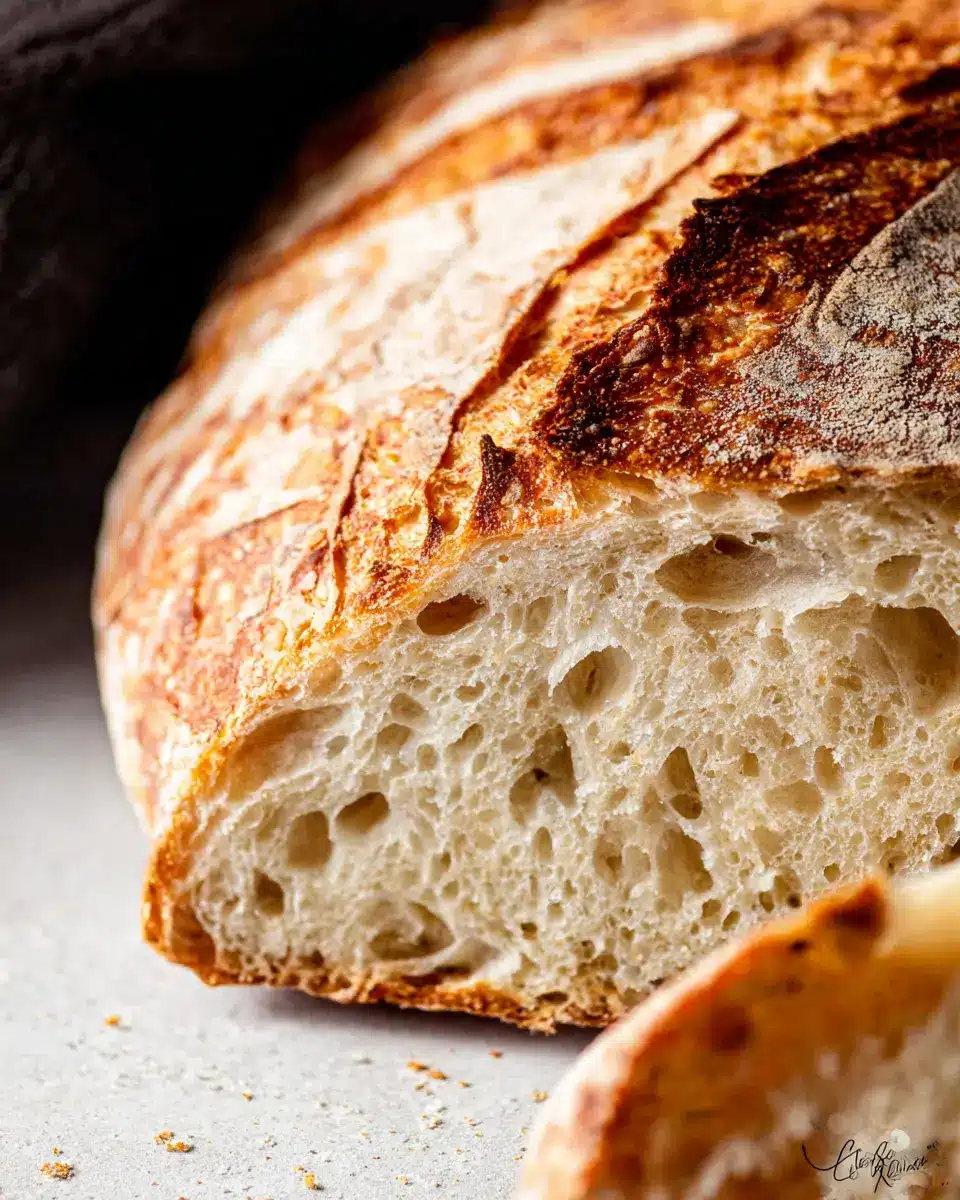
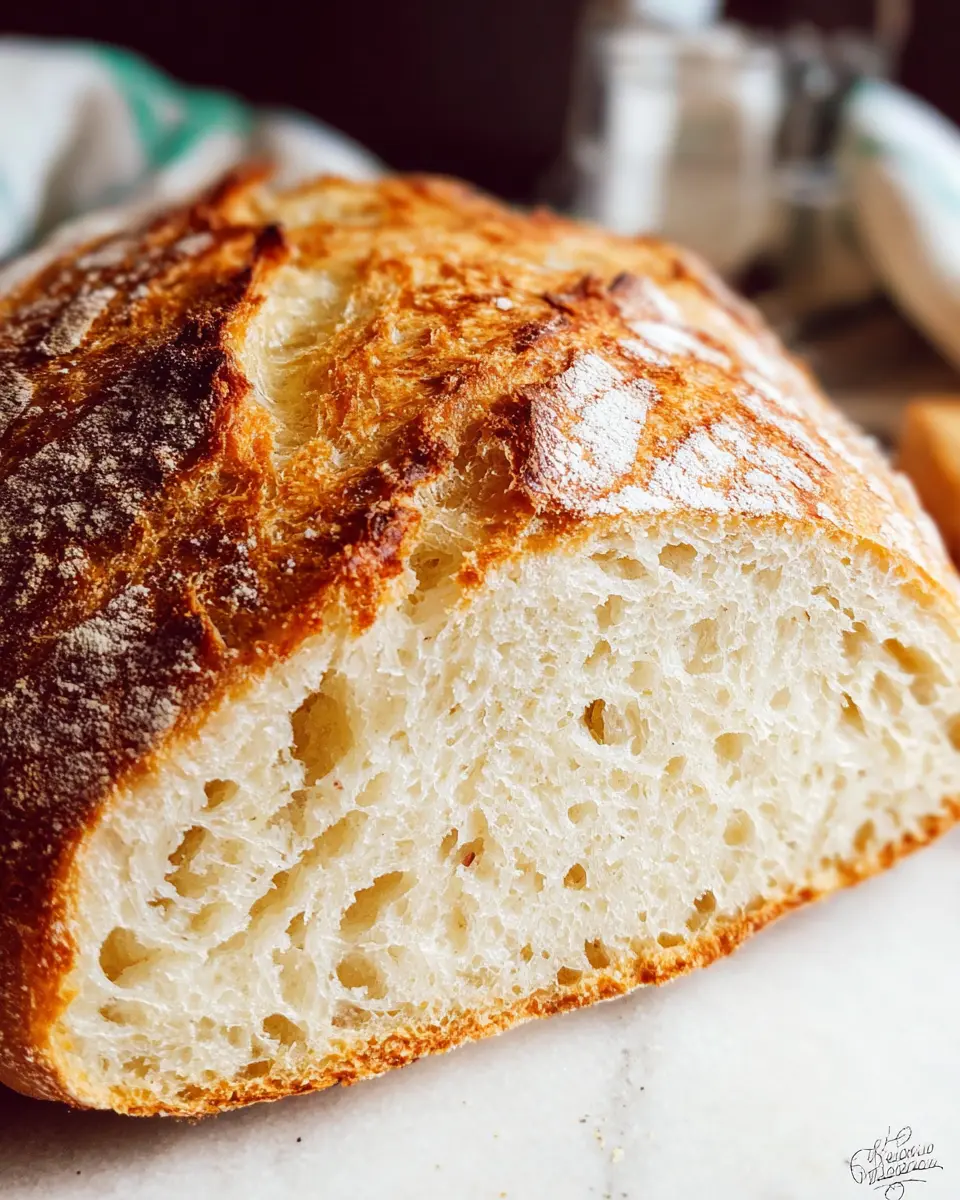
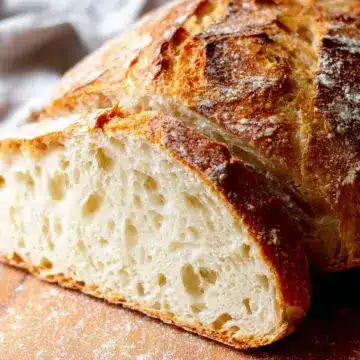
And there you have it! Once your no knead bread is baked to perfection, transfer it to a cooling rack, let it cool slightly (if you can resist the temptation), slice, and enjoy your homemade masterpiece! Each bite will remind you just how rewarding bread-making can be.
Variations of No Knead Bread
Herbed No Knead Bread
Add a flavor boost to your no knead bread by incorporating fresh or dried herbs. Think rosemary, thyme, or basil—these not only elevate the taste but also add a delightful aroma while baking. Simply mix about 2 tablespoons of your favorite herbs into the dry ingredients before you add the water. You’ll be amazed at how this simple tweak can transform your loaf into a gourmet experience!
Sweet No Knead Bread with Cinnamon
Craving something sweet? Transform your no knead bread into a delightful treat by adding cinnamon and sugar. Mix in 1 tablespoon of cinnamon and about ¼ cup of sugar to the dry ingredients. For extra flavor, consider folding chopped nuts or dried fruit into the dough. This variation is perfect for breakfast or as a dessert, paired with a spread of butter or cream cheese!
Cooking Tips and Notes for No Knead Bread
Common pitfalls and how to avoid them
Making no knead bread is wonderfully simple, but there are a few common mistakes to watch out for. First, ensure your water is warm enough—aim for about 120°F/48°C; if it's too cold, your dough may not rise properly. Using an adequately large bowl is also important, as the dough expands significantly. If you want to double-check your yeast's potency, you can learn how to test it here.
Storing your homemade bread
To keep your no knead bread fresh, store it in a paper bag at room temperature. Avoid plastic, as it traps moisture and can lead to a soggy crust. If you plan to keep the bread for more than a couple of days, you can slice and seal it in an airtight container or freezer bag, and pop it in the freezer. Just make sure to let it cool completely before storage. Happy baking!

Serving Suggestions for No Knead Bread
Pairing with Spreads and Toppings
Your freshly baked no knead bread is incredibly versatile! Try slathering it with:
- Buttery spreads: A classic choice—smash a little butter on warm slices for an irresistible treat.
- Hummus or avocado: Both options add creaminess and nutrition. Top with cucumber or tomatoes for extra flair.
- Turkey bacon or chicken ham: Layer with fresh greens for a satisfying sandwich. Combine with mustard for a tangy twist.
Don’t forget, a drizzle of olive oil with balsamic vinegar makes for a delightful dip!
Creative Uses for Leftover Bread
If you have leftover no knead bread, don’t let it go to waste! Here are a few ideas:
- Croutons: Cut into cubes, toss with olive oil, and bake until crispy. Perfect for salads!
- Breadcrumbs: Pulse in a food processor for homemade breadcrumbs. Use in various recipes like meatballs or breading.
- French toast: Transform stale slices into a delicious breakfast by soaking them in egg mixture and frying until golden.
Make the most of your delicious bread—enjoy it in new ways!
Time Breakdown for No Knead Bread
When you’re ready to embark on your no knead bread journey, here’s a quick guide to help you manage your time effectively.
Preparation Time
Expect to spend about 15 minutes gathering your ingredients and mixing everything together. It’s the simplest step, yet it sets the stage for your delicious loaf!
Rising Time
Give your dough a cozy home for 2 hours. This is when the magic happens; the dough will double in size, creating that airy texture we all love.
Baking Time
Ready your oven for about 1 hour and 5 minutes. This includes 45 minutes with the lid on for that perfect crust, followed by an additional 15-20 minutes to achieve golden perfection. Your kitchen will smell absolutely amazing!
By planning your time around these three phases, you’ll enjoy the process and relish in the delightful results. For tips on how to troubleshoot any issues with your no knead bread, check this helpful guide. Happy baking!
Nutritional Facts for No Knead Bread
Calories per slice
Each slice of this no knead bread packs a delicious punch at approximately 143 calories. This makes it a fantastic option for a light lunch or a cozy breakfast without straying too far from your dietary goals.
Key nutrients
In addition to being low in calories, this hearty bread offers several key nutrients per slice:
- Carbohydrates: 30g – A great source of energy!
- Protein: 5g – Helps keep you feeling full and satisfied.
- Fat: 2g – Keeps the texture deliciously moist.
- Fiber: 5g – Important for digestive health!
- Calcium: 27mg – Contributes to strong bones.
- Iron: 2mg – Boosts your energy levels.
For more detailed nutritional insights, check out resources like the USDA National Nutrient Database. Whether you’re making a sandwich or enjoying a slice with your favorite spread, this no knead bread is a wonderful addition to your diet!
FAQs about No Knead Bread
Can I use whole wheat flour?
Absolutely! Using whole wheat flour for your no knead bread can add a delightful nutty flavor and extra nutrients. However, be aware that it may require a bit more hydration. You can start by substituting half of the all-purpose flour with whole wheat and adjusting the water accordingly. Just add a little more to achieve that ideal dough consistency.
How do I know when my bread is done?
To check if your no knead bread is perfectly baked, tap the bottom of the loaf after removing it from the oven. It should sound hollow—a sure sign it’s cooked through. Additionally, look for a beautiful golden-brown crust, which indicates a well-baked loaf.
Can I make the dough ahead of time?
Yes, making the dough ahead of time is a great idea! You can prepare the dough and let it rise in the fridge for up to 12 hours. Just remember to bring it back to room temperature before baking to ensure the best texture and flavor. For more tips on prepping dough, check out King Arthur Baking.
Feel free to explore these tips as you embark on your no knead bread journey!
Conclusion on No Knead Bread
In summary, no knead bread is a game-changer for home bakers! Its simplicity enables anyone to whip up a deliciously crusty loaf with minimal effort. Enjoy the delightful aroma filling your kitchen, and embrace the joy of sharing this versatile bread with loved ones. Happy baking!
No Knead Bread
Equipment
- Dutch oven
Ingredients
- 4 ¾ cups all purpose flour plus some extra for flouring
- 2 ½ teaspoons instant yeast about 1 packet
- 2 teaspoons sea salt
- 2 cups very warm water about 120°F/48°C
- 2 teaspoons maple syrup, agave or granulated sugar
- 1 teaspoon olive oil or any oil
Instructions
- In a very large bowl, whisk the dry ingredients together until thoroughly combined. Create a well in the centre and add the warm water, maple syrup and the oil. Stir the water into the dry ingredients to form a dough. You want to stir until it’s all incorporated and the dough looks shaggy but mixed together, about 1 minute.
- Lightly grease the sides of the bowl, and turn the dough over in it to grease the dough. Cover with greased plastic wrap, an alternative wrap or light kitchen towel and let it rise on your counter for 2 to 3 hours. If your kitchen is cold, place it in your oven with the oven light turned ON and the oven OFF for a warm, draft free area for it to rise. The dough will double in size so be sure to use a bowl tall enough to manage this rise.
- In the last 30-40 minutes of rising, place your Dutch oven in the oven and preheat at 450℉/230°C. You want to add your Dutch before preheating so it preheats with the oven.
- After two hours, the dough should have bubbles on the top. Flour a surface with at least 1 tablespoon flour spread out, then pour the risen dough onto it. Sprinkle another ½ tablespoon of flour onto the top of the dough and flour your dough scraper/knife/large spatula.
- Using your dough scraper or large knife or spatula, fold the dough on top of itself. Do this by pulling the outer edges up and onto the centre. Rotate the dough and do it a few more times, about 6 to 12 times. You want the dough to feel a bit tighter and to start forming a shape.
- Scoop the dough and place onto a piece of parchment paper. Using your hands, scoop/shape it into a circle.
- When the oven is preheated, remove the dutch oven carefully with oven mitts. Take the lid off and place the dough (on the parchment paper) into the Dutch oven. Place lid back on and place it all back into the oven.
- Bake for 45 minutes. After that time, open the oven, carefully remove the lid and continue to bake for an additional 15 to 20 minutes until the crust is at your desired level.
- Remove from the oven, and set down. Lift up the edges of the parchment to transfer the bread to a wire cooling rack.
- Completely cool, then slice, serve and enjoy! If you can't wait, cool it for at least 30 minutes!


Leave a Reply