
Introduction to Red Velvet Cake with Cream Cheese Frosting
What is Red Velvet Cake?
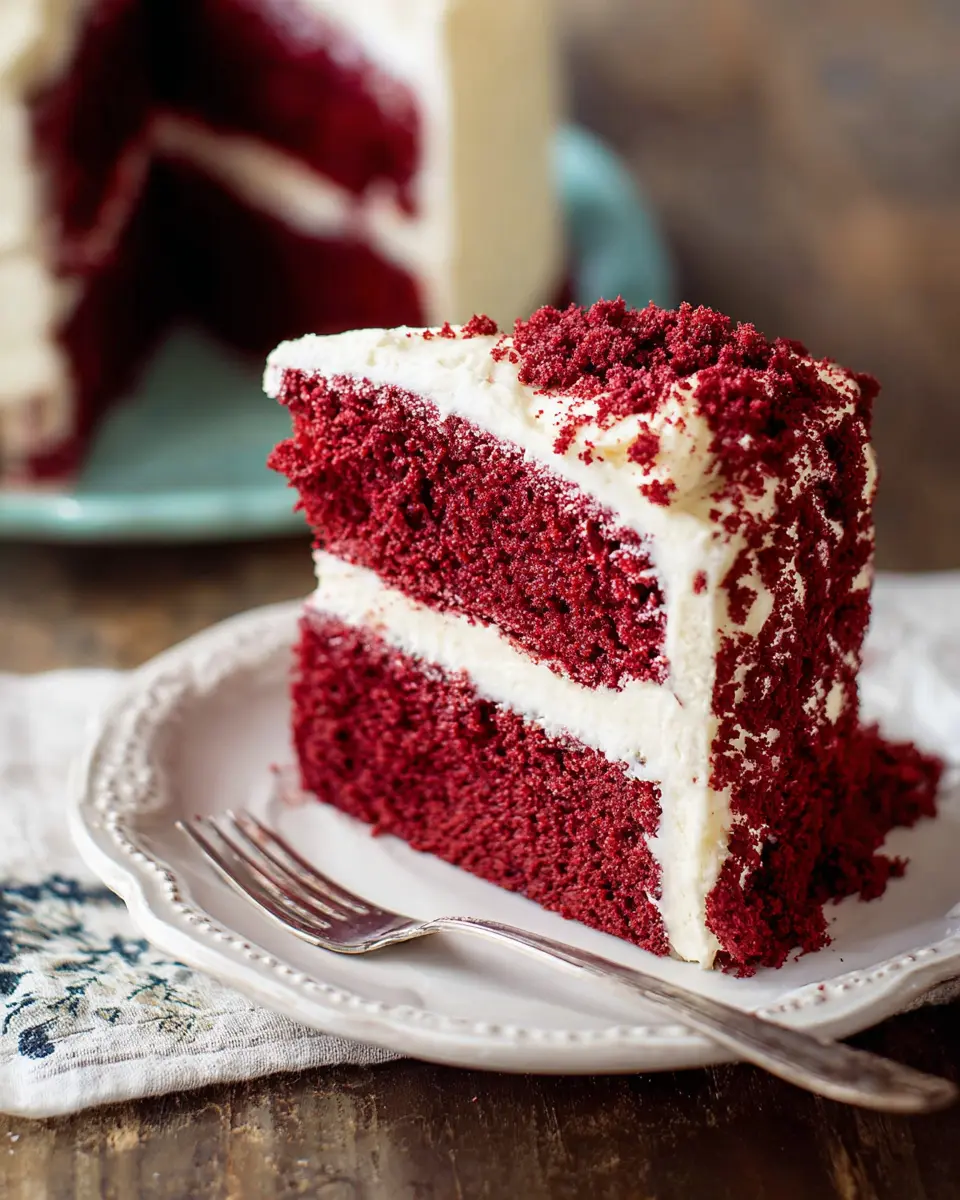
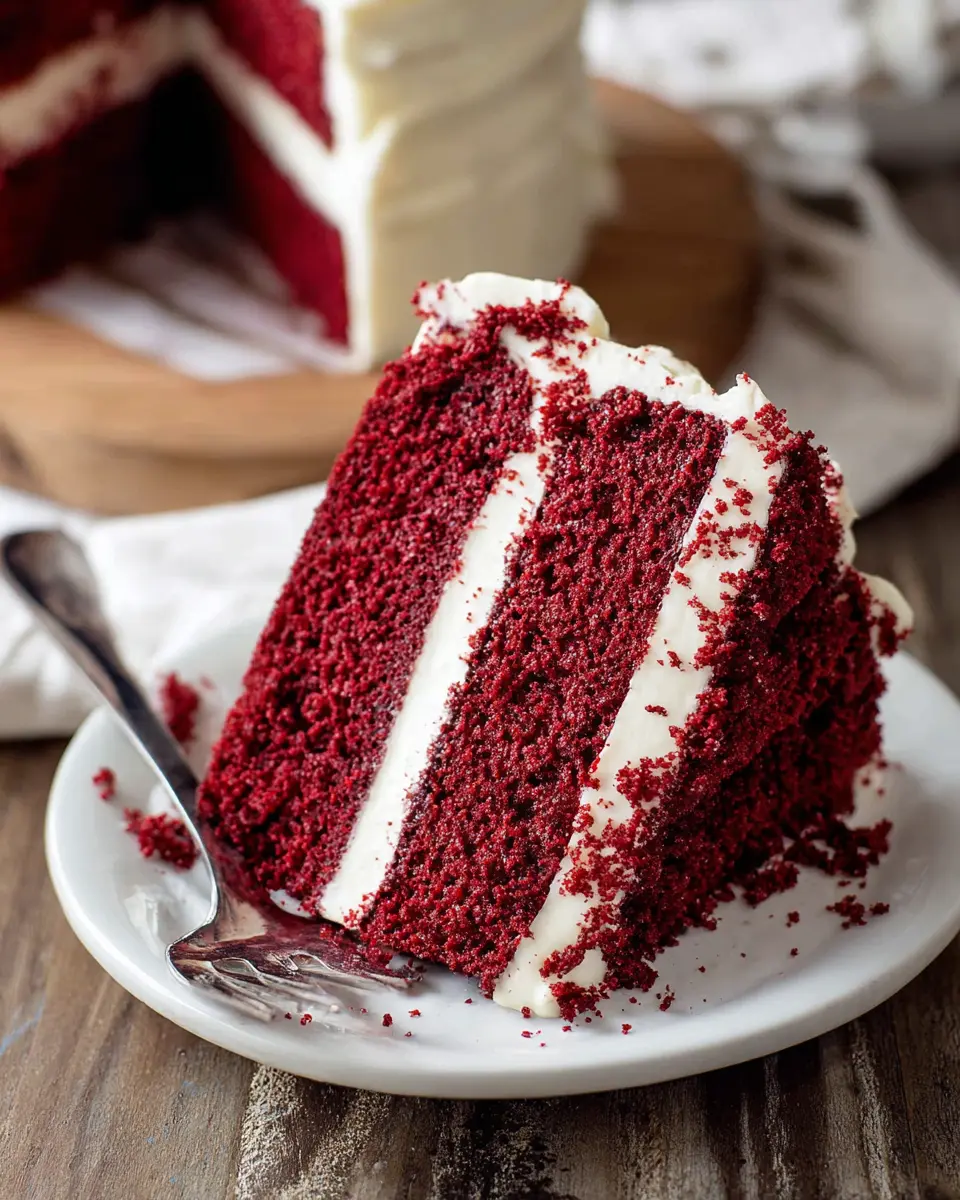
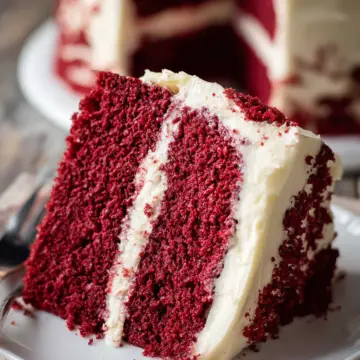
Red velvet cake is a delightful creation that marries the flavors of rich cocoa with a subtle tanginess from buttermilk, topped with creamy and slightly sweet cream cheese frosting. The striking red color, often enhanced by food coloring, gives it a visual appeal that's hard to resist. More than just a cake—it's a centerpiece that brings joy and celebration to any occasion.
A Brief History of Red Velvet Cake
The history of red velvet cake is as rich as its flavor. Originating in the 1920s, this iconic dessert gained popularity in the Southern United States, particularly during the Great Depression when it was highlighted in promotional campaigns by flour companies. Many also believe that its unique hue comes from a reaction between cocoa powder and acidic ingredients, like vinegar. Check out this detailed history for more about its intriguing backstory!
Why Homemade is Better Than Store-Bought
Have you ever tasted a store-bought red velvet cake and felt it lacked that homemade touch? When you prepare this cake yourself, you control every ingredient, ensuring that it is both fresher and more flavorful. The textures and flavors of homemade goodies—especially with that creamy cream cheese frosting—are simply unmatched. Plus, making it yourself is a labor of love that adds a personal touch, making it even more special for your loved ones.
Dive into our delicious recipe below and embrace the joy of baking your very own red velvet cake with cream cheese frosting!
Ingredients for Red Velvet Cake
Essential Ingredients for the Cake
Creating a delightful red velvet cake with cream cheese frosting starts with gathering the essential ingredients. For the cake, you’ll need:
- Cake flour: 3 cups for that perfect soft texture.
- Unsweetened cocoa powder: 2 tablespoons to enhance the flavor profile.
- Granulated sugar: 2 cups makes it sweet and delicious.
- Buttermilk: 1 cup adds that signature tanginess.
- Eggs and oil: They provide moisture and richness.
Having high-quality ingredients, like pure vanilla extract, can really elevate your cake.
Must-Have Ingredients for Cream Cheese Frosting
When it comes to the frosting, the key components are equally important:
- Full-fat cream cheese: 16 ounces, as it adds creaminess and flavor.
- Unsalted butter: ¾ cup, softened for easy mixing.
- Confectioners’ sugar: 5 cups for that perfect sweet touch.
Once you have these, you can whip up a frosting that complements your cake perfectly!
Ingredient Substitutions and Alternatives
Don’t worry if you can’t find every ingredient! Here are some handy substitutions:
- Cake flour: Use all-purpose flour mixed with cornstarch (2 cups of all-purpose flour minus 4 tablespoons + 4 tablespoons cornstarch).
- Buttermilk: Combine regular milk with a tablespoon of lemon juice or white vinegar; let it sit for 5 minutes.
- Cream cheese: Greek yogurt can be used for a lighter frosting alternative, but it will change the flavor and texture.
Feel free to get creative with your ingredients while keeping the essence of this classic dessert!
Step-by-step Preparation of Red Velvet Cake
Baking a stunning red velvet cake with cream cheese frosting isn't just for special occasions; it's a delightful journey in every step. From prepping your kitchen to the final assembly, let's dive into making this beautifully vibrant cake.
Prepping Your Kitchen and Equipment
Before you even touch the ingredients, it’s crucial to have a clean workspace. Start by gathering all your equipment and ingredients. You’ll need:
- Two 9-inch round cake pans
- Parchment paper (to prevent sticking)
- Mixing bowls
- An electric mixer (handheld or stand)
- An oven thermometer (to ensure accurate temperature)
Preheat your oven to 350°F (177°C) while you organize. This ensures that your oven is ready to go when your cake batter is mixed. Don’t forget to grease those cake pans generously and line them with parchment paper. This little trick guarantees your cakes will pop out with ease!
Mixing the Dry Ingredients
In a large bowl, whisk together:
- 3 cups cake flour
- 1 teaspoon baking soda
- 2 tablespoons cocoa powder
- ½ teaspoon salt
Mixing these dry ingredients first helps to evenly distribute the baking soda and cocoa, ensuring a beautiful rise and color in your red velvet cake.
Creating the Cake Batter
Next, in another bowl, beat ½ cup softened butter and 2 cups granulated sugar together until smooth. This process incorporates air, making your cake light and fluffy. Add in 1 cup of oil, 4 egg yolks, 1 tablespoon vanilla, and 1 teaspoon vinegar, mixing well.
Now, alternate adding the dry ingredients and 1 cup of buttermilk to your wet mixture until combined. Add your desired amount of liquid or gel food coloring for that signature red hue. If you want to achieve the rich color, go for 1-2 teaspoons of gel food coloring.
Finally, in a separate bowl, whisk the 4 egg whites until they form fluffy peaks. Gently fold these whites into your cake batter for that signature velvety texture.
Baking the Cake Layers
Divide the batter evenly between the prepared cake pans and bake for 30-32 minutes. Keep an eye on your cakes; they’re done when the tops spring back to touch and a toothpick comes out clean. Once baked, let your cakes cool in the pans on a wire rack. This is critical! Your red velvet cake layers must cool completely before frosting.
Making the Cream Cheese Frosting
While your cakes are cooling, whip up that oh-so-delicious cream cheese frosting. In a mixing bowl, combine 16 ounces of softened cream cheese and ¾ cup of softened butter. Beat until smooth. Gradually add 5 cups of confectioners’ sugar and 1 and ½ teaspoons of vanilla, mixing until creamy. Taste and adjust with a pinch of salt if needed.
Assembling the Cake
Now, the fun part! Level the tops of your cake layers if needed. Place the first layer on a cake stand, spread a generous amount of frosting on top, and repeat with the next layer. Finish by covering the top and sides with the leftover frosting. For an elegant touch, use a piping bag with a decoration tip to add some swirls.
Let your red velvet cake with cream cheese frosting chill in the refrigerator for about 30-60 minutes before slicing. This helps the slices hold their shape beautifully.
Enjoy the process and the sweet rewards! There's nothing quite like the celebration that a homebaked cake brings.
For more detailed tips and techniques, check out Sally's Baking Addiction!
Variations on Red Velvet Cake
Red Velvet Cupcakes
If you're craving a personal treat, red velvet cupcakes are a delightful alternative to the classic cake. These mini versions maintain the same rich flavors and stunning color. Simply use your cake batter in cupcake liners, bake for about 20-21 minutes, and top them with the creamy cream cheese frosting for an irresistible bite-sized indulgence. Perfect for parties or a cozy night in, these cupcakes are sure to impress!
Layered Red Velvet Trifle
For a show-stopping dessert, consider making a layered red velvet trifle. Start by cutting your cake into cubes and layering them in a glass dish with cream cheese frosting and whipped cream. Add some fresh berries for a burst of flavor! This elegant dessert not only looks gorgeous but also provides a fun way to enjoy the classic red velvet cake with cream cheese frosting at gatherings. Who can resist digging into those beautiful layers?
Cooking Tips and Notes for Red Velvet Cake
Tips for Achieving the Perfect Texture
For an irresistibly tender red velvet cake with cream cheese frosting, focus on your mixing technique! Whip the egg whites separately and fold them into the batter last. This lightens the mix and creates that signature soft crumb. Remember, gentle folding is key—overmixing will lead to a dense cake.
Importance of Ingredient Temperature
Always ensure your ingredients are at room temperature. This helps them blend more easily, ensuring a harmonious texture and flavor throughout your cake. Cold butter or eggs can lead to uneven mixing, and you want that velvety finish in every bite! If you're curious about more kitchen tricks, check out this helpful resource.

Serving Suggestions for Red Velvet Cake
Pairings for your Red Velvet Cake
Red velvet cake with cream cheese frosting is a delightful dessert that pairs beautifully with various treats. Consider serving it alongside:
- Fresh berries, like raspberries or strawberries, which add a refreshing contrast.
- A scoop of vanilla or chocolate ice cream for a classic twist.
- Gourmet coffee or herbal tea to balance the sweetness of the cake.
Occasion Ideas for Serving
This stunning cake isn't just for birthdays! Here are some occasions where your red velvet cake can shine:
- Bridal showers or romantic dinners, thanks to its elegant look.
- Holiday gatherings, as its rich color makes it festive.
- Potlucks or family gatherings, where it’s sure to impress friends and loved ones.
Make it memorable and enjoy every bite!
Time Breakdown for Red Velvet Cake
Preparation time
Get ready to create your delectable red velvet cake with cream cheese frosting in just 30 minutes! During this time, you’ll gather ingredients, preheat your oven, and prepare your cake pans for a seamless baking experience.
Baking time
Bake your cake for 30 minutes, allowing the kitchen to fill with that mouth-watering aroma. Make sure to check for doneness with a toothpick—nothing beats the joy of a perfectly baked cake!
Total time
The entire process, including cooling and frosting, takes about 3 hours. This might seem lengthy, but the result is a stunning cake that's sure to impress your friends and family. For more tips on timing, check out this guide on baking to ensure your red velvet cake turns out perfectly every time!
Nutritional Facts for Red Velvet Cake
Calories per slice
Each slice of red velvet cake with cream cheese frosting contains approximately 350 calories. While this delightful treat satisfies a sweet tooth, moderation is key!
Primary nutrients
This cake is rich in essential nutrients, providing:
- Fat: contributing to its moist texture
- Carbohydrates: offering a quick energy source
- Protein: thanks to the eggs and cream cheese frosting
Allergens to consider
When preparing this delicious cake, be mindful of potential allergens:
- Dairy: from the butter and cream cheese
- Eggs: used in the batter
- Gluten: in the cake flour
For more detailed insights on ingredient substitutions, you can check resources like the Food Allergy Research and Education site for guidance. Enjoy your baking adventure and remember, balance is essential!
FAQs about Red Velvet Cake
When it comes to making the perfect red velvet cake with cream cheese frosting, you might have a few questions. Here are some common FAQs to help you achieve that sweet success!
How can I make my cake extra moist?
To keep your red velvet cake moist, consider these tips:
- Use buttermilk: It not only enhances flavor but also adds moisture.
- Don't overbake: Keep an eye on your cakes; they should spring back when touched.
- Egg whites: Whipping the egg whites separately and folding them in creates a light and airy texture.
What’s the best way to store leftovers?
Store leftover red velvet cake in an airtight container in the fridge. It will stay fresh for up to 5 days. If you have un-frosted layers, you can also freeze them for 2-3 months. Just wrap them tightly in plastic wrap.
Can I make this cake ahead of time?
Absolutely! Bake the cake layers a day in advance and keep them covered at room temperature. You can also prepare the frosting ahead and refrigerate it overnight. Just let it sit out for about 10 minutes before assembling for easy spreading.
For more great baking tips, check out resources like King Arthur Baking or Sally's Baking Addiction. Happy baking!
Conclusion on Red Velvet Cake with Cream Cheese Frosting
Red velvet cake with cream cheese frosting is a timeless classic that never fails to impress. Its rich flavors and moist texture are simply irresistible. Whether for a birthday or just because, this delightful cake will surely bring smiles to your table. Bake, share, and enjoy every luscious bite!
Red Velvet Cake with Cream Cheese Frosting
Equipment
- 9-inch cake pans
- Mixing bowl
- handheld mixer
- spatula
- whisk
- toothpick
- Cooling Rack
Ingredients
Cake Ingredients
- 3 cups cake flour (spooned & leveled)
- 1 teaspoon baking soda
- 2 Tablespoons unsweetened natural cocoa powder
- ½ teaspoon salt
- ½ cup unsalted butter (softened to room temperature)
- 2 cups granulated sugar
- 1 cup canola or vegetable oil
- 4 large eggs (room temperature and separated)
- 1 Tablespoon pure vanilla extract
- 1 teaspoon distilled white vinegar
- 1 liquid or gel red food coloring
- 1 cup buttermilk (at room temperature)
Cream Cheese Frosting
- 16 ounces full-fat brick cream cheese (softened to room temperature)
- ¾ cup unsalted butter (softened to room temperature)
- 5 cups confectioners’ sugar
- 1.5 teaspoons pure vanilla extract
- 1 pinch salt (to taste)
Instructions
Making the Cake
- Preheat oven to 350°F (177°C). Grease two 9-inch cake pans, line with parchment paper rounds, then grease the parchment paper.
- Whisk the flour, baking soda, cocoa powder, and salt together in a large bowl. Set aside.
- Beat the butter and sugar together on medium-high speed until combined, about 1 minute. Add the oil, egg yolks, vanilla extract, and vinegar and beat on high for 2 minutes.
- With the mixer on low speed, add the dry ingredients in 2-3 additions alternating with the buttermilk. Add food coloring just until combined. Whisk or beat egg whites until fluffy peaks form and gently fold into batter.
- Divide batter between cake pans. Bake for 30-32 minutes until a toothpick inserted comes out clean. Cool completely in pans on a wire rack.
Making the Frosting
- Beat cream cheese and butter together on medium-high speed until smooth, about 2 minutes. Add confectioners’ sugar, vanilla extract, and a pinch of salt. Beat on low for 30 seconds, then increase to high speed and beat for 3 minutes.
Assembling the Cake
- Slice the tops off the cakes for a flat surface. Place one layer on your cake stand, cover top with frosting, then add the second layer and frost the top and sides.
- Refrigerate cake for at least 30-60 minutes before slicing.
- Store leftovers tightly in the refrigerator for up to 5 days or freeze up to 2-3 months.
Leave a Reply