
Introduction to Authentique Mango Sticky Rice Thaïlandais
Mango sticky rice, or khao neow mamuang, is more than just a dessert in Thai cuisine; it’s a delightful experience that transports your taste buds to the bustling streets of Thailand. This indulgent dish combines sweet, glutinous rice with the naturally luscious flavor of ripe mango, all drizzled with creamy coconut sauce. It’s no wonder that this dessert has captured the hearts of many—who can resist that perfect blend of sweetness and texture?
But what truly makes authentique mango sticky rice thaïlandais a beloved staple? For starters, it's a harmonious fusion of flavors and colors, often enjoyed during festive occasions and celebrations. The vibrant yellow of the mango, paired with the rich white coconut sauce, creates an eye-catching presentation that excites both the stomach and the senses.
Not to mention, this dessert is steeped in tradition. Its ingredients tell a story of Thailand’s agricultural bounty, showcasing local produce and culinary techniques passed down through generations. If you're curious about the history behind this treat, consider exploring resources like the Thai Food and Travel Blog for a deeper understanding.
Ready to dive into a world of flavor? Let’s explore the recipe for authentique mango sticky rice thaïlandais and learn how to master this beloved dessert!
Ingrédients pour Authentique Mango Sticky Rice Thaïlandais
Pour réaliser un authentique mango sticky rice thaïlandais, plusieurs ingrédients clés sont nécessaires afin de capturer cette délicieuse harmonie de saveurs et de textures. Voici ce dont vous aurez besoin pour le préparer parfaitement :
Liste des ingrédients nécessaires
-
500 g de Riz gluant thaïlandais
Le pilier de votre plat, le riz gluant apporte la texture caractéristique. -
400 ml de crème de noix de coco
Cette crème onctueuse donne une richesse et une douceur inoubliables. -
75 g de sucre
Le sucre va caraméliser légèrement, ajoutant une touche sucrée essentielle. -
0,5 cuillère à café de sel
Pour équilibrer les saveurs, n’oubliez pas le sel.
Pour les garnitures
-
100 ml de crème de noix de coco
Une crème supplémentaire à verser pour une touche finale délicieuse. -
0,5 pincée de sel
Utilisé pour rehausser encore la saveur de la garniture. -
Mangues bien mûres
Assurez-vous qu’elles soient à point pour capturer cette douceur naturelle. -
50 g de haricots mungo jaunes
Ces haricots apportent du croquant et une belle couleur à votre plat.
Avec ces ingrédients à portée de main, vous êtes bien parti pour réaliser un authentique mango sticky rice thaïlandais. Bonne cuisine ! N'hésitez pas à vous référer à des sources comme Serious Eats pour des astuces supplémentaires sur la préparation du riz gluant.
Step-by-step Preparation of Authentique Mango Sticky Rice Thaïlandais
Creating authentique mango sticky rice thaïlandais is not just about following steps; it's about embracing the rich, delicious traditions of Thai cuisine. Ready to dive in? Let’s take it step by step!
Rinse and soak the sticky rice
Start with 500 g of Thai sticky rice. Place it in a large bowl, and rinse it under cold water. Trust me, you’ll want to rinse it about 6 to 10 times until the water runs clear. This is crucial to remove excess starch, which ensures the finished product is delightfully soft and not too gummy. Once rinsed, soak the sticky rice in water for approximately 6 hours. A little patience here is key, as this will enhance the texture of the rice when steamed.
Steam the sticky rice
After soaking, it's time to bring the sticky rice to life with steam! Using a steamer basket, place the drained rice in the basket and steam it for about 15 minutes. What you’re looking for is a glossy appearance—the rice should be tender, fluffy, and cooked to perfection. Set it aside and let it cool a bit.
Make the coconut sauce for the rice
In your trusted saucepan, combine 400 ml of coconut cream, 75 g of sugar, and 0.5 teaspoons of salt. Heat this mixture over medium-low and stir gently. As everything melds together, the aroma of coconut will fill your kitchen. Once it reaches a boil, take it off the heat, and your coconut sauce is ready!
Combine the coconut sauce with the rice
Now comes the fun part! Place the warm sticky rice in a mixing bowl. Slowly pour in the coconut sauce—do this a spoonful at a time while gently folding the rice. You want to ensure every grain gets coated in that luscious, creamy goodness. You should end up with a delightful mixture that glimmers and almost resembles a pudding-like texture. Cover it with plastic wrap to keep it warm and moist.
Prepare the additional coconut sauce
For an extra touch of indulgence, you’ll want to create additional coconut sauce. In a separate saucepan, combine 100 ml of coconut cream and a pinch of salt. Heat it gently until it’s warm and well mixed, then set it aside for drizzling later.
Toast the mung beans for the garnish
Bring out those 50 g of yellow mung beans! In a dry pan over low heat, toast them until they turn golden and crunchy. This added texture will elevate your dessert. Once toasted, set these aside as a final garnish.
Slice the mango
Select ripe, juicy mangoes for this dessert. Peel the mangoes, then slice the flesh away from the pit into thick slices. The sweet, succulent mango pairs beautifully with the creamy sticky rice.
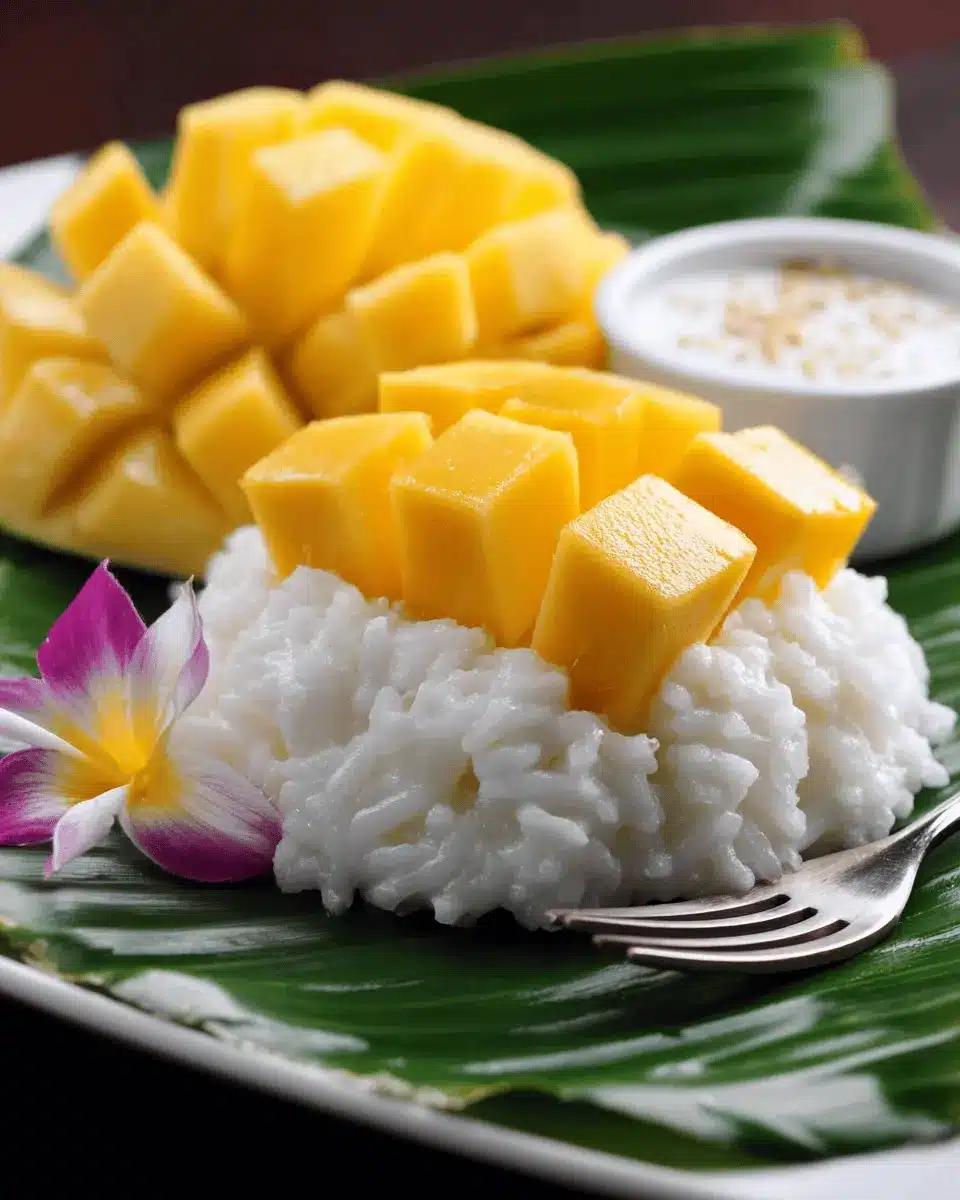
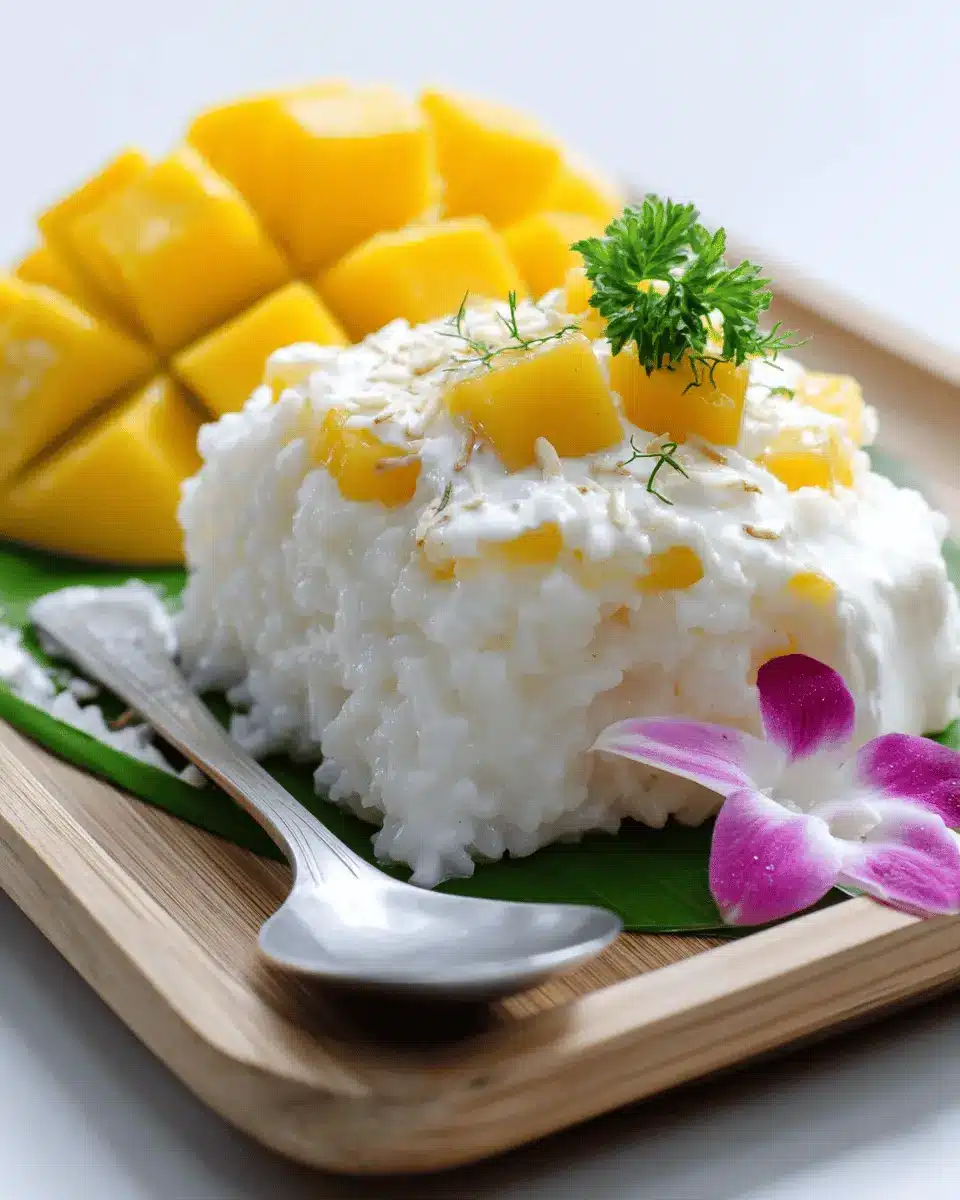
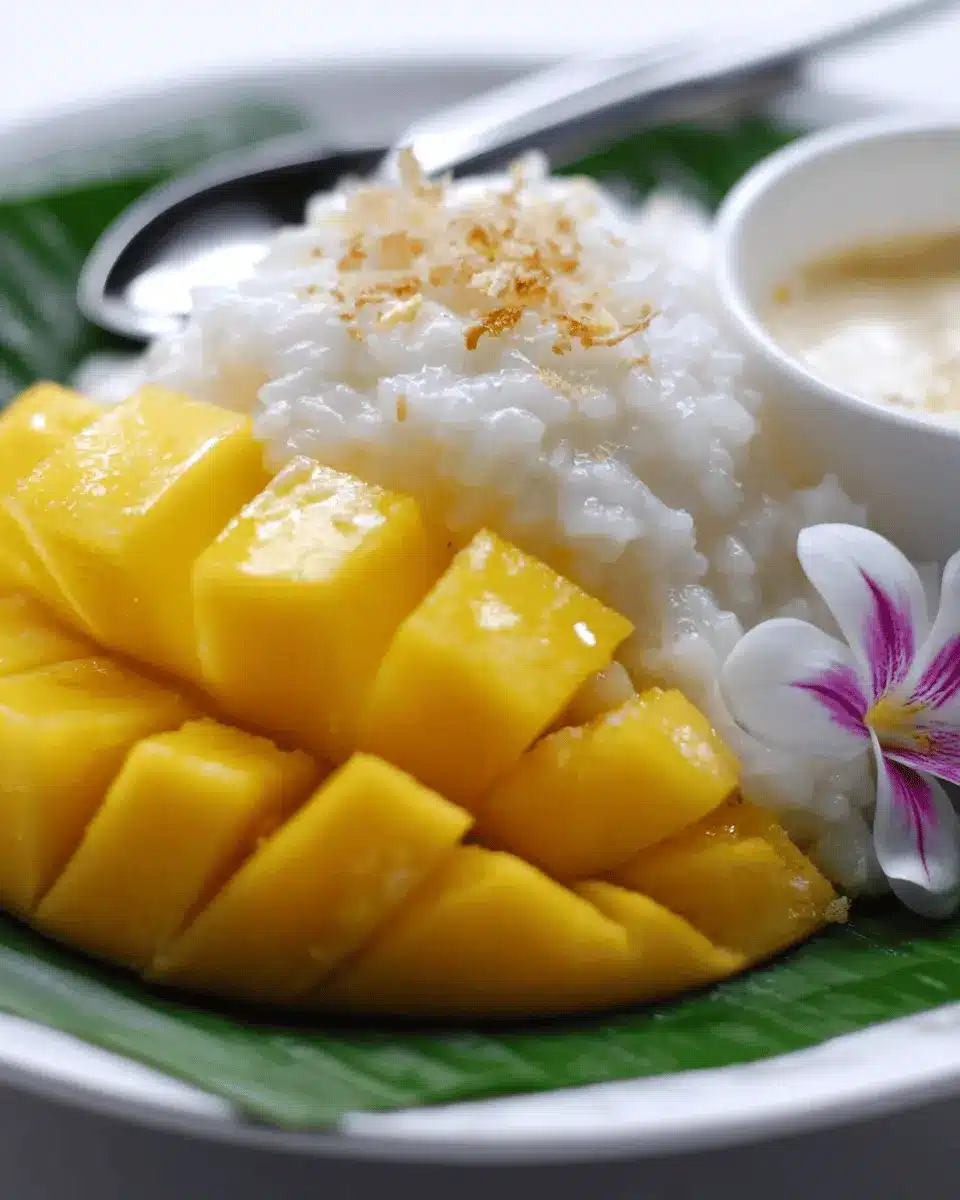
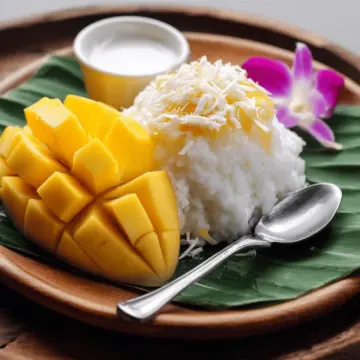
Plate the mango sticky rice for serving
To serve your authentique mango sticky rice thaïlandais, start by placing a generous portion of the sticky rice on a plate. Add slices of mango on top, sprinkle your toasted mung beans, and finish with a drizzle of the additional coconut sauce. Voila! You have a stunning dessert that is sure to impress.
This step-by-step guide not only encourages you to embrace authentic Thai methods but also makes the process approachable and enjoyable. For more tips and traditional recipes, check out resources like Serious Eats or Thai Food and Travel. Happy cooking!
Variations on Authentique Mango Sticky Rice Thaïlandais
Mango Sticky Rice with Coconut Ice Cream
Elevate your authentique mango sticky rice thaïlandais by pairing it with creamy coconut ice cream. This combination brings a delightful contrast in texture and flavor. Just serve a scoop of coconut ice cream on the side of your sticky rice and fresh mango slices. The cold ice cream melts into the warm rice, creating a luscious treat that's perfect for warm days. You can even sprinkle some toasted coconut flakes on top for an extra crunch!
Chocolate Drizzled Mango Sticky Rice
For the chocolate lovers out there, try drizzling melted dark chocolate over your mango sticky rice. Simply melt some chocolate and use a fork or spoon to create a beautiful drizzle across the sticky rice and mango. This unexpected twist not only adds a luxurious touch but also harmonizes beautifully with the sweetness of the coconut and mango. It’s a tempting dessert that will impress any guest!
Experimenting with these variations can add exciting new flavors to your authentique mango sticky rice thaïlandais, making it a favorite for dessert enthusiasts everywhere. For more inspiration, check out this ice cream recipe or explore chocolate drizzling techniques.
Cooking Tips and Notes for Authentique Mango Sticky Rice Thaïlandais
Tips for achieving the perfect sticky texture
To ensure your authentique mango sticky rice thaïlandais has that sought-after sticky texture, it's crucial to rinse your glutinous rice thoroughly until the water runs clear. This step removes excess starch that can make your rice gummy instead of pleasantly sticky. Additionally, soaking the rice for about six hours helps the grains absorb moisture, leading to a lovely chewy consistency when steamed.
Storage advice for leftover sticky rice
If you find yourself with leftover sticky rice, store it in an airtight container in the refrigerator. To maintain its delightful texture, it’s best to steam it briefly when reheating. Avoid using a microwave directly, as it can dry the rice out. Instead, pop it in a steamer for about 5-10 minutes for that fresh, warm feel again. Enjoy your authentique mango sticky rice thaïlandais whenever you crave a cozy dessert!
Serving Suggestions for Authentique Mango Sticky Rice Thaïlandais
When enjoying authentique mango sticky rice thaïlandais, consider enhancing the experience with some delightful accompaniments. Here are a few ideas to elevate your dessert game:
Ideal Accompaniments and Pairings
- Fresh Fruits: Serve alongside tropical fruits like ripe bananas, fresh pineapple, or even lychee for a refreshing contrast.
- Coconut Flakes: Toasted coconut flakes not only add flavor but also a delightful crunch that complements the creamy texture of the sticky rice.
- Thai Green Tea or Coconut Water: Pair your dessert with a chilled glass of Thai green tea or a refreshing coconut water. These beverages balance the sweetness of the dish.
- Savory Snacks: A side of spring rolls or Thai dumplings can provide a savory contrast, creating a well-rounded meal experience.
These pairings not only enhance the flavor but also bring a delightful balance to the overall meal. Don't hesitate to mix and match until you find your perfect combo!
Time Breakdown for Authentique Mango Sticky Rice Thaïlandais
Preparation Time
For the authentique mango sticky rice thaïlandais, you'll need about 6 hours and 15 minutes to prepare. The majority of this time is dedicated to soaking the sticky rice to achieve that perfect texture.
Cooking Time
Once you're ready to cook, the actual cooking time is relatively short, taking just 15 minutes. This quick steam method keeps the rice moist and tender, allowing the flavors to meld beautifully.
Total Time
In total, you're looking at approximately 6 hours and 30 minutes from start to finish. While that may seem like a commitment, most of it is hands-off, giving you plenty of time to focus on perfecting your skill or perhaps even trying out a new mangue de dessert recipe to serve alongside!
For more tips on cooking Thai desserts, you might enjoy exploring resources from Thai Food Master or Serious Eats, where they feature various ways to enhance your Thai culinary skills. Happy cooking!
Nutritional Facts for Authentique Mango Sticky Rice Thaïlandais
Calories
Each serving of the authentique mango sticky rice thaïlandais contains approximately 798 calories. While that sounds substantial, it's worth noting that this dessert is packed with flavor rather than empty calories.
Key Nutritional Highlights
- Carbohydrates: The sticky rice provides a hearty dose of carbohydrates, perfect for energy.
- Fats: The coconut cream adds healthy fats, contributing to your daily nutritional needs.
- Vitamins: Fresh mango offers vitamins A and C, which are essential for immune function and skin health.
- Minimals: With low levels of cholesterol and no sodium, this dish remains heart-healthy in moderation.
Though delicious, remember to enjoy this Thai classic as an occasional treat, balancing it with your overall dietary intake! For more in-depth insights on the nutritional benefits of coconut and mango, check out Healthline for extensive information.
FAQs about Authentique Mango Sticky Rice Thaïlandais
Can I make this dessert vegan-friendly?
Absolutely! The traditional recipe for authentique mango sticky rice thaïlandais already features coconut cream, which is naturally vegan. Ensure that you use pure coconut cream without additives that may contain animal products. You can substitute sugar with raw cane sugar for an even healthier option.
What’s the best type of mango for this recipe?
For the best flavor and texture, opt for Nam Dok Mai or Honey mangoes, which are sweet, fragrant, and have a smooth texture. This will enhance your authentique mango sticky rice thaïlandais experience. When ripe, they should yield slightly when pressed and have a rich yellow hue.
How long can I store my mango sticky rice?
You can store leftover mango sticky rice in an airtight container in the refrigerator for up to three days. To reheat, simply steam the rice again or microwave it with a splash of coconut milk to restore its creamy texture.
For further insights, check out sources like Serious Eats for additional tips on storing coconut desserts effectively!
Conclusion on Authentique Mango Sticky Rice Thaïlandais
L'authentique mango sticky rice thaïlandais est bien plus qu'un simple dessert; c'est une expérience culinaire délicieuse qui évoque les saveurs exotiques de la Thaïlande. En suivant cette recette, vous pourrez impressionner vos invités avec un plat sucré, crémeux, et irrésistible. Bon appétit!
Authentique mango sticky rice thaïlandais
Equipment
- panier vapeur
Ingredients
- 500 g Riz gluant thaïlandais
- 400 ml crème de noix de coco
- 75 g sucre
- 0.5 cuillère à café sel
Pour les garnitures
- 100 ml crème de noix de coco
- 0.5 pincée sel
- Mangues bien mûres
- 50 g haricots mungo jaunes
Instructions
Procédé
- Rincez le riz gluant 6 à 10 fois, en vous assurant que la majeure partie de l'amidon est éliminée et qu'il vous reste de l'eau claire. Ensuite, faites tremper le riz immergé dans l'eau pendant environ 6 heures.
- À l'aide d'un panier vapeur ou d'un autre type de cuiseur vapeur, faites cuire le riz gluant à la vapeur pendant environ 15 minutes jusqu'à ce qu'il soit complètement cuit, puis réservez.
- Dans une casserole, ajouter la crème de noix de coco pour le riz à feu moyen, et remuez doucement dans un sens circulaire. Ajouter le sucre et le sel, et continuez à remuer et à cuire jusqu'à dissolution complète. Lorsque le mélange de crème de coco arrive à ébullition, éteignez le feu.
- Mettez le riz gluant frais dans un bol à mélanger et commencez à ajouter lentement le mélange de crème de noix de coco et de sucre. Vous combinerez tout cela, mais ajoutez-le cuillère par cuillère et incorporez-le lentement dans le riz. Une fois que tout est combiné, vous devriez vous retrouver avec du riz gluant chatoyant qui ressemble presque à un pudding granuleux. Votre riz gluant est prêt, recouvrez-le de plastique pour qu'il ne sèche pas.
- Dans une casserole séparée, ajoutez l'autre portion de crème de noix de coco et de sel, et remuez à feu doux. Porter à ébullition, puis éteindre le feu et réserver dans un bol. Ce sera servi avec le mango sticky rice comme garniture.
- Dans un wok ou une poêle, à feu doux, faites revenir à sec les haricots mungo jaunes pendant quelques minutes jusqu'à ce qu'ils deviennent dorés et croustillants. Encore une fois, mettez-le de côté comme garniture.
- Pour la mangue, commencez par peler la peau, puis coupez la chair de chaque côté de la graine de mangue et coupez la mangue en gros morceaux.
- Dans une assiette, ajoutez d'abord une portion de riz gluant, garnissez-la de mangue, saupoudrez de haricots mungo et servez la crème de noix de coco supplémentaire à côté.


Leave a Reply