
Introduction to Cheddar Bay Sausage Balls
What are Cheddar Bay Sausage Balls and why are they a must-try?
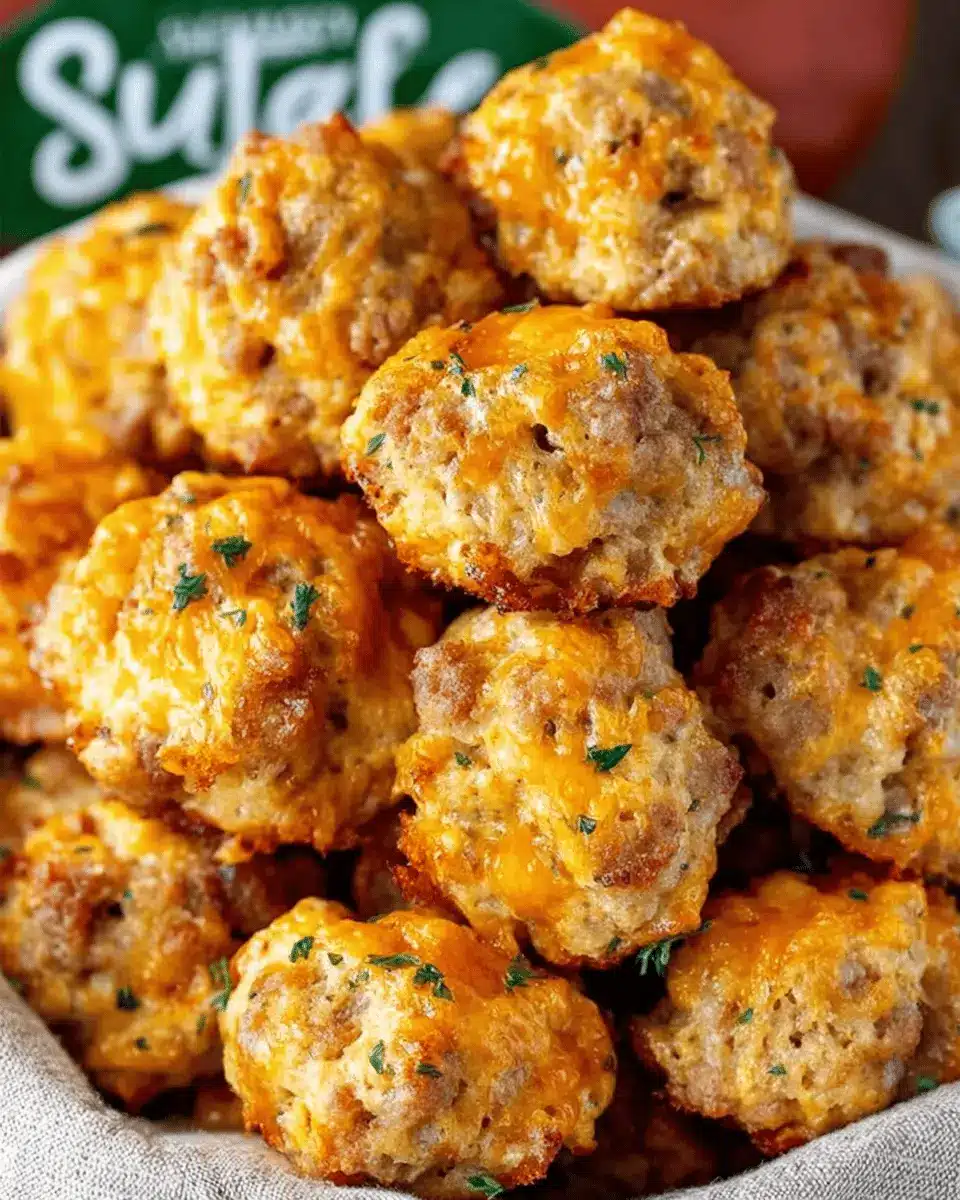
If you think the classic sausage ball can't get any better, think again! Cheddar Bay Sausage Balls combine the beloved flavors of Cheddar Bay Biscuits and savory sausage into a single, irresistible bite-sized snack. These delightful morsels are perfect for parties, holiday gatherings, or even just a cozy movie night at home.
What's great about these delicious bites is their versatility. You can whip them up in just about 30 minutes, making them a quick and easy appetizer that everyone will love. Plus, they’re super easy to prepare. Using a pre-packaged biscuit mix, you get all the buttery, cheesy goodness with minimal effort. Need to prep ahead of time? No problem! You can freeze the unbaked balls and simply pop them in the oven when you're ready to enjoy them.
In addition to being a crowd favorite, Cheddar Bay Sausage Balls can appeal to various dietary preferences. For a gluten-free option, just swap in a gluten-free biscuit mix. Trust me; this is a recipe you'll want to save for your next gathering! For more tips on perfecting these snacks, check out this article on the art of finger foods.

Ingredients for Cheddar Bay Sausage Balls
Essential ingredients for the perfect blend
To whip up a batch of Cheddar Bay Sausage Balls, you'll need a few key ingredients that create that delightful flavor combination. Here’s what you’ll need:
- Red Lobster Cheddar Bay Biscuit Mix: This is the star of the show! It brings that iconic flavor straight into your sausage balls.
- Cream Cheese: Softened, of course! It adds creaminess and richness that makes these bites irresistible.
- Shredded Cheddar Cheese: Use good quality, sharp cheddar for an intense cheese flavor.
- Uncooked Sausage: You can choose your favorite type, but I highly recommend going for a delicious breakfast sausage or even a spicy option for an extra kick.
Optional ingredients for added flavor
While the essential ingredients will give you a fantastic result, there are plenty of ways to kick things up a notch! Consider adding:
- Red Pepper Flakes: For a bit of heat, toss in some red pepper flakes to spice things up. This will transform them into what I like to call “Firecracker Cheddar Bay Sausage Balls.”
- Other Cheeses: Want to mix it up? Feel free to add in some pepper jack or mozzarella for different flavors.
- Chopped Green Onions or Herbs: For freshness, sprinkle in some green onions or rosemary. They bring a lovely brightness to each bite!
These ingredients can be a game-changer for your Cheddar Bay Sausage Balls! Trust me—a little creativity goes a long way in the kitchen. Happy cooking!
Preparing Cheddar Bay Sausage Balls
Getting ready to whip up a batch of Cheddar Bay Sausage Balls? You’re in for a real treat! These bites are packed with flavor and are perfect for any occasion, whether it’s a game night, holiday gathering, or just a cozy night in. Follow these steps for an effortless experience in the kitchen.
Gather all your equipment
First things first, let’s pull together the equipment you’ll need. A well-stocked kitchen makes everything smoother! Here’s a checklist to get you started:
- Kitchen-Aid Mixer: If you have one, it speeds up the mixing process significantly.
- Small Cookie Scoop: This handy tool helps shape uniform sausage balls.
- Rotary Cheese Grater: Freshly grated cheese melts better and adds a great texture.
With these tools at your fingertips, you’re ready to go!
Mix the dry and wet ingredients
Now it’s time to dive into the mixing! In the bowl of your Kitchen-Aid Mixer, combine the Red Lobster Cheddar Bay Biscuit mix and seasoning packet, along with the uncooked sausage, softened cream cheese, and shredded cheddar cheese. If you’re mixing by hand, use a sturdy spoon and some elbow grease!
Tip: Make sure all the ingredients are well incorporated, as this ensures every bite of your Cheddar Bay Sausage Balls bursts with flavor. You can always find tips on mixing techniques if you want to avoid messy hands!
Shape the sausage balls
Once everything is mixed, it’s time to shape. Grab your small cookie scoop, and portion out the mixture into 1-inch balls. If you’d like to make an even larger batch, especially for a party, feel free to double the recipe!
Prepare your baking sheet
Preheat your oven to 400ºF, while you line a baking sheet with parchment paper. This step is essential as it prevents sticking and helps with clean-up. Plus, did you know that parchment paper can keep your sausage balls perfectly round?
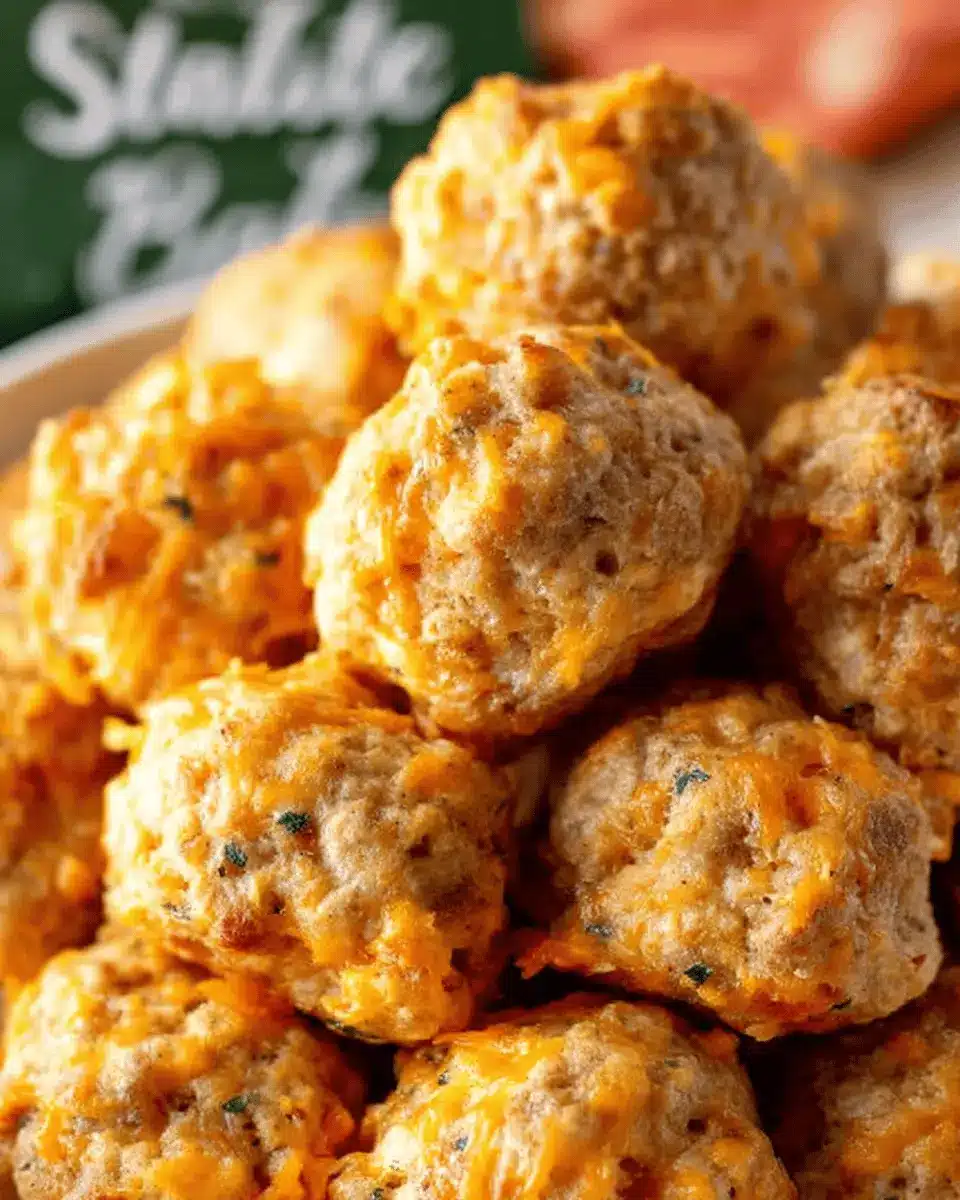
Baking to perfection
Now comes the exciting part: baking! Place your shaped sausage balls onto the prepared baking sheet. Bake them for about 15-20 minutes, or until they turn golden brown. Your kitchen will smell incredible!
Note: If you’re preparing ahead of time, these can be frozen unbaked. Just add a few extra minutes to the cooking time if baking them from frozen.
There you have it—your very own Cheddar Bay Sausage Balls ready for munching! They pair beautifully with a zesty dipping sauce, making them the ultimate finger food for gatherings. Enjoy!
Variations on Cheddar Bay Sausage Balls
Spicy Firecracker Cheddar Bay Sausage Balls
If you're a fan of a little heat, these Spicy Firecracker Cheddar Bay Sausage Balls are perfect for you! Simply mix in some red pepper flakes or diced jalapeños with your sausage, cream cheese, and cheddar cheese for that extra kick. These spicy bites make for a fantastic party appetizer or a zesty game day treat. Just imagine serving a platter of these fiery treats—ideal for anyone who loves a bold flavor experience!
Gluten-Free Cheddar Bay Sausage Balls
Enjoying Cheddar Bay Sausage Balls while keeping things gluten-free is easy! Just swap out the regular Red Lobster biscuit mix for the gluten-free version, and you’re set. The texture and taste remain just as delicious, allowing you to treat all your gluten-sensitive friends to this flavorful dish. You can also experiment with gluten-free breadcrumbs if you want an added crunch. Everyone deserves to enjoy these amazing sausage balls!
Cooking tips for Cheddar Bay Sausage Balls
Avoiding Messy Hands While Mixing
Mixing dough for Cheddar Bay Sausage Balls doesn’t have to be a sticky situation! To keep your hands clean, try using a pair of disposable gloves or lightly oiling your hands before handling the mixture. If you have a stand mixer, that’s even better—just let it do the heavy lifting for you! As you combine the ingredients, be sure not to over-mix; a gentle touch helps maintain that perfect texture.
Freezing and Reheating Tips
One of the best parts about these delectable sausage balls is how well they freeze. You can shape them into balls and place them on a baking sheet in the freezer. Once frozen, transfer them to a zip-top bag for easy storage. When you’re ready to bake, there’s no need to thaw—just pop them straight into the preheated oven, adding a few extra minutes to the cooking time. For best results, check for a golden-brown finish to ensure they’re heated all the way through!
Serving Suggestions for Cheddar Bay Sausage Balls
Perfect dips to accompany your sausage balls
When serving Cheddar Bay Sausage Balls, pairing them with the right dips can elevate the experience. Here are some delightful options:
- Honey Mustard: The sweetness and tanginess of honey mustard contrast beautifully with the savory flavors of the sausage balls.
- Ranch Dressing: A classic choice, ranch adds a creamy texture and a hint of herbal notes that perfectly complements the cheddar.
- Buffalo Sauce: If you like a little heat, drizzle some spicy buffalo sauce over your sausage balls for an extra kick!
Ideal pairings for parties and gatherings
Cheddar Bay Sausage Balls are a crowd-pleaser at any gathering! Consider these pairings:
- Veggie Platter: Fresh vegetables like carrots, celery, and bell peppers not only offer crunch but also provide a refreshing contrast to the rich flavors of the sausage balls.
- Cheese Board: Add an assortment of cheeses, including spicy pepper jack and creamy gouda, for a sophisticated touch.
- Mocktails: Opt for flavorful mocktails like a citrus spritzer or berry fizz to brighten up your spread. Check out TheKitchn for some fun mocktail recipes to impress your guests!
With these suggestions, your Cheddar Bay Sausage Balls will shine at any event or gathering!
Time Breakdown for Cheddar Bay Sausage Balls
Preparation Time
The prep for these delicious Cheddar Bay Sausage Balls takes about 15 minutes. It’s a straightforward process, especially if you use a Kitchen-Aid mixer, which makes blending the ingredients a breeze.
Cooking Time
Once you've shaped the sausage mixture into balls, pop them in the preheated oven at 400ºF for 15-20 minutes. Keep an eye on them until they’re golden brown and irresistible.
Total Time
In total, you’ll need around 30 minutes from start to finish. This means you can whip them up quickly for a satisfying appetizer or surprise snack during a busy week. Plus, with the option to freeze them, you’ll always have a tasty treat on hand!
For more tips on freezing and serving these delightful bites, you might want to check out this guide on meal prep.
Nutritional Facts for Cheddar Bay Sausage Balls
Calories per Serving
Each serving of Cheddar Bay Sausage Balls typically contains about 130 calories. This makes it a delightful yet manageable addition to your appetizer spread or breakfast table.
Protein Content
One of the highlights of these tasty bites is their protein content, boasting around 5 grams per ball. This makes them a great option for a satisfying snack or a hearty part of your morning routine.
Dietary Considerations
When enjoying Cheddar Bay Sausage Balls, keep in mind:
- Gluten-Free Option: You can easily make these gluten-free by substituting the biscuit mix with a gluten-free variety.
- Meat Choices: Feel free to use turkey sausage or any type of sausage you prefer.
- Dietary Preferences: Ideal for a range of diets, just ensure to check the ingredients if you're cooking for someone with specific dietary needs.
With just a few simple swaps, these delicious bites can fit various dietary lifestyles, making them perfect for gatherings where everyone can enjoy them without worry. For detailed nutritional breakdowns, check out resources like the USDA FoodData Central for accurate information.
FAQs about Cheddar Bay Sausage Balls
Can I make these ahead of time?
Absolutely! Cheddar Bay Sausage Balls can be prepared in advance. After mixing the ingredients, simply shape them into balls and store them in the fridge for up to 24 hours before baking. If you're planning a gathering, consider making a batch and freezing them unbaked. This gives you a quick snack option anytime!
How do I store leftovers?
If you have any leftovers (highly unlikely, but just in case!), store them in an airtight container in the fridge. They should stay fresh for about 3 to 4 days. For longer storage, consider freezing the baked sausage balls. Just reheat them in the oven at 350ºF until warmed through.
What to serve with Cheddar Bay Sausage Balls?
These delicious bites pair well with various dips, such as honey mustard or ranch dressing. Serve them alongside fresh veggies or a light salad for a balanced meal that your guests will love! For more ideas, check out this entertaining guide.
Conclusion on Cheddar Bay Sausage Balls
In summary, Cheddar Bay Sausage Balls are a delicious and versatile appetizer perfect for any gathering. Their delightful blend of flavors will surely impress your guests. Plus, they’re easy to make ahead and freeze for a quick snack later. Enjoy this crowd-pleaser at your next event!

Cheddar Bay Sausage Balls
Equipment
- Kitchen-Aid Mixer
- Small Cookie Scoop
- Rotary Cheese Grater
Ingredients
- 1 package Red Lobster Cheddar Bay Biscuit mix
- 1 package cream cheese softened
- 1.25 cups shredded cheddar cheese
- 1 lb sausage uncooked
Instructions
- Preheat oven to 400ºF.
- In the bowl of an electric stand mixer fitted with a dough hook, combine biscuit mix and seasoning packet, sausage, cream cheese, and cheddar cheese. Mix until everything is incorporated into the sausage.
- Shape into 1-inch balls. Place on a parchment-lined baking sheet. (Can freeze at this point)
- Bake for 15-20 minutes, until golden brown.

Leave a Reply