
Introduction to Frozen Yogurt Granola Cups
Why Frozen Yogurt Granola Cups are a Game Changer for Young Professionals
Are you a busy young professional juggling work, social life, and perhaps a side hustle? If so, frozen yogurt granola cups could be a deliciously smart solution for your on-the-go lifestyle. These little delights are not only easy to make but serve as a quick, nutritious option for breakfast, snacks, or even dessert.
In just five minutes of prep time, you can whip up a batch of these versatile cups. All you need are a few simple ingredients like Greek yogurt, granola, and your favorite nut butter. Once you freeze them, they become a convenient treat ready to help you power through your day. Imagine opening your freezer to find a frozen yogurt cup packed with calcium, protein, and fiber to keep you fueled and satisfied.
What’s more, you can customize them endlessly! Add fruits, nuts, or even a drizzle of honey to match your cravings. You can explore how to make them and discover variations tailored to your preferences. If you’re eager to learn more about healthy snacking options, dive into this quick and delightful recipe that truly embodies the idea of smart eating in today's fast-paced world.

Ingredients for Frozen Yogurt Granola Cups
Essential Ingredients for a Delicious Cup
Creating your own frozen yogurt granola cups is surprisingly easy! To kick off this delightful recipe, gather these essential ingredients:
- ¼ cup peanut butter or almond butter: This adds a creamy texture and rich flavor.
- 1 tablespoon honey or agave syrup: For that natural sweetness without refined sugars, choose either of these.
- ¾ cup granola: Opt for a mix that you love; it’s the crunch that brings everything together!
- 1 cup whole milk Greek yogurt: The star ingredient for creaminess and a protein boost.
You can find high-quality Greek yogurt at most local grocery stores or even consider shopping online from reputable retailers like Greek Gods.
Optional Toppings to Elevate Your Cups
Now, give your frozen yogurt granola cups an extra flair with these optional toppings:
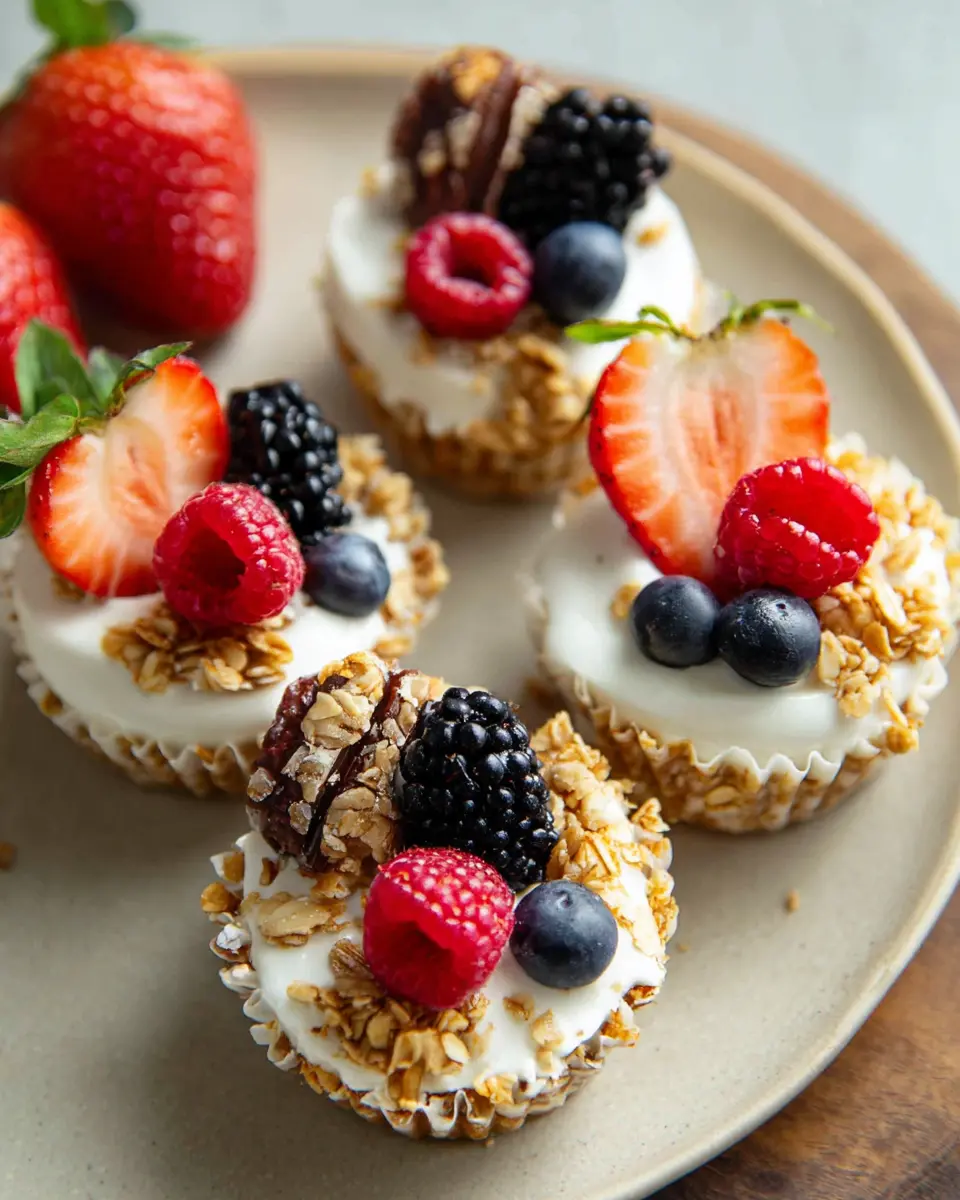
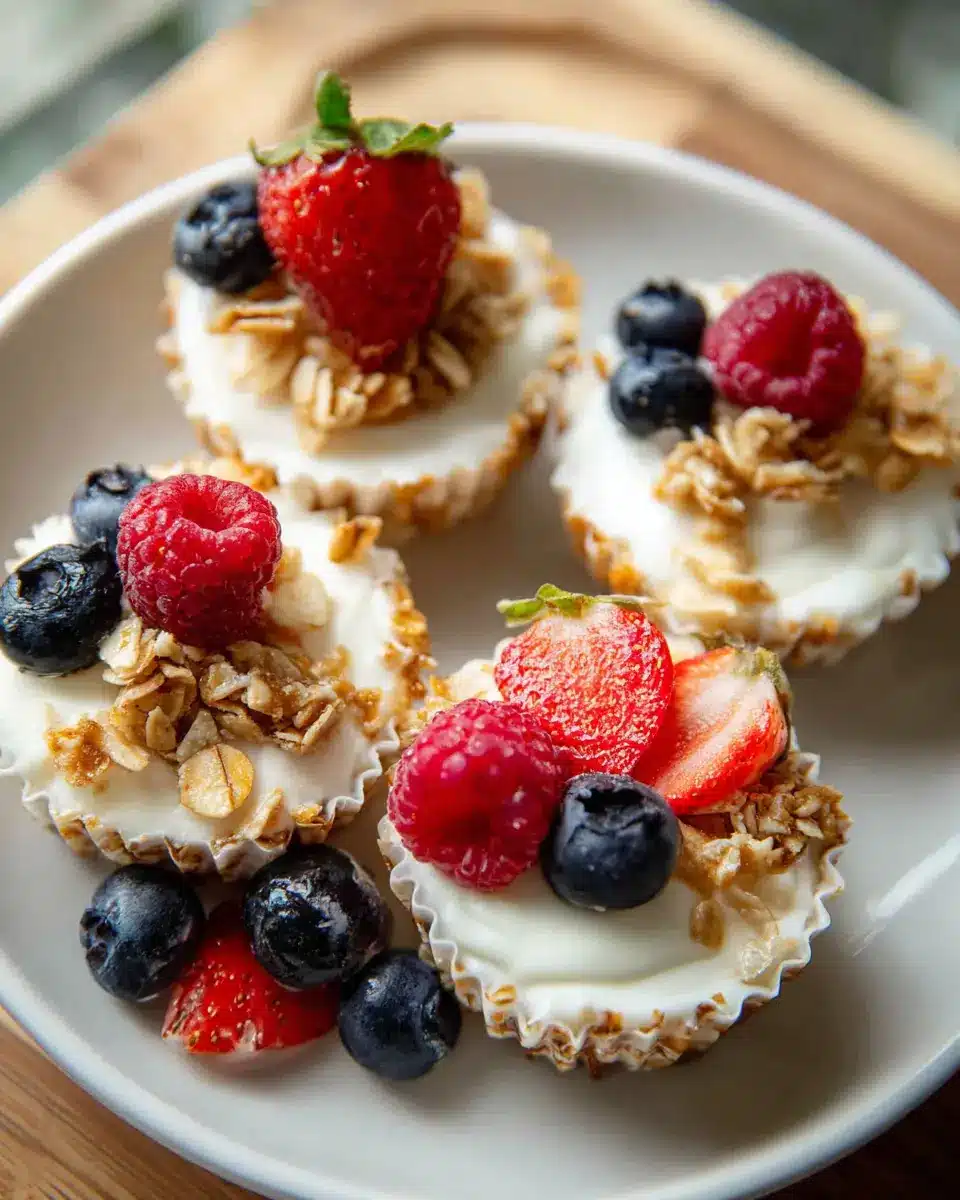
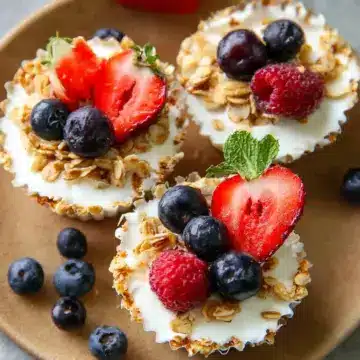
- ½ cup sliced berries or your favorite fruit: Strawberries, blueberries, or bananas all work beautifully.
- 1 tablespoon chopped walnuts: These not only add crunch but also healthy fats.
- A honey drizzle: Just a touch will make a world of difference!
Feel free to mix and match based on your personal preferences—these variations are what make this treat your own! Whether it’s for breakfast or a midday snack, these cups are sure to impress.
Preparing Frozen Yogurt Granola Cups
If you're looking for a delightful, healthy treat that you can whip up quickly and keep on hand for busy days, frozen yogurt granola cups are just what you need! This versatile recipe makes a fantastic snack or breakfast option that's both satisfying and easy to make. Let's walk through the preparation step by step so you can enjoy these tasty cups in no time.
Gather Your Ingredients
Before you start, it's essential to gather all your ingredients. For these delicious frozen yogurt granola cups, you will need:
- ¼ cup peanut butter or almond butter: This will provide a rich flavor base.
- 1 tablespoon honey or agave syrup: For a touch of sweetness.
- ¾ cup granola: Choose your favorite type—consider a gluten-free option if needed.
- 1 cup whole milk Greek yogurt: This adds creaminess and protein.
- Toppings: You can go with ½ cup sliced berries or fruit of your choice, 1 tablespoon chopped walnuts, and a drizzle of honey if desired.
Gathering everything at the outset makes the process smoother and more enjoyable.
Mix the Granola Base
Once you have everything ready, the fun begins! In a small bowl, combine the peanut butter and honey. Mix well until they form a smooth, cohesive blend. Then, add your granola into the mix and stir until it's evenly coated. This mixture will become the delightful crust of your yogurt cups, providing both flavor and a satisfying crunch.
Set Up Your Muffin Tin
Next, prepare your muffin tin by either lining it with six paper liners or using silicone molds. While paper liners are suitable, silicone molds often make it easier to pop out the frozen yogurt granola cups once they're set.
Assemble the Frozen Cups
Now comes the best part: assembly! Evenly distribute the granola mixture into each liner, pressing it down using a spoon or the bottom of a measuring cup to create a firm base. After this, fill each cup with Greek yogurt, leaving a bit of space at the top for your toppings. Finally, add your favorite fruits and a sprinkle of chopped walnuts, making it as colorful and delicious as possible!
Freeze and Store
Place the muffin tin in the freezer and let your creation set for about 30 minutes to an hour. Once the cups are solid, carefully remove them from the tin. If you’ve used silicone molds, they should pop out easily. For paper liners, let the cups thaw for a few minutes before gently lifting them out. Store these tempting frozen yogurt granola cups in an airtight container in the freezer for up to 4-6 weeks, perfect for when you need a quick snack or breakfast option!
These cups are not just a delightful treat but a great way to incorporate healthy ingredients into a delicious format. Enjoy your creations!
Variations on Frozen Yogurt Granola Cups
Tropical Paradise Yogurt Cups
Transform your frozen yogurt granola cups into a tropical delight! Simply swap in coconut yogurt for a creamy base, and top with sliced mango, pineapple, and toasted coconut flakes. This fruity twist not only adds a burst of flavor but also offers a refreshing, summer vibe any time of year.
Nut Butter Swirl Cups
For a nutty twist that packs a protein punch, try the nut butter swirl cups. Combine your favorite nut butter—like almond or cashew—with the yogurt before filling your molds. The result? Creamy, decadent cups that are sure to satisfy sweet cravings while keeping nutrition in check!
Feel free to mix and match toppings according to your taste. These variations let you keep your frozen yogurt granola cups exciting and delicious, so you never get bored!
Cooking Tips and Notes for Frozen Yogurt Granola Cups
Best Practices for Mixing Ingredients
When making your frozen yogurt granola cups, ensure that the peanut butter or almond butter is at room temperature for easier mixing. Combine the honey or agave syrup with the nut butter first to create a smooth base. Next, gently fold in the granola for an even distribution. This will enhance the flavor and texture of your cups, making each bite a delightful experience!
Tips for Freezing and Storing
Once you've filled your muffin liners, freeze the cups for about an hour until they firm up. If you’re using paper liners, allow the cups to thaw for a few minutes before attempting to remove them. For best results, store your frozen yogurt granola cups in an airtight container in the freezer, where they'll stay fresh for up to 4-6 weeks! This keeps them ready for a quick breakfast or snack on busy days.
Serving Suggestions for Frozen Yogurt Granola Cups
Ideal Pairings for a Balanced Meal
When enjoying frozen yogurt granola cups, consider pairing them with a light smoothie or a fresh fruit salad. This combination provides a delightful balance of flavors and nutrients. For a heartier touch, serve them alongside turkey bacon or chicken ham for a protein boost. Not only will this keep you satisfied, but it also ensures a deliciously balanced meal perfect for breakfast or a midday snack.
Creative Ways to Present Your Cups
Presentation can elevate your frozen yogurt granola cups into a fun, inviting treat. Arrange them on a colorful platter and sprinkle some additional fresh fruit and nuts around for visual appeal. You can even serve them in a mason jar for an Instagram-worthy touch! Drizzling a bit of honey or topping them with a dollop of almond butter adds a personal touch that will impress guests—perfect for brunch gatherings or casual get-togethers.
Time Breakdown for Frozen Yogurt Granola Cups
Preparation Time
Getting started with your frozen yogurt granola cups takes just 5 minutes! You can quickly mix your ingredients and fill the liners, making this a perfect option for busy mornings or last-minute snacks.
Freezing Time
After preparing your cups, they need about 1 hour in the freezer to set. This is the perfect time to tidy up or enjoy a leisurely coffee break.
Total Time
In just 1 hour and 5 minutes, you’ll have a delicious batch of frozen yogurt granola cups ready for enjoyment. A simple recipe that delivers satisfying results without the fuss! If you're curious about customizing your cups, consider adding unique toppings like dark chocolate chips or sliced almonds. For more tips, check out sites like Healthline that offer insights on healthy snacks.
Nutritional Facts for Frozen Yogurt Granola Cups
Calories per Cup
Our frozen yogurt granola cups pack a delightful nutritional punch with only 184 calories per cup. This makes them an energizing choice for a refreshing breakfast or a mid-day snack without the guilt!
Macronutrient Breakdown
These tasty treats offer a balanced mix of macronutrients:
- Carbohydrates: 19g — great for quick energy!
- Protein: 8g — helps keep you full and satisfied.
- Fat: 10g — provides healthy fats from peanut or almond butter.
With 2g of fiber, these cups can also aid digestion. The combination of granola, yogurt, and fruit makes them not just delicious but also a nutritious option for a health-conscious lifestyle. For more personalized dietary information, consider checking out EatRight.org for reliable nutrition advice.
FAQs about Frozen Yogurt Granola Cups
Can I make these vegan-friendly?
Absolutely! You can easily modify the frozen yogurt granola cups to suit a vegan diet. Simply substitute Greek yogurt with your favorite plant-based yogurt, like almond or coconut yogurt. For the sweetener, replace honey with maple syrup or agave nectar. With these tweaks, you’ll have a delicious vegan treat that everyone will enjoy!
How long do they last in the freezer?
These frozen yogurt granola cups can last in your freezer for up to 4-6 weeks when stored in an airtight container. Just make sure to wrap them well to prevent freezer burn. When you’re ready to indulge, simply let them thaw for a few minutes for the perfect bite!
What are some alternative toppings I can use?
Get creative with toppings! Beyond berries and walnuts, consider options like:
- Sliced bananas
- Shredded coconut
- Chopped nuts (like almonds or pecans)
- Dried fruits (such as raisins or cranberries)
- Drizzles of dark chocolate or nut butter
These alternatives can add different flavors and textures to your frozen yogurt granola cups, making them even more enjoyable!
Conclusion on Frozen Yogurt Granola Cups
Why You Should Try Making These Cups Today
These frozen yogurt granola cups are not just a tasty treat, but a quick and healthy option to have on hand. With only a few ingredients, you can whip them up in under five minutes—perfect for busy mornings or a late-night snack. Trust me, once you try them, you'll wonder how you ever lived without this delightful snack in your freezer! They're customizable, cater to various dietary needs, and super fun to make. Give them a try today and enjoy delicious bites of health!
Frozen Yogurt Granola Cups
Equipment
- Muffin tin
- Mixing bowl
- spoon
Ingredients
Base Ingredients
- ¼ cup peanut butter or almond butter Use organic for best flavor.
- 1 Tablespoon honey or agave syrup
- ¾ cup granola
- 1 cup whole milk Greek yogurt
Toppings
- ½ cup sliced berries or fruit of choice
- 1 Tablespoon chopped walnuts
- honey drizzle optional
Instructions
Preparation Steps
- Line a muffin tin with 6 paper or silicone liners.
- Mix the peanut butter, honey, and granola together in a small bowl.
- Evenly distribute the granola mixture into each cupcake liner.
- Press each one down with a spoon or the bottom of a measuring cup.
- Fill the cups with yogurt to the top of the liner (about 2-3 Tablespoons of yogurt for each liner).
- Top with sliced fruit, chopped walnuts, and a drizzle of honey (optional).
- Freeze for about 30 minutes to 1 hour.
- Let thaw for about 2-3 minutes, then carefully remove each yogurt cup from the muffin tin.
- Enjoy or store in an airtight container in the freezer for later.
Leave a Reply