
Introduction to Homemade Ciabatta Bread
Why Make Ciabatta Bread at Home?
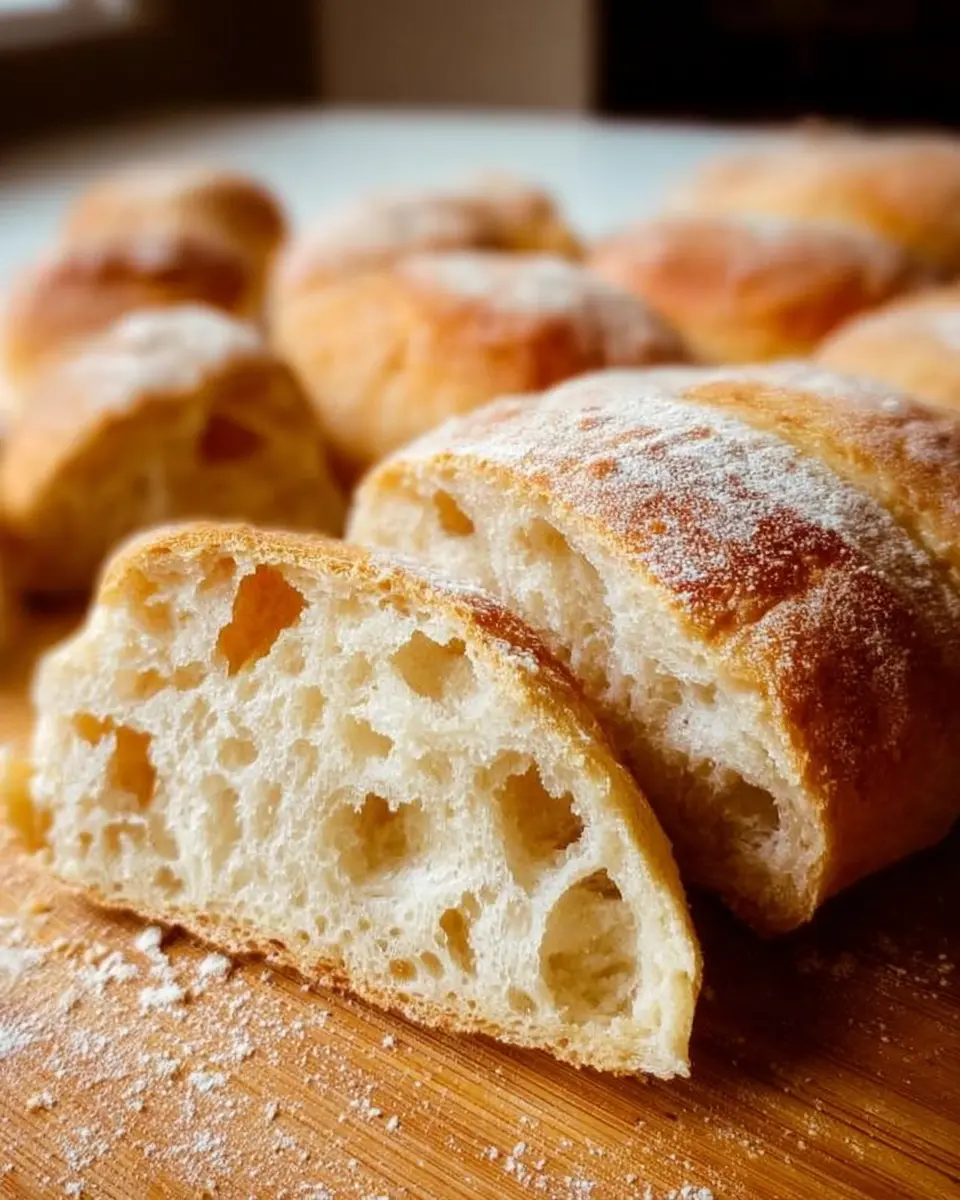
Making homemade ciabatta bread is not just about baking; it's a culinary adventure that brings a little slice of Italy right into your kitchen. The process may take some time, but the payoff is effortless, rustic bread with a crusty exterior and a chewy, airy interior.
Imagine breaking open a warm loaf, the aroma wafting through your home, transforming the atmosphere into something truly special. Plus, nothing beats the satisfaction of enjoying bread you crafted yourself. With just four simple ingredients — bread flour, yeast, water, and salt — you can achieve bakery-style bread that’s perfect for sandwiches, toast, or just savoring with olive oil.
Not convinced yet? Besides the extraordinary flavor, you gain complete control over your ingredients — no preservatives or additives here! You can also experiment with flavors, adding herbs or spices for a personal touch. According to King Arthur Baking, homemade bread is not just fresher; it’s often healthier than store-bought alternatives.
So, if you’re ready to impress your friends or simply want to indulge your culinary creativity, let’s dive into the exciting world of homemade ciabatta bread!
Ingredients for Homemade Ciabatta Bread
Essential Ingredients for the Bigа/Preferment
To kick off your Homemade Ciabatta Bread journey, you’ll need to prepare a biga, a type of preferment that enhances flavor and texture. Gather the following ingredients:
- 1 cup (130g) bread flour – A high-protein flour is key for that delightful chewiness.
- ⅛ teaspoon active-dry or instant yeast – This little bit helps develop that authentic Italian flavor.
- ½ cup (120g/ml) room-temperature water – Aim for about 70°F (21°C), as it activates the yeast while promoting fermentation.
Ingredients for Ciabatta Rolls
Once your biga is ready, move on to the main dough for your ciabatta rolls. You’ll need:
- 1 teaspoon (3g) active-dry or instant yeast – More yeast ensures the dough rises beautifully.
- 1 cup (240g/ml) warm water – This time, around 100–110°F (38°–43°C) works best.
- 2 and ½ cups (325g) bread flour – Don’t forget to have extra on hand for dusting.
- 1 and ½ teaspoons (8g) table salt – Essential for flavor enhancement.
- Olive oil – A little for coating your hands and spatula, preventing sticky situations!
With these simple ingredients, you’re on your way to creating a bread that’s not just a sidekick, but the star of your meal. Happy baking!
Step-by-step Preparation of Homemade Ciabatta Bread
Making homemade ciabatta bread is a delightful journey that spans two days, transforming simple ingredients into a rustic loaf with a crusty exterior and a chewy, airy interior. Follow these steps to create your own batch of ciabatta rolls that will have your friends and family begging for more!
Day 1: Preparing the biga/preferment
Start by creating the biga, a preferment that enhances the flavor and texture of your ciabatta. In a large mixing bowl, whisk together 1 cup (130g) of bread flour and ⅛ teaspoon of active-dry yeast. Add in ½ cup (120ml) of room-temperature water, mixing it until fully combined. Cover the bowl tightly with plastic wrap and allow it to rest at room temperature for 8 to 24 hours. The longer you let it sit, the more flavor it develops.
Day 2: Making the dough
Now that your biga is bubbling with goodness, it's time to create the dough. In a separate bowl, combine 1 teaspoon of yeast with 1 cup (240ml) of warm water (around 100–110°F). Let it sit for about 5–10 minutes until the yeast blooms. Then, add the biga, 2.5 cups (325g) of bread flour, and 1.5 teaspoons of table salt. Mix gently until all ingredients are combined into a sticky dough. It may seem wet, but don’t worry; this is exactly what you want.
First rest and stretch-and-fold technique
Let the dough rest—cover it and set a timer for 30 minutes. This brief period allows the gluten to relax.
After the first rest, it’s time to utilize the stretch-and-fold technique. Imagine a clock atop your bowl. Starting at the 12 o'clock position, gently stretch and fold the dough over itself to the 6 o'clock position. Rotate the bowl and repeat this at 90-degree intervals until you’ve folded it around twice (making a total of eight folds). Cover and rest for another 30 minutes.
Remaining stretch-and-folds
You’ll repeat the stretch-and-fold process three more times, letting the dough rest for 30 minutes between each round. After completing your fourth set of folds, cover the bowl and refrigerate the dough for at least an hour (up to 24 hours). This step improves the flavor further.
Shaping the rolls or bread
When you're ready to shape, generously flour your work surface. Gently scrape the sticky dough out onto the floured area, sprinkle more flour on top, and stretch it into a rough rectangle (about 10x7 inches). If making rolls, divide the dough into eight pieces, each roughly 2.5x3.5 inches.
Proofing before baking
Transfer your dough pieces onto a floured piece of parchment paper, arranging them at least two inches apart. Lightly sprinkle flour over the tops, covering them with a kitchen towel or parchment. Let them proof at room temperature for 1 hour.
Baking the ciabatta rolls
Finally, preheat your oven to 450°F (232°C), with a baking sheet on the middle rack. When ready, create steam in your oven by placing ice cubes in a shallow pan on the bottom rack. Carefully transfer the rolls onto the hot baking sheet, and bake for 20-25 minutes until golden brown. Your ciabatta is done when it sounds hollow when tapped, and the internal temperature reaches 205°F (96°C).
Once baked, allow the ciabatta rolls to cool for at least 45 minutes before slicing into them. Enjoy the process, and savor the delicious flavors created through your hard work!
Variations on Homemade Ciabatta Bread
Herb-infused ciabatta
For a delightful twist on your Homemade Ciabatta Bread, consider adding herbs! Fresh or dried rosemary pairs beautifully with garlic, infusing each bite with aromatic flavors. Simply mix 2 teaspoons of finely chopped rosemary or 1 teaspoon of dried rosemary with the salt when preparing your dough. This slight alteration can elevate your bread, making it perfect for sandwiches or as a standalone snack.
Whole wheat ciabatta option
If you're looking for a healthier alternative, try a whole wheat version. Substitute half of the bread flour with whole wheat flour. This not only adds a nutty flavor but also increases the bread's nutritional value. Keep an eye on hydration levels and be ready to adjust your water slightly, as whole wheat flour can absorb more moisture. Your ciabatta might take a bit longer to rise but the results will be worth it!
Cooking Tips and Notes for Homemade Ciabatta Bread
Flour Types and Their Effects
When making your homemade ciabatta bread, the choice of flour can really make or break your loaf. Using bread flour gives you that sought-after chewiness and allows the dough to rise beautifully due to its higher protein content. While you can substitute with all-purpose flour in a pinch, be aware that it might yield a softer texture and less structured crumb. For the best results, stick with a quality bread flour.
Utilizing a Kitchen Scale
A kitchen scale is your best friend when baking ciabatta. Measuring ingredients by weight ensures precision, which is crucial for achieving that perfect sticky dough. Trust me, it’s worth investing in a good scale—you’ll find your baking skills improve tremendously. Plus, it simplifies the process and minimizes the guesswork. If you don’t already own one, consider checking out this kitchen scale for reliable measurements.
Serving Suggestions for Homemade Ciabatta Bread
Pairing with Soups and Salads
Homemade Ciabatta Bread shines as a perfect sidekick to your favorite soups and salads. Picture a warm bowl of tomato basil soup complemented by a slice of this crusty bread, ideal for dipping. Pair it with a fresh arugula salad drizzled with lemon vinaigrette for a light, satisfying meal. The bread’s airy texture absorbs flavors beautifully, making each bite delightful.
Using for Sandwiches and Bruschetta
Transform your ciabatta into incredible sandwiches! Fill it with roasted vegetables and turkey bacon for a hearty lunch or layer it with chicken ham and fresh greens for a quick dinner. Alternatively, slice it thin for bruschetta topped with ripe tomatoes, basil, and a drizzle of balsamic glaze. It’s an effortless way to impress guests at your next gathering!
For more pairing ideas, check out this guide on food pairings.
Time Breakdown for Homemade Ciabatta Bread
Preparation Time
The preparation for your Homemade Ciabatta Bread spans about 13 hours, primarily because of the overnight biga fermentation that really enhances flavor.
Rising and Baking Time
After mixing the dough, expect an additional 2 hours for various rising intervals, plus 25 minutes of baking to achieve that perfect golden crust.
Total Time
In total, from start to finish, you'll dedicate about 14 hours and 10 minutes—but remember, most of that is hands-off time. Just think of the delicious aroma wafting through your kitchen! For detailed guidance, check out our engaging guide on bread baking to make the most of your bread-making adventure.
Nutritional Facts for Homemade Ciabatta Bread
Calories per serving
A serving of Homemade Ciabatta Bread (about one roll) contains approximately 150 calories. This makes it a delightful addition to your meals without overwhelming your daily calorie intake.
Protein and sodium content
Each ciabatta roll boasts around 5 grams of protein, providing a satisfying bite. Additionally, the sodium level is about 150 mg per serving, allowing you to enjoy the bread without excessive salt intake. Remember, pairing this bread with fresh veggies or lean proteins can make a wholesome meal! For more insights on healthy eating, check out the USDA’s nutritional guidelines.
FAQs about Homemade Ciabatta Bread
Can I make ciabatta without a stand mixer?
Absolutely! While a stand mixer can make things easier, you can create marvelous Homemade Ciabatta Bread using just your hands. Simply follow the mixing and kneading steps in the recipe, and be sure to give the dough plenty of attention while stretching and folding it. This hands-on approach becomes a great workout and connects you with your baking process.
How can I prevent the dough from being too sticky?
Sticky dough is expected in ciabatta making, but there are some tricks to help you out:
- Always have extra flour handy when shaping and transferring the dough.
- Make sure your work surface is well-floured.
- Use olive oil on your hands and utensils to reduce sticking.
These little adjustments can make a big difference!
What’s the best way to store leftover ciabatta?
For optimal freshness, store your Homemade Ciabatta Bread loosely covered at room temperature for up to five days. If you anticipate having leftover bread beyond that, consider slicing and freezing the ciabatta in a freezer-safe bag for up to three months. Just toast or reheat slices directly from the freezer for a delightful treat!
Conclusion on Homemade Ciabatta Bread
Creating homemade ciabatta bread is a rewarding adventure for your culinary skills. With just four ingredients and a touch of patience, you can achieve that perfect crust and chewy interior. Whether enjoyed fresh or used for sandwiches, this bread promises satisfaction in every bite. Happy baking!
Homemade Ciabatta Bread
Equipment
- Large mixing bowl
- Silicone spatula
- Bench scraper
- Stand mixer (optional)
- baking sheet
- instant-read thermometer
Ingredients
Biga/Preferment
- 1 cup bread flour spooned & leveled
- ⅛ teaspoon active-dry or instant yeast
- ½ cup room-temperature water about 70°F (21°C)
Ciabatta Rolls
- 1 teaspoon active-dry or instant yeast
- 1 cup warm water about 100–110°F (38°–43°C)
- 2.5 cups bread flour spooned & leveled, plus more as needed
- 1.5 teaspoons table salt
- olive oil as needed for coating hands and spatula
Instructions
Day 1 - Make the biga/preferment
- In a large mixing bowl, whisk together the bread flour and yeast. Add the water and mix with a silicone spatula until combined. Cover the bowl tightly with plastic wrap and let rest at room temperature for 8–24 hours.
Day 2 - Make the dough
- Uncover the bowl with the biga. In a separate mixing bowl, whisk together the yeast and warm water. Cover and let sit for 5 to 10 minutes until the yeast has dissolved. Add the biga, flour, and salt. Mix until all flour is moistened and the dough is uniform.
- Lightly grease your hands with olive oil and gently knead the ingredients together.
- Cover the bowl and let the dough rest for 30 minutes.
1st Stretch-and-Fold
- Visualize a clock on top of your dough. Lift the dough at 12 o’clock and stretch it toward the 6 o’clock position. Turn the bowl 90 degrees and repeat for a total of 8 folds. Cover and let rest for 30 minutes.
Remaining Stretch-and-Folds
- Repeat the stretch-and-fold three more times, resting for 30 minutes each time. After the 4th stretch-and-fold, refrigerate for at least 1 hour up to 24 hours.
Shape the rolls/bread
- Flour your counter or work surface generously. Scrape the dough onto the floured surface and shape into a rectangle.
- Cut into 8 pieces for rolls or into 2 pieces for loaves using a floured bench scraper.
Proof Before Baking
- Lightly sprinkle flour over the rolls and cover with a towel. Let rest for 1 hour.
Preheat Oven and Bake
- Position one oven rack at the bottom and preheat the oven to 450°F (232°C). Scatter ice cubes in a pan.
- Bake for 20–25 minutes, until golden brown and hollow sounding.
Cool and Serve
- Remove from the oven and cool for at least 45 minutes before slicing.


Leave a Reply